9
Section 3: Operating Procedures
2/01/07
RBT1560, RBT1572 & RBT1584 Rear Blades 301-144M
Land Pride
Table of Contents
Section 3: Operating Procedures
Operating Check List
Hazard control and accident prevention are dependent
upon the awareness, concern, prudence and proper
training involved in the operation, transport,
maintenance and storage of the blade. Therefore, It is
absolutely essential that no one operates the rear blade
without first having read, fully understood and become
totally familiar with the Operator’s Manual. Make sure the
operator has paid particular attention to:
• Important Safety Information, pages 1 to 4
• Section 1: Assembly & Set-up, page 7
• Section 2: Adjustments, page 8
• Section 3: Operating Procedures, page 9
• Section 4: Maintenance & Lubrication, page 10
Before beginning to operate your rear blade the following
inspection should be performed
Transporting
!
CAUTION
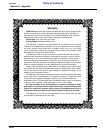
When traveling on public roads at night or during the day, use
accessory lights and devices for adequate warning to operators
of other vehicles. Comply with all federal, state and local laws.
5. When traveling on roadways, transport in such a way
that faster moving vehicles may pass you safely.
6. When turning, leave enough clearance so the blade
does not contact obstacles such as buildings, trees
or fences.
7. Slow down when traveling over rough or hilly terrain.
General Operating Instructions
The RBT15 Series Rear Blades design and built by Land
Pride are ideal for snow removal as well as dirt leveling,
finish grading, and backfilling applications at feedlots,
outdoor arenas, building sites, and maintenance
operations on farm and ranch lanes or roadways. They
are also excellent for soil contouring and construction
and maintenance of ditches and waterways.
Once you have familiarized yourself with the Operator’s
Manual, completed the operations checklist, and
properly attached your Land Pride Rear Blade to your
tractor, you are almost ready to begin work. Hopefully
you have checked out your work site for any buried utility
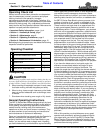
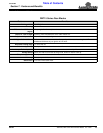
Operating Checklist
✔ Check Reference
Check 3-point Hook-up procedure. Be sure all
pins have been installed and are secured.
Page 7
All blade adjustments have been made and pins
have been installed and are secured.
page 8
The operator has read and understood how to
operate the blade.
Page 9
The rear blade has been lubricated as needed.
Page 10
Check the cutter initially and periodically for loose
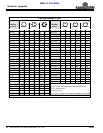
bolts & pins, See Torque Values Chart.
Page 14
cables, pipelines, sprinkler heads, or other obstaclesthat
you wouldn’t want to damage or encounter. Grade
stakes should now be in place if you intend to develop a
specific grade, elevation, soil contour, or roadbed crown.
An RBT15 Series Rear Blade’s primary purpose is for
grading or leveling of soil, gravel, or aggregate in the
warmer months or snow removal in the colder months.
These functions are best done at an approximate 2 to
4 mph ground speed. Becoming proficient with a rear
blade takes practice. Tractor horsepower, your personal
skill level, soil or aggregate composition, moisture levels,
and compaction factors will all have a definite impact on
how easily and effectively you get the job done when you
are in the dirt working mode. Develop a plan to achieve
your expected results. Set the blade up at the proper
angle or angles to do the job. This may require some
experimentation to achieve the desired results. Lower
the box scraper to the ground and proceed forward at a
speed of no more than 2 to 4 mph. The blade should
immediately begin shaving the soil surface and dirt or
aggregate material. Set the tractors draft-link height
control in the desired position. With the blade set at a 90
degree angle you may need to raise the blade slightly so
that the dirt or gravel can flow out evenly under the blade
effectively shaving off high spots and filling in potholes or
depressions. Skid shoes on the 15 Series Blades can
help maintain a consistent blade height for this purpose.
If you have the blade set at a horizontal angle, the
shaved or accumulated material will begin to move
outward toward the trailing edge of the blade. The
greater the angle the more quickly the shaved material
will be distributed off to the side. If it is necessary to work
up next to a building foundation, abutment, or raised curb
you my want to offset the blade so that the outside edge
of the blade is beyond the outer edge of the tractor tire in
working position. Back-filling operations may be more
easily performed by reversing the blade and operating
the tractor in reverse or commonly called the push mode.
If you are performing the construction of soil contours or
waterways you will probably need to set a tilt angle on the
blade to achieve the desired effect. If you are grading or
cutting a new ditch bank or forming a road crown, you will
probably want to offset the blade in combination with
setting an appropriate tilt angle. This again will likely
require some experimentation to gain desired results. If
you are performing landscaping operations for the
purpose of seedbed preparation, you may want to
remove the moldboard and install an optional landscape
rake component to achieve a truly professional finish
when you are finished blading. Snowremoval techniques
with a blade will be very similar to dirt working techniques
and will require a little experimentation to become
proficient.
With a little practice you should become a very good
operator and consistently achieve the desired results
you expect with your Land Pride RBT15 Series Rear
Blade. See the “Features and Benefits” section or the
“Product Specifications” for additional information and
performance enhancing options.


