English – 31
MAINTENANCE
High speed jet H
At the factory the engine is adjusted at sea level. When
working at a high altitude or in different weather
conditions, temperatures and atmospheric humidity, it
may be necessary to make minor adjustments to the high
speed jet.
CAUTION! If the high speed jet is screwed in too far, it
may damage the piston/cylinder.
When test run at the factory, the high speed jet is set so that
the engine satisfies the applicable legal requirements at the
same time as achieving maximum performance. The
carburetor’s high speed jet is then locked using a limiter cap
in the fully screwed out position. The limiter cap limits the
potential to adjust the high speed jet to at most half a turn.
CAUTION! There is an integrated speed governor in the
ignition system that limits the maximum speed to 13000 rpm.
The maximum speed will not exceed 13000 rpm when the
high speed jet is adjusted (screwed in). When the speed
governor is activated, you will get the same sound experience
as when the chain saw 4-cycles.
To adjust the carburetor correctly you should contact a
mechanic with access to a rev counter.
CAUTION! As the spark is cut off, the rev counter does not
show speeds higher than 13000 rpm.
Correctly adjusted carburetor
When the carburetor is correctly adjusted the machine
accelerates without hesitation and the machine 4-cycles a
little at max. speed. It is also important that the chain does not
rotate at idle. If the L-jet is set too lean it may cause starting
difficulties and poor acceleration. If the H-jet is set too lean
the machine will have less power, poor acceleration and could
suffer damage to the engine.
Starter
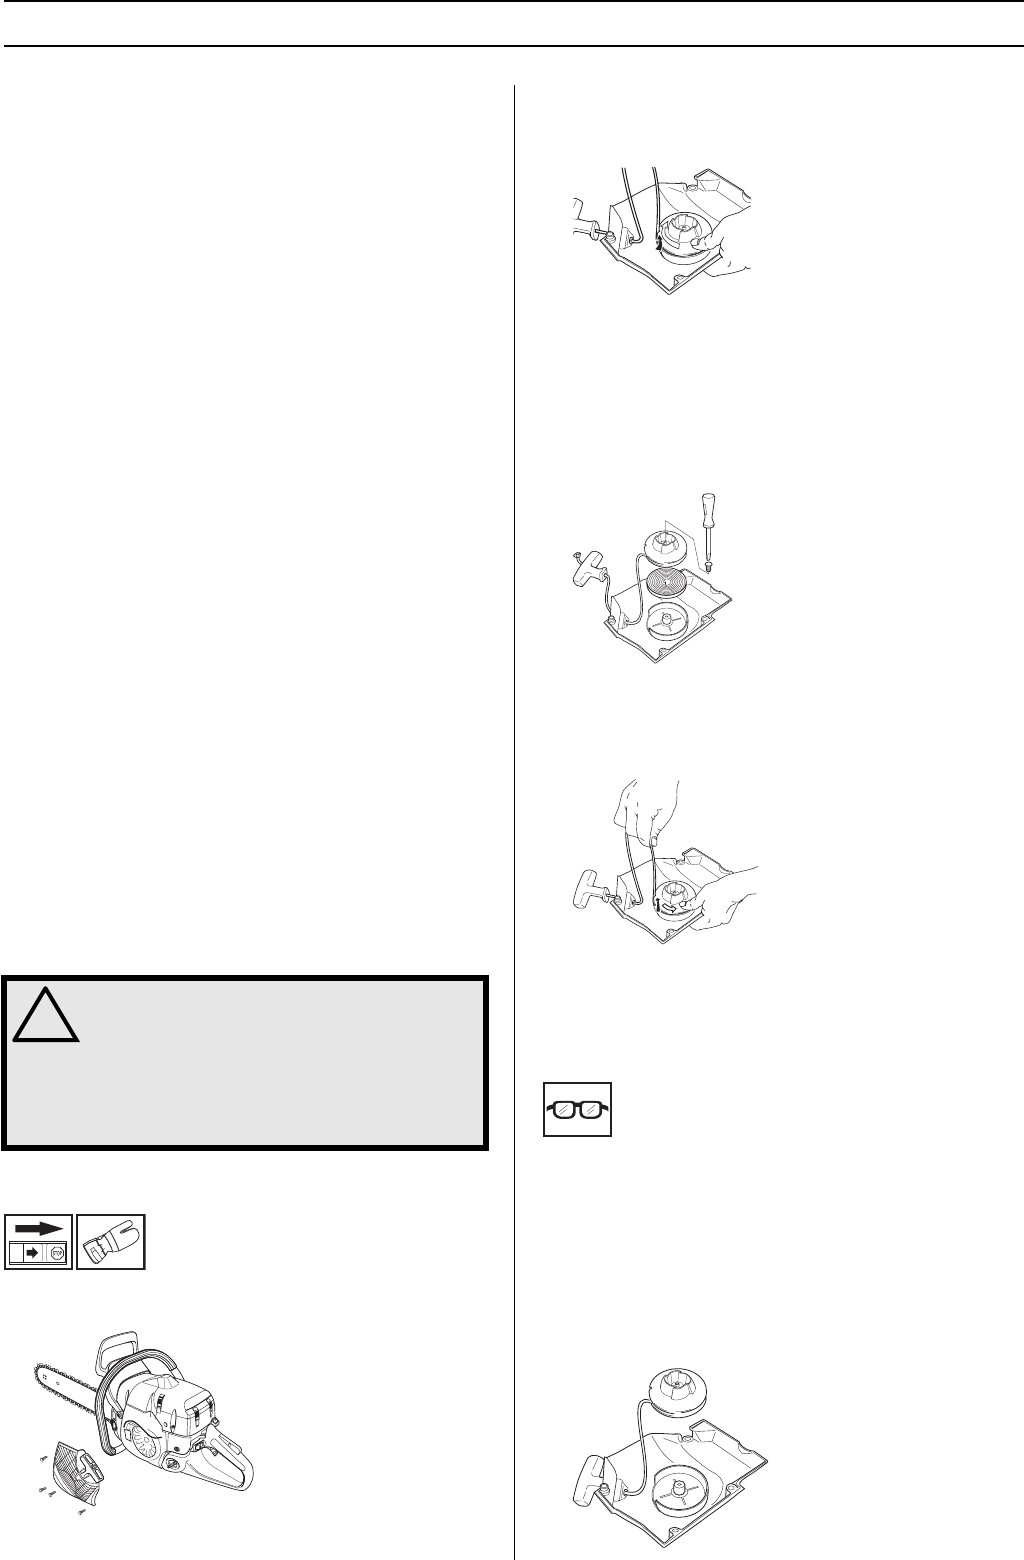
Changing a broken or worn starter cord
• Loosen the screws that hold the starter against the
crankcase and remove the starter.
• Pull out the cord approx. 30 cm (12 inches) and hook it
into the notch in the rim of the pulley. Release the recoil
spring by letting the pulley rotate slowly backwards.
• Undo the screw in the centre of the pulley and remove the
pulley. Insert and fasten a new starter cord to the pulley.
Wind approx. 3 turns of the starter cord onto the pulley.
Connect the pulley to the recoil spring so that the end of
the spring engages in the pulley. Fit the screw in the
center of the pulley. Insert the starter cord through the
hole in the starter housing and the starter handle. Make a
secure knot in the end of the starter cord.
Tensioning the recoil spring
• Hook the starter cord in the notch in the pulley and turn
the starter pulley about 2 turns clockwise.
CAUTION! Check that the pulley can be turned an
additional 1/2 turn when the starter cord is pulled all the
way out.
Changing a broken recoil spring
• Lift off the pulley. See instructions under heading
Changing a broken or worn starter cord.
• Remove the recoil spring from inside the pulley by tapping
the pulley lightly with its inside face downwards against a
work bench or the like. If the spring pops out during fitting,
wind it up again, working from the outside in towards
centre.
• Lubricate the recoil spring with light oil. Fit the pulley and
tension the recoil spring.
!
WARNING! When the recoil spring is wound
up in the starter housing it is under tension
and can, if handled carelessly, pop out and
cause personal injury. Always be careful
when changing the recoil spring or the
starter cord. Always wear protective
goggles.


