


9
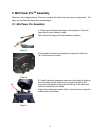
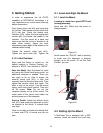
Figure 8
4. Secure the mount to the tripod by using the long tripod rod
(#4). Hand tighten the rod into the bottom of the mount by
turning the tripod knob (#3).
Next, slide tripod support (#2) onto bottom of rod (#4). Position
the three edges to fit against the three tripod legs. Then hand
tighten tripod lock knob (#1) to secure the tripod support in
place.
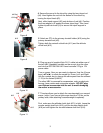
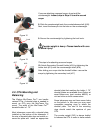
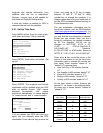
Figure 9
5. Attach an OTA to the primary dovetail holder (#10) using the
primary dovetail lock (#9).
Tighten both the azimuth clutch lock (#11) and the altitude
clutch lock (#13)
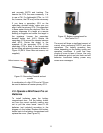
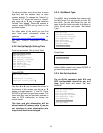
Figure 10
6. Plug one end of supplied 6pin RJ-11 cable into either one of
the two HBX (Handbox) sockets on the mount; plug the other
end into the GOTONOVA 8401 hand controller. Plug in 12V
power cable.
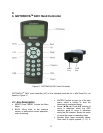
Turn on power. Now you are ready to observe. Use the 4 Arrow
keys (▲▼◄►) to rotate the scope Up, Down, Left, and Right.
Use the number key to change the slew speed from the slowest
(1:1X) to the fastest (9:MAX).
The other HBX is reserved for accessories, such as electronic
focuser, laser pointer and autoguider adapter. DO NOT plug
non-iOptron accessories into the unit to avoid damaging
the mount or accessories.
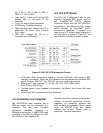
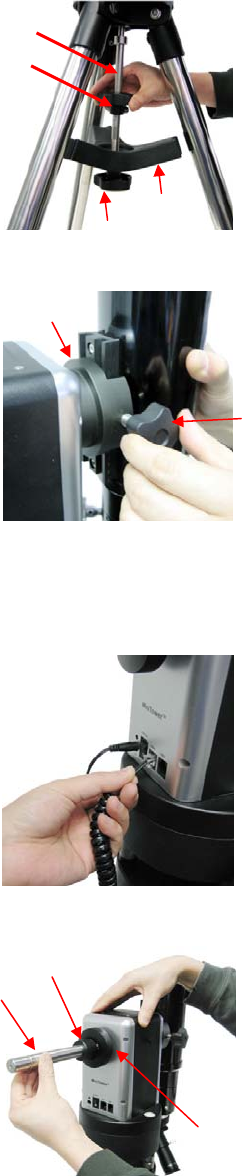
Figure 11
7. This step allows you to attach the counterweight or a second
scope. (note: if you have a light scope less than 10 lbs. on the
primary side, then attaching a counterweight is optional).
First, make sure the altitude clutch lock (#13) is tight. Loose the
counter weight shaft lock (#14), pull the counter weight shaft
(#18) out and tighten the counter balance shaft lock (#14).
#4 Rod
#2
#10
#9
#18
#14
#3 Knob
#1
#13