


12
For other parts of the world, time zone
information can be found online such as
http://www.timeanddate.com/worldclock/
.
DO NOT COUNT DAYLIGHT SAVING
TIME.
If your mount is equipped with a GPS
receiver only Daylight Time Saving and
Time Zone settings are needed. However,
the local time and site info can still be
manually entered (in case the GPS signal is
too weak from clouds or buildings). It is
always recommended to get the GPS
coordinates before traveling to a new
observation site.
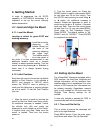
4.2.2. Using your telescope
Selecting an Eyepiece:
1. Always begin viewing with the lowest
power eyepiece. (Note: a 25 mm focal
length eyepiece has a lower power than a
10 mm one.) A formula can be used to
determine the power of each eyepiece:
Telescope focal length divided by eyepiece
focal length equals magnification. Ex.
400mm ÷ 25mm = 16X (magnification)
2. Included with this telescope is a 45°
Erecting Diagonal Prism. The Erecting
Diagonal Prism is used to erect the image
you will see. Astronomical telescopes are
designed in such a way that the image you
see may be UPSIDE DOWN and
REVERSED. This is acceptable for viewing
celestial bodies. However, it will feel strange
when observing a land object or a bird.
Focusing Telescope:
1. After selecting the desired eyepiece aim
the telescope tube at a land-based target at
least 200 yards away (e.g. A telephone pole
or building). Fully extend focusing tube by
turning the focus knob.
2. While looking through selected eyepiece,
slowly retract focusing tube by turning
focusing knob until object comes into focus.
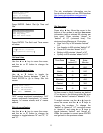
4.2.3. Go to the Moon
After performing these setups, the mount is
ready to GOTO and track objects. The most
common object will be Moon.
Press MENU button, select “Select and
Slew” by press ENTER button. Select
“Planets, Sun, Moon”, and using ▲ or ▼
button to select Moon. Press ENTER. The
telescope will automatically slew to the
Moon and lock on. Press BACK key to stop
GOTO. It will automatically begin to track
once it locks on to it. Use the arrow keys to
center the Moon in your eyepiece, if it is not
centered. Press ENTER key to stop the
tracking.
4.2.4. Initial Star Alignment
A simple alignment/synchronization can be
performed to improve the GOTO and
tracking accuracy. To do so, press MENU
button, scroll down to “Align”, select
“Solarsys Align” and press ENTER. The
screen will list Moon, Sun and other planets
for you to select from. Select an object
using ▲ or ▼ key. Then press ENTER. The
mount will slew to the object. Use ◄ ► ▲
or ▼ key to center the object in your
eyepiece. Press SPEED button to change
the slew speed if needed. Then press
ENTER to complete the alignment. Or press
the BACK key to cancel the process.
An alternate way is performing “Sync to
Target”. To do so, press MENU button,
select “Select and Slew” and press ENTER.
Then select a known sky object, such as
Moon from “Planets, Sun, Moon” menu and
press ENTER. The mount will slew to the
Moon. When the mount stopped slewing,
the Moon could be just inside your eyepiece
or way off. Press MENU button and scroll
down the menu to “Sync to Target” and
press ENTER. Follow the instruction, use ◄