


10
4. Getting Started
In order to experience the full GOTO
capability of GOTONOVA technology it is
important to set up the mount correctly
before observation.
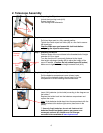
4.1. Level and Align the Mount
4.1.1. Level the Mount.
Leveling is critical for good GOTO and
tracking accuracy.
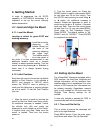
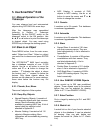
Level the mount by
observing the
bubble (shown) on
the base of the
mount by adjusting
the tripod legs.
The bubble should
be in the center of
the circle. It is also recommended to use
additional levelers (such as a torpedo
leveler) to assure precise leveling. Turn the
mount around by pressing ► or ◄ button to
make sure it is always leveled during
movement.
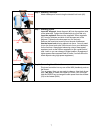
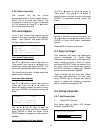
4.1.2. Initial Positions
Each time the mount is turned on the default
position is Park Position, (i.e.,its altitude is
90º0.0’ and azimuth is 180º0.0’) which
means the “SOUTH” mark is pointing to
south and the telescope is pointing straight
up at the zenith. To set the Park Position
you can:
1. Align the mount to south by moving the
mount so that the South mark faces south.
An additional compass is needed. Unlock
the altitude lock (#4) and rotate the
telescope to point straight up at the Zenith.
A torpedo level may help. Make sure the
mount is leveled. Then turn the mount
power on.
or
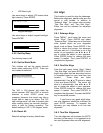
2. Turn the mount power on. Press the
SPEED button to select a slew speed (MAX
for fast slew and 2X for fine tuning). Turn
the SOUTH mark pointing to south using ►
or ◄ button. An additional compass is
needed. Rotate the telescope to point to
zenith using the ▲ or ▼ buttons. A torpedo
level may help. Then turn the mount power
off and turn it on. Or you can press MENU.
Scroll down to “Set Telescope Coord.”
Press ENTER. The default number is “Alt:
90º00.0’ and Azi: 180º00.0’”. Press ENTER
to complete the initialization.
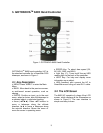
4.2. Setting Up the Mount
For a SmartStar
®
telescope equipped with a
GPS receiver, the local time, longitude and
latitude information will be received from
satellites after a link is established. For units
without a GPS receiver this information can
be entered manually. Regardless, manual
input is still needed for the time zone and
Daylight Time Saving settings for all
models.
A clear sky outside is needed for GPS to
communicate well with the satellites.
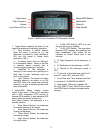
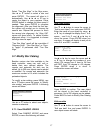
4.2.1. Time and Site Set Up
This is critical to ensure the telescope will
point to the right direction.
Press MENU button. From the main menu
scroll down and select “Set Up Controller”
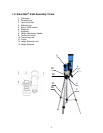
1
)
South
2) Up
Alt lock (#4)