


10
➁
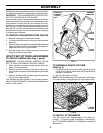
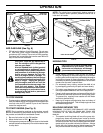
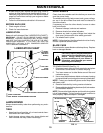
ENGINE OIL
➀
HANDLE BRACK ET MOUNT ING PINS
➀
REAR DOOR HINGE
➀
MULCHER
DOOR
HINGE PIN
➀
WHEEL
ADJUSTER
(ON EACH
WHEEL)
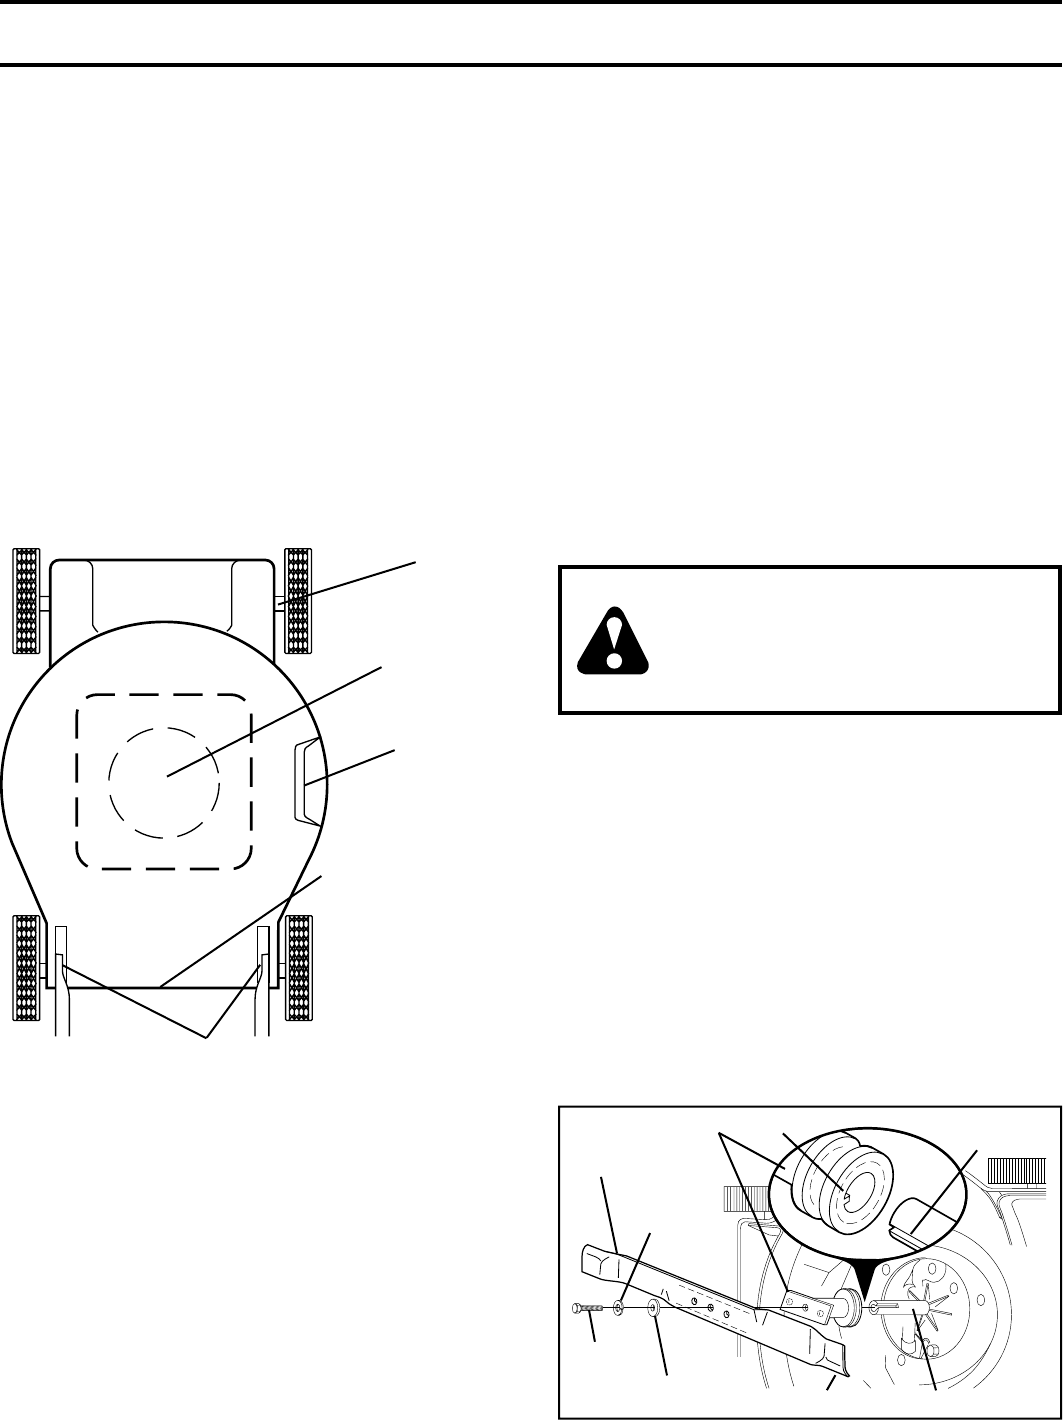
LUBRICATION CHART
➀
SPRAY LUBRICANT
➁
SEE “ENGINE” IN MAINTENANCE SECTION
• At least once a year, replace the spark plug, clean or
replace air fi lter element and check blade for wear. A
new spark plug and clean/new air fi lter element assure
proper air-fuel mixture and help your engine run better
and last longer.
• Follow the maintenance schedule in this manual.
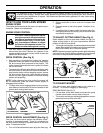
BEFORE EACH USE
1. Check engine oil level.
2. Check for loose fasteners.
LUBRICATION
Keep unit well lubricated (See “LUBRICATION CHART”).
IMPORTANT: DO NOT OIL OR GREASE PLASTIC WHEEL
BEARINGS. VISCOUS LU BRICANTS WILL ATTRACT DUST
AND DIRT THAT WILL SHORT EN THE LIFE OF THE SELF-
LUBRICAT ING BEARINGS. IF YOU FEEL THEY MUST BE
LUBRICATED, USE ONLY A DRY, POW DERED GRAPHITE
TYPE LUBRICANT SPAR INGLY.
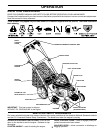
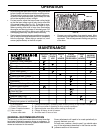
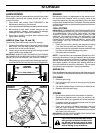
FIG. 11
BLADE
BOLT
HARDENED
WASHER
LOCK
WASHER
BLADE ADAPTER KEY
BLADE
TRAILING EDGE
CRANKSHAFT
KEYWAY
CRANKSHAFT
MAINTENANCE
LAWN MOWER
Always observe safety rules when performing any main-
tenance.
TIRES
• Keep tires free of gasoline, oil, or insect control chem-
icals which can harm rubber.
• Avoid stumps, stones, deep ruts, sharp objects and
other hazards that may cause tire damage.
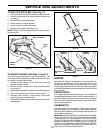
DRIVE WHEELS
Check front drive wheels each time be fore you mow to be
sure they move freely.
The wheels not turning freely means trash, grass cuttings,
etc. are in the drive wheel area and must be cleaned to
free drive wheels.
If necessary to clean the drive wheels, be sure to clean
both front wheels.
1. Remove hubcaps, locknuts and washers.
2. Remove wheels from wheel ad justers.
3. Remove any trash or grass cuttings from inside the
dust cover, pinion and/or drive wheel gear teeth.
4. Put wheels back in place.
NOTE: If after cleaning, the drive wheels do not turn freely,
contact a qualifi ed service center.
BLADE CARE
For best results, mower blade must be kept sharp. Re place
bent or dam aged blades.
CAUTION: Use only a replacement blade
approved by the manufacturer of your
mower. Using a blade not approved
by the manufacturer of your mower is
hazardous, could damage your mower
and void your warranty.
TO REMOVE BLADE (See Fig. 11)
1. Disconnect spark plug wire from spark plug and place
wire where it cannot come in contact with plug.
2. Turn lawn mower on its side. Make sure air fi lter and
carburetor are up.
3. Use a wood block between blade and mower hous ing
to prevent blade from turning when re moving blade bolt.
NOTE: Protect your hands with gloves and/or wrap blade
with heavy cloth.
4. Remove blade bolt by turning counter-clockwise.
5. Remove blade and attaching hardware (bolt, lock wash er
and hardened wash er).
NOTE: Remove the blade adapter and check the key inside
hub of blade adapter. The key must be in good condition to
work properly. Replace adapter if dam aged.