


GB - 14
Husqvarna Dealers will provide any service,
parts or adjustments which may be required to
keep your unit operating at peak efficiency.
Should engine service be required, contact a
Husqvarna dealer or an authorized engine
manufacturer's service center.
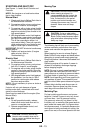
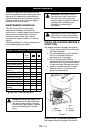
MAINTENANCE SCHEDULE
The chart shows the recommended
maintenance schedule that should be
performed on a regular basis. More frequent
service may be required due to working
conditions (heavy loads, high ambient
temperatures, dusty conditions, or airborne
debris).
See Engine Manual for further maintenance
and troubleshooting information.
After first 2 Hours of operation
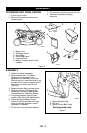
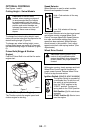
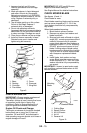
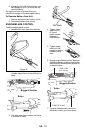
CHECK AIR CLEANER (BRIGGS &
STRATTON)
See engine manual for specific information.
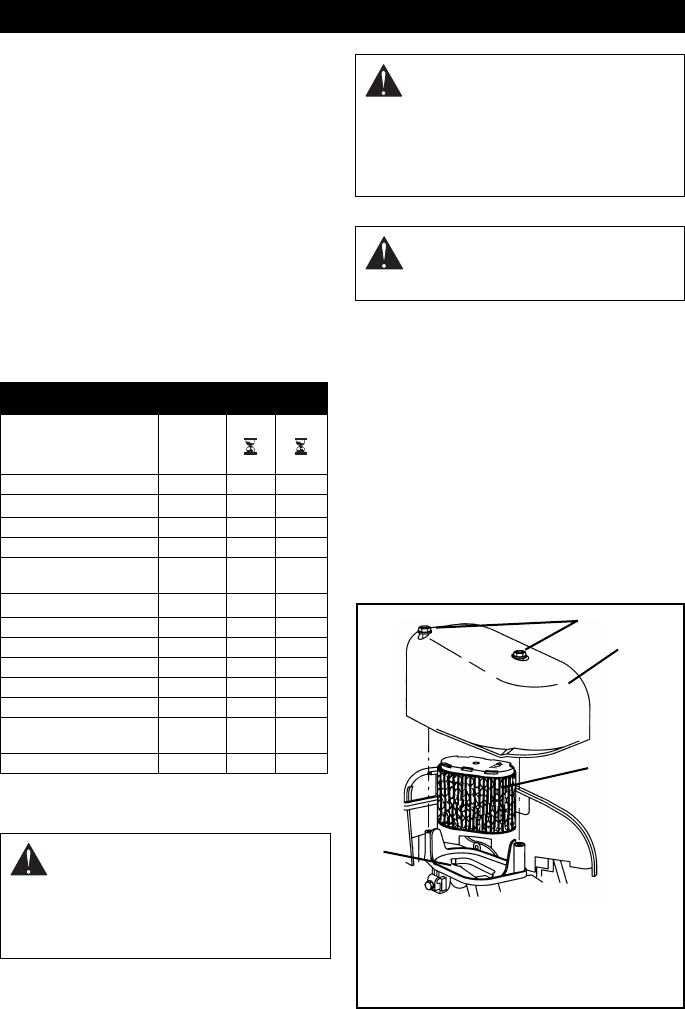
1. Loosen screws and lift cover. Remove
cartridge assembly.
2. Tap cartridge gently on a flat surface.
Do not oil cartridge. Replace if
extremely dirty or damaged.
3. Do not use petroleum solvents
(kerosene) which will cause cartridge to
deteriorate. Do not use pressurized air
to clean cartridge. Damage can result.
4. Install air cleaner assembly in base.
Reinstall cover on air cleaner and
tighten screws securely.
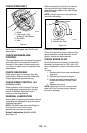
CHECK AIR CLEANER (ROBIN)
See engine manual for specific information.
MAINTENANCE
MAINTENANCE SCHEDULE
Service Performed Before
Each
Use
25 100
Check Air Cleaner •
Check Engine Oil ••
Check Mower Blade •
Check Drive Belt •
Check Engine/Blade
Control
•
Change Engine Oil
•
•
Check Grass Bag •
Check Drive Control •
General Lubrication •
Check Fasteners •
Check Spark Plug •
Check Engine
Cooling
•
Check Muffler •
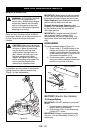
WARNING: ROTATING PARTS can
cut off body parts. Keep hands and
feet away. Loose clothing, long hair
or scarves can get caught in rotating
parts and cause death or serious
injury.
*
*
WARNING: Stop engine, wait for
moving parts to stop, and remove
wire from spark plug (keep wire
away from plug to prevent accidental
starting) before attempting any
lubrication or maintenance
procedures.
CAUTION: DO NOT touch engine
parts which are hot from operation.
Allow parts to cool before servicing.
Figure 8
1
2
3
4
1. Base
2. Cartridge
3. Cover
4. Screws
OM0580