20
ENGLISH
Felling
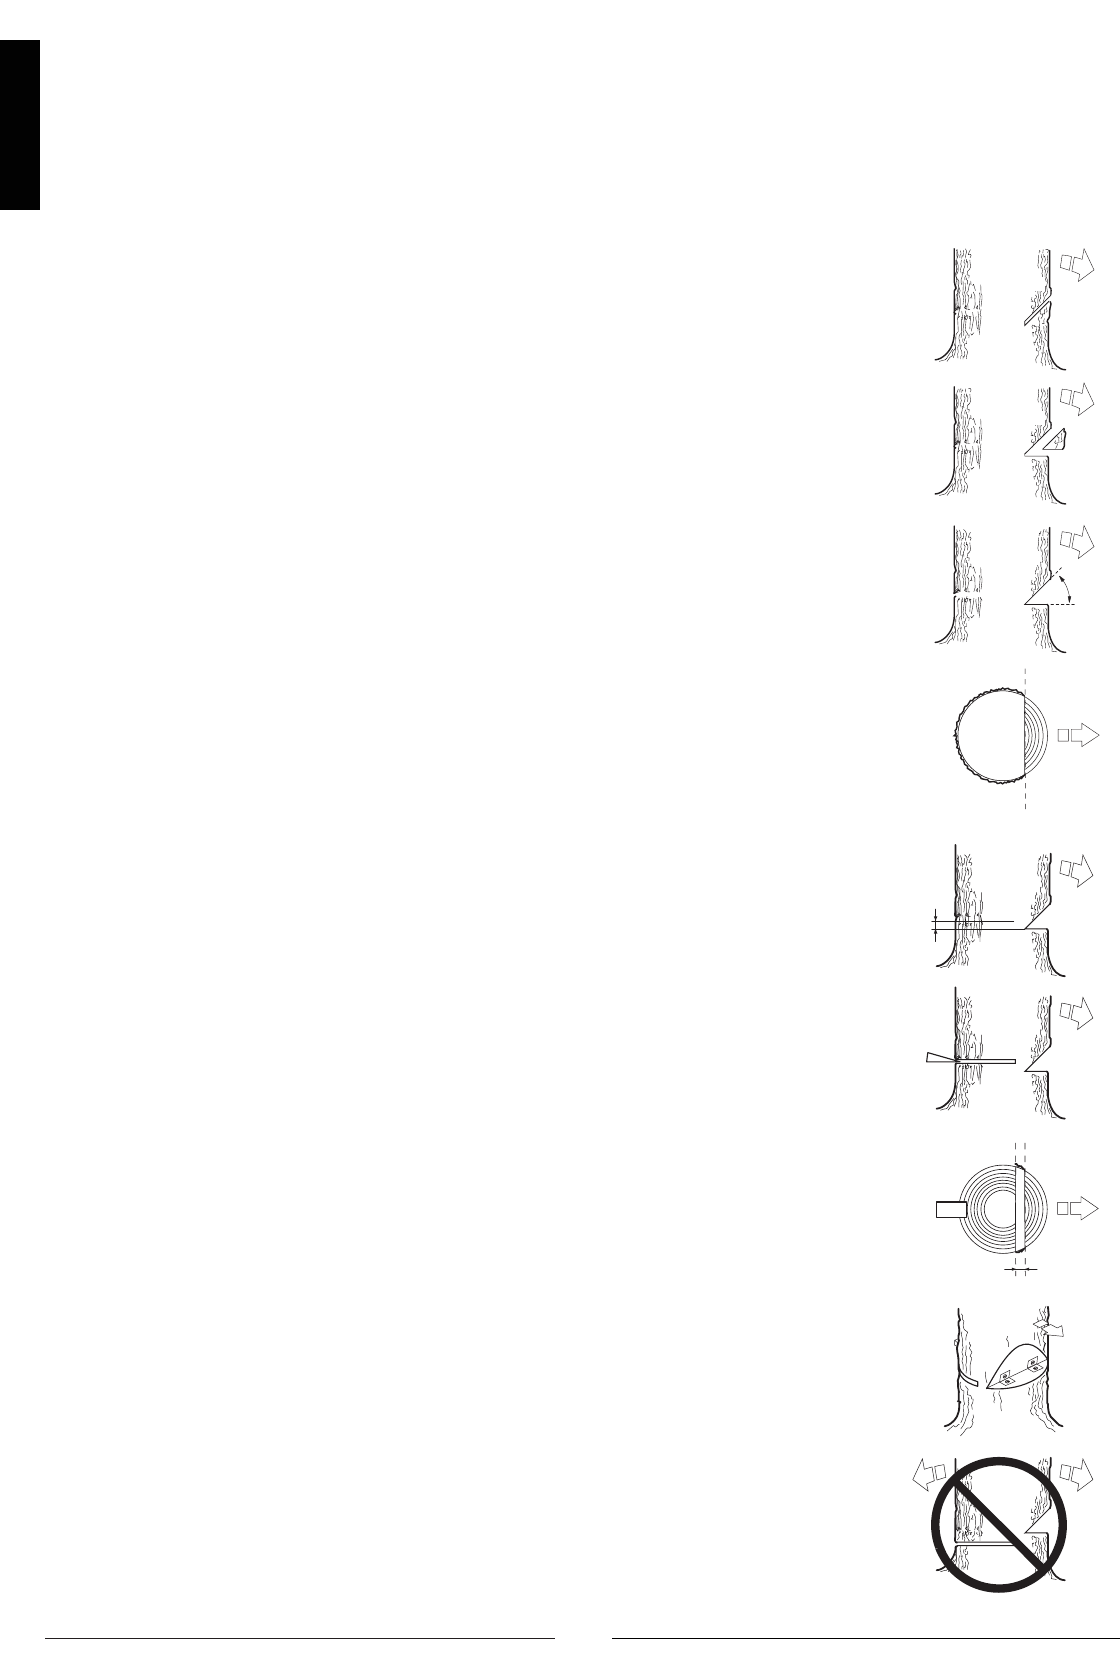
Three cuts are made to fell a tree. The «TOP NOTCH CUT» and the «BOTTOM» or «HORIZONTAL
NOTCH CUT» form the «NOTCH», which determines the direction in which the tree will fall.
The final cut is the «FELLING CUT», which allows the tree to topple over.
Notch
To form the NOTCH, start with the TOP NOTCH CUT. Using the bottom of the guide
bar (pulling chain), make a 45° downward angled cut at right angles to the intended
direction of fall.
Next do the BOTTOM NOTCH CUT, ensuring that it meets the bottom of the TOP
NOTCH CUT precisely.
Notch depth should be around 1/4 of the diameter of the tree and the angle should
be around 45°.
The line defined by the inside angle of the notch must be precisely horizontal and at
a precise right angle to the direction of fall.
Felling cut
The felling cut is done from the opposite side of the tree and must also be horizontal.
Stand with the tree to your left and cut with the bottom of the guide bar (pulling chain).
Place the FELLING CUT approximately 3-5 cm (1 1/2 - 2") above the BOTTOM
NOTCH CUT.
Cut at full motor speed, feeding the saw slowly into the tree. Watch out for tree
movement opposite to the intended direction of fall. Insert a WEDGE or FELLING
BAR in the FELLING CUT as soon as the depth of the cut permits.
When complete, the FELLING CUT must be parallel to the notch and leave
a strip of HINGE WOOD at least 1/10 the diameter of the tree.
The HINGE WOOD acts as a hinge, steering the direction of the falling tree.


