32 – English
MAINTENANCE
Belt change on Combi 103
1. Remove the cutting unit.
2. Remove the front bolt from the parallel strut and
tip the strut backwards. Push the height
adjustment strut forwards.
WARNING!
Wear gloves to protect your
hands when working with the
blades.
3. Loosen the two bolts holding the protective hood
and then lift off the hood.
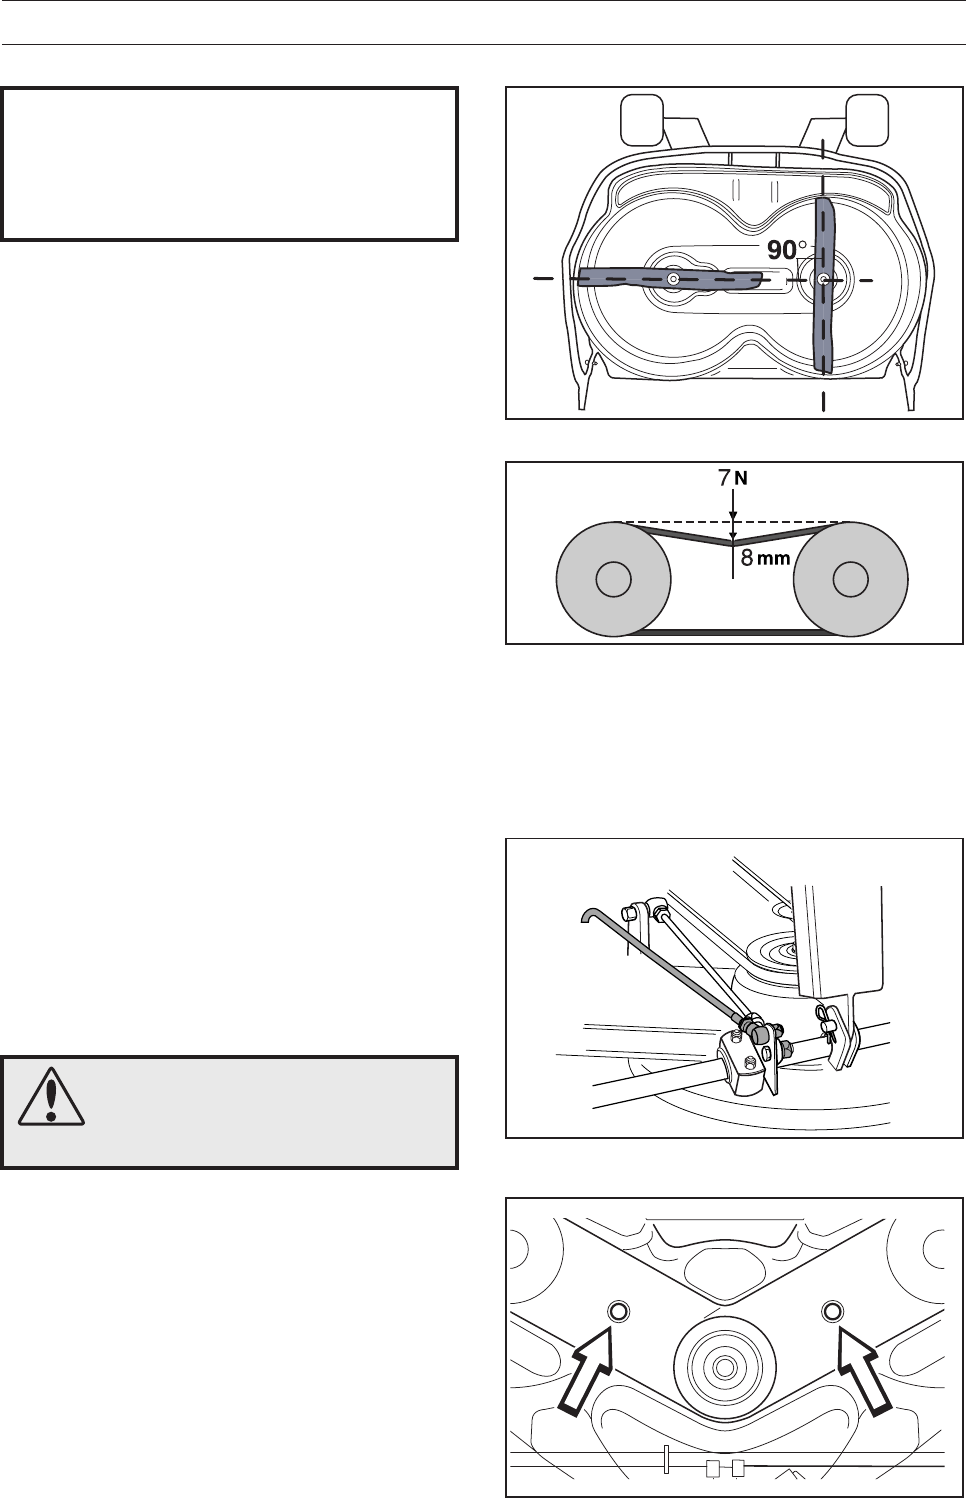
5. Ensure the blades are positioned as set out in
the diagram, at 90 degrees to each other,
otherwise the belt must be adjusted. When the
blade bearings are loose the belt can be moved
around to the next tooth.
Tighten the nuts enough so that the bearings
rest against the cutting hood but still can be
moved.
Tension the belt by turning the eccentric adjuster
on top of the cutting hood. Tighten the nut.
Tighten all nuts on the blade bearings.
6. When the belt can be moved 8 mm (5/16")
inwards using a force of 7 N (1.5 lb) the belt is
adjusted correctly.
7. Fit the protective cover over the belts and
replace the parall strut.
IMPORTANT INFORMATION
The blades on a BioClip unit should be
set at 90 degrees to each other. In all
other cases the blades can collide and
cause serious damage to the cutting unit.


