


8
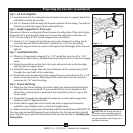
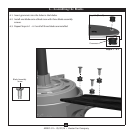
3 • Assembling and Hanging the Fan
WARNING: Fan may fall if not assembled as directed in these
installation instructions.
You can assemble your fan for standard or angled mounting as
shown in steps below.
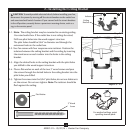
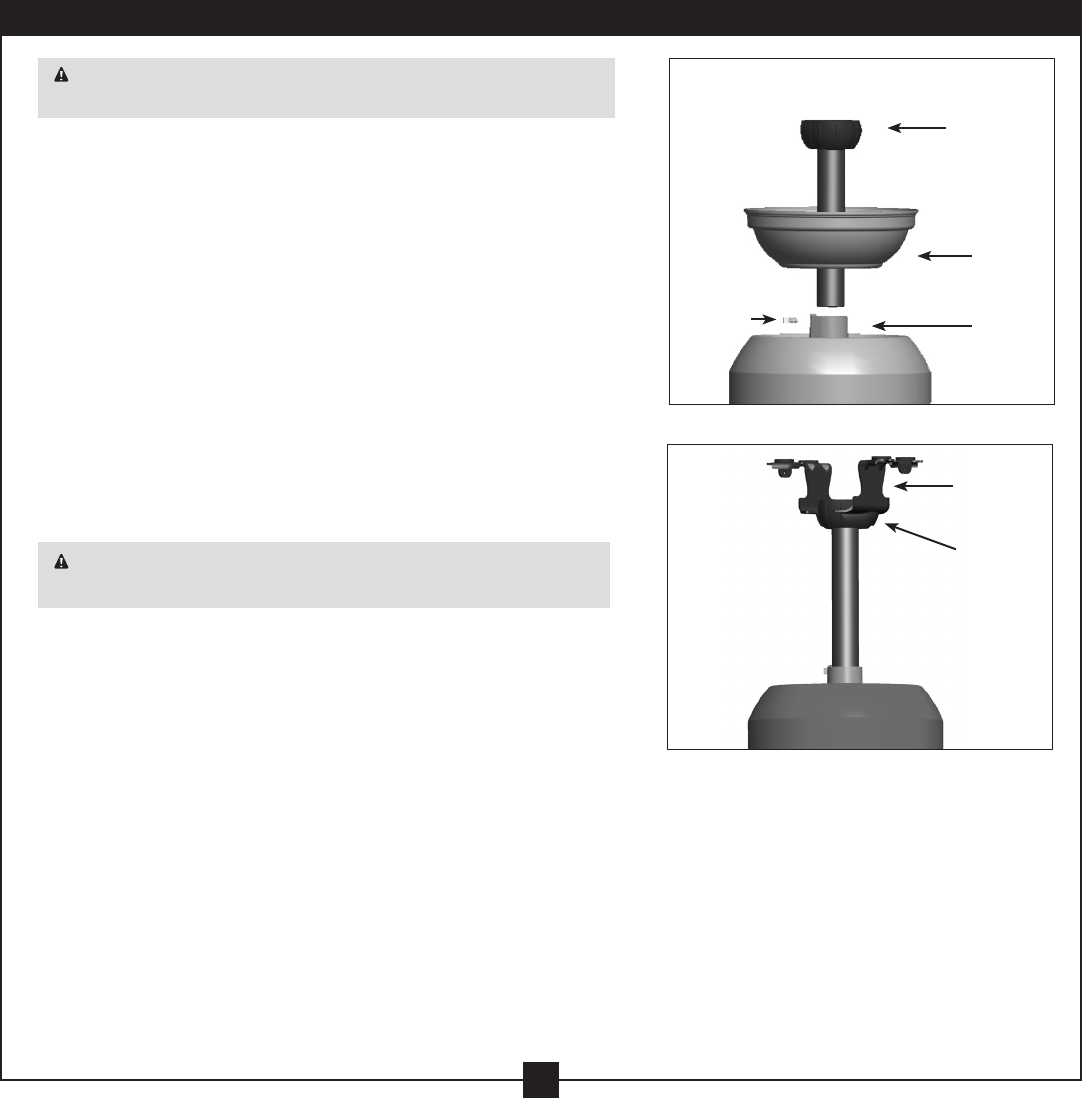
3-1. Unbundle the wires from the fan.
3-2. Feed the wires from the fan through the downrod.
Note: Make sure all the wires are on the same side of the metal
dowel pin inside the downrod.
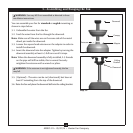
3-3. Loosen the square head setscrew on the adapter in order to
install the downrod.
3-4. Insert the downrod into the adapter. Tighten by turning the
downrod assembly at least 4-5 full turns until it stops.
Note: When the downrod assembly is fully installed, 2-3 threads
on the pipe will still be visible; this is normal. Securely
retighten the setscrew with a wrench or pliers.
WARNING: If the setscrew is not tightened securely, the fan
may fall.
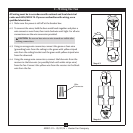
3-5. (Optional) - e wires can be cut (shortened), but leave at
least 8” extending from the top of the downrod.
3-6. Raise the fan and place the downrod ball into the ceiling bracket.
Steps 3-1 – 3-4
Step 3-6
Downrod
Downrod
Canopy
Ceiling
Bracket
Setscrew
Adapter
M0021-01 • 05/21/14 • Hunter Fan Company