


5
42641-01•09/13/07 HunterFanCompany
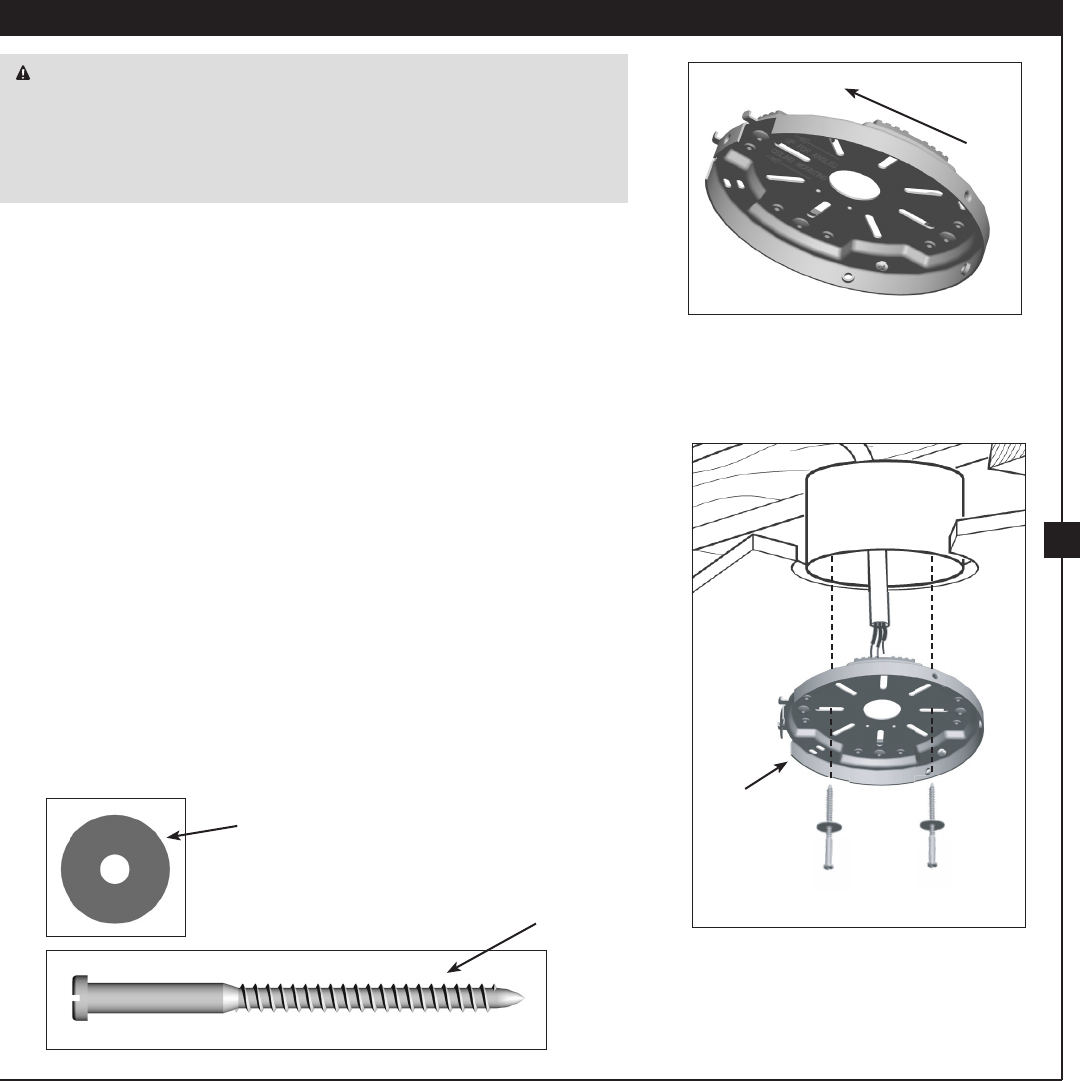
2 • Installing the Ceiling Plate
CAUTION: Toavoidpossibleelectricalshock,beforeinstallingyourfan,
disconnectthepowerbyturningothecircuitbreakerstotheoutletbox
andassociatedwallswitchlocation.Ifyoucannotlockthecircuitbreakers
intheoposition,securelyfastenaprominentwarningdevice,suchasa
tag,totheservicepanel.
2-1. Drilltwopilotholesintothewoodsupportstructurethroughthe
outermostholesintheoutletbox.epilotholesshouldbe9/64”
indiameter.
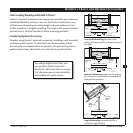
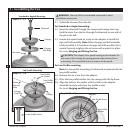
For Angled Ceilings:Besuretoorienttheceilingplatesothatthe
twotabsarepointingtowardtheceilingpeak.
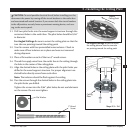
2-2.Yourfancomeswithfourpreinstallednoiseisolators.Checkto
make sure all four isolators are in place and were not removed
duringshipment.
2-3. Placeaatwasheroneachofthetwo3”woodscrews.
2-4. readthesupplywiresfromtheoutletboxintheceilingthrough
theholeinthecenteroftheceilingplate.
2-5. Aligntheslottedholesintheceilingplatewiththepilotholesyou
drilledinthewoodsupportstructure.Forproperalignmentuse
slottedholesdirectlyacrossfromeachother.
Note:eisolatorsshouldbeushagainsttheceiling.
2-6. Passthescrewsthroughtheslottedholesintheceilingplateinto
thepilotholesyoudrilled.
Tightenthescrewsintothe9/64”pilotholes;donotuselubricants
onthescrews.Donotovertighten.
Flat Washer
3”Wood
Screw
Steps 2-3 – 2-6
Ceiling
Plate
For Angled Ceilings: Besuretoorient
theceilingplatesothatthetwotabs
arepointingtowardtheceilingpeak.
Toward
Ceiling Peak