


10
Hunter Fan Company 41873-01 • 11/18/05
11
41873-01 • 11/18/05 Hunter Fan Company
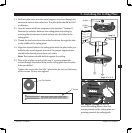
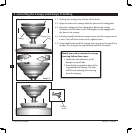
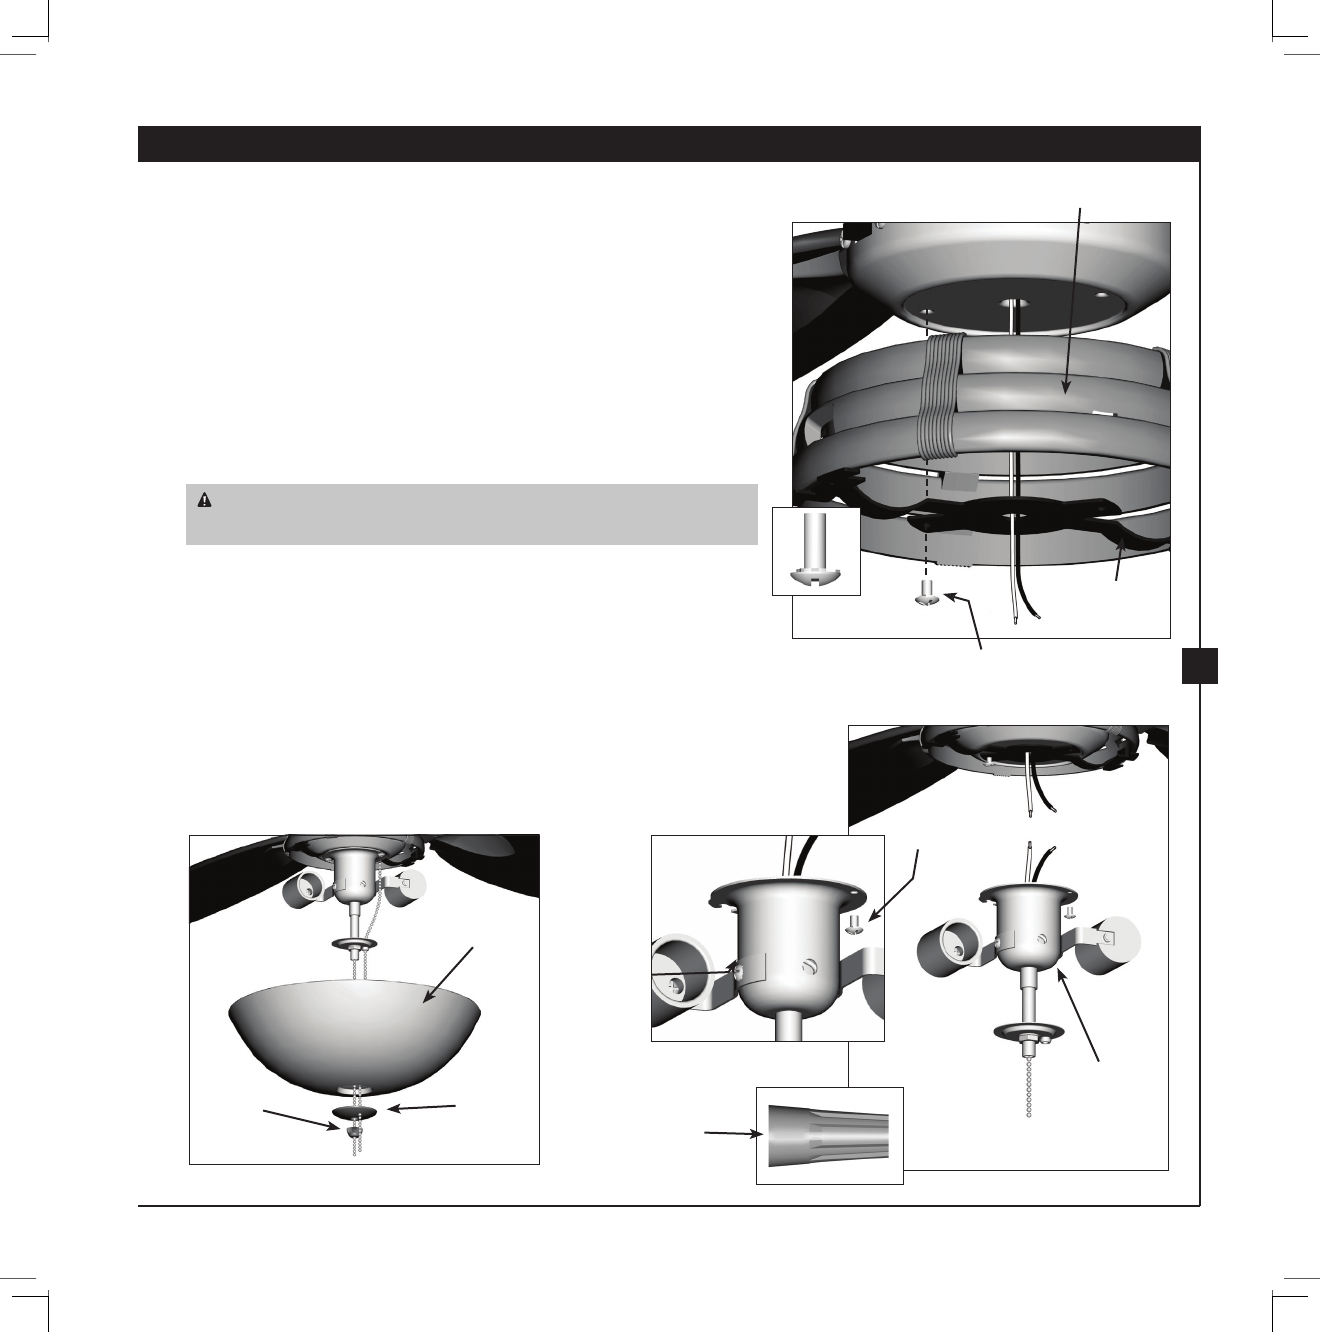
7-8. Align the bracket with the reversing switch hole on the switch
housing cover. Snap the bracket into place.
7-9. Attach the switch housing cover by partially installing the
assembly screw.
7-10. Connect the wires from the switch housing to the wires from
the light kit as follows: connect the black wire to black wire and
connect the white wire to white wire. Place the wires into the
light kit assembly.
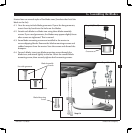
7-11. To connect the wires, hold the bare metal leads together and
place a wire nut over them, then twist clockwise until tight.
CAUTION: Be sure no bare wire or wire strands are visible after
making connections.
7-12. Place the key slot on the light kit over the screw attached to the
bracket. Twist the light kit assembly into place and tighten the
screw securely.
7-13. Install and tighten the remaining screw securely.
7-14. Install two A-19 bulbs (60 watts maximum each).
7-15. Install the glass bowl, cap, and nial. Be sure to thread the pull
chains through as shown. Securely tighten the nial.
Assembly
Screw
Steps 7-12 – 7-13
Step 7-15
Glass Bowl
Cap
Finial
Steps 7-8 – 7-10
Assembly
Screw
Bracket
Switch Housing Cover
Key Slot
Wire Nut
Light Kit
Assembly