


3
41556-01 8/08/03 © 2003 HUNTER FAN CO.
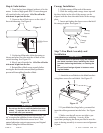
Step 3: Installation of Ceiling Mounting
Hardware
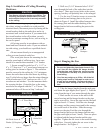
2” x 4” Wood Brace
Outlet Box
Ceiling
Joist
Ceiling
M4 Wood Screw &
Washer (2) Required
Figure 3
2. Drill two (2) 1/4” diameter holes 2-9/16”
apart through the back of the outlet box into the
cross brace. There may be two holes at the correct
spacing, but they will probably have to be enlarged.
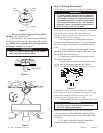
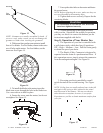
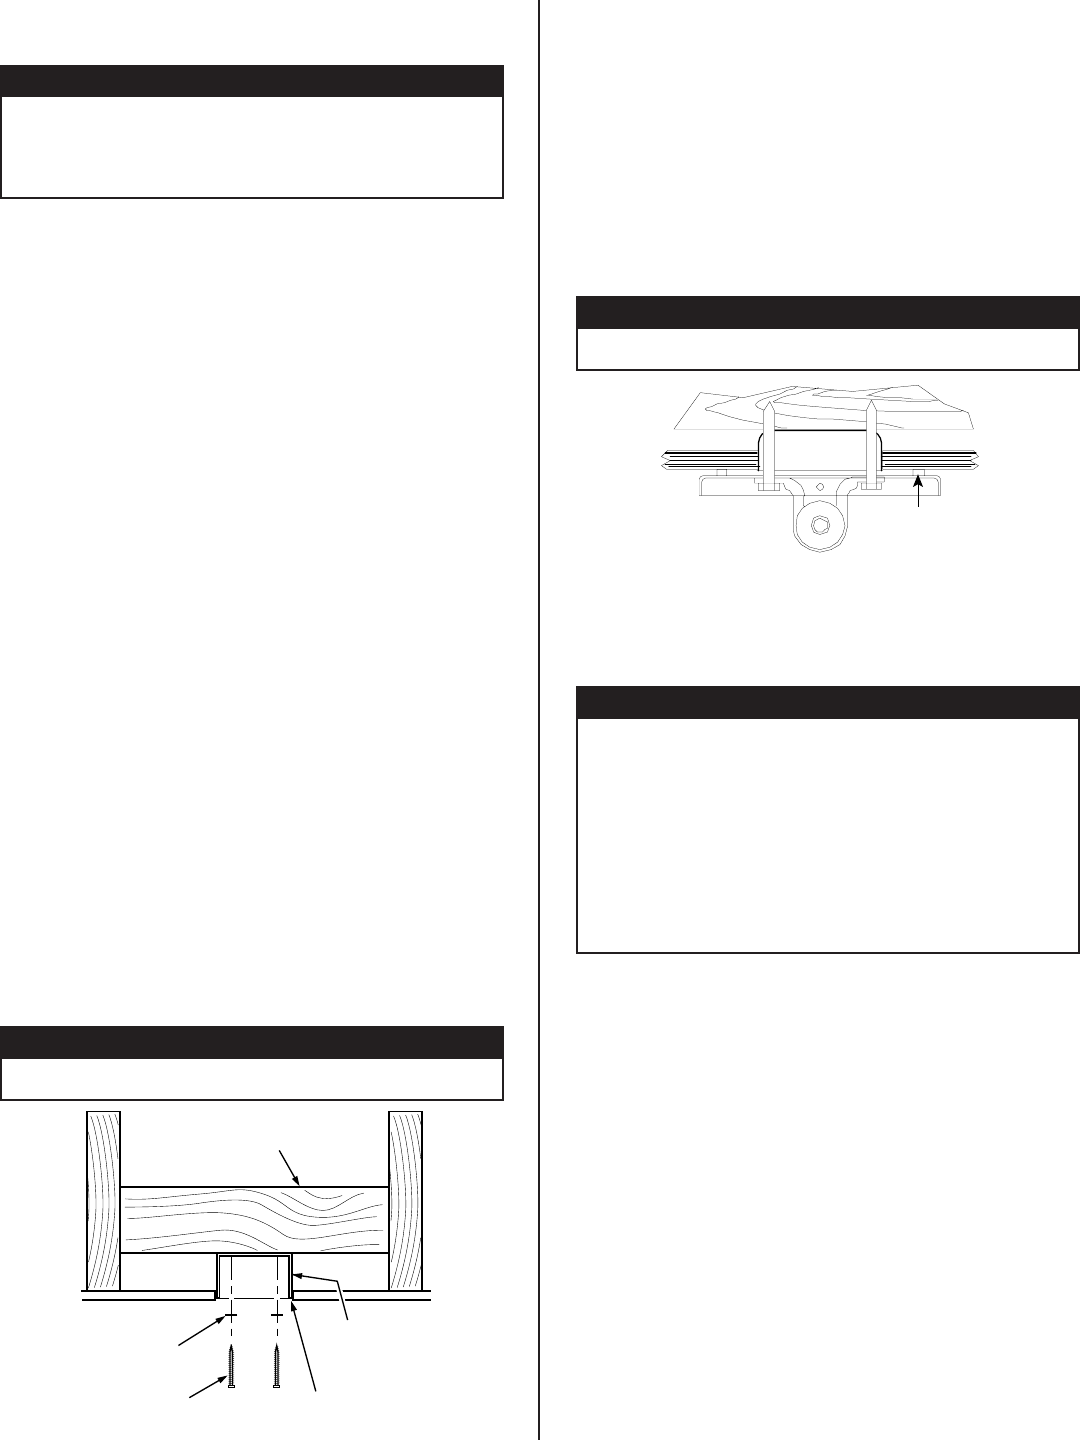
3. Use the two (2) bracket screws to secure the
hanger bracket and canopy plate to the joist as
shown in Figure 4. Install the rubber bumpers into
the canopy plate and the rubber bushing in the
hanger bracket before assembling the parts to the
ceiling joist.
Rubber
Bumpers
Figure 4
Step 4: Hanging the Fan
• When inspecting or preparing the installation
site where wiring is available, to avoid possible
electrical shock, disconnect power by turning off the
circuit breakers both to the outlet box and to its
associated wall switch location. If you cannot lock
the circuit breakers in the off position, securely
fasten a prominent warning device, such as a tag, to
the service panel.
• All wiring must be in accordance with na-
tional and local electrical codes. If you are unfamil-
iar with wiring, you should use a qualified electri-
cian.
• Do not mount directly to an unsupported
ceiling or to an electrical outlet box.
• The wood joist chosen for mounting the fan
must be sound and of sufficient size. In no case
should it be smaller than standard 2”x4” lumber.
1. Secure a metallic outlet box 4” x 1-1/2” or
4” x 1/2” deep to a 2” x 4” cross brace between two
ceiling joists as shown in Figure 3. The outletbox
must be recessed in the ceiling by 1/16” minimum.
Secure the outlet box to the cross brace by drilling
two (2) pilot holes no larger than the minor diameter
of the woodscrews (5/64”) and use two #8 x 1-1/2”
woodscrews and washers. Use the innermost holes
for securing the box. Orient the box so the outer-
most holes are aligned with the 2” x 4” brace. The
outermost holes will be use in Step 3 sub-step 2.
!
CAUTION
!
• Your Hunter ceiling fan weighs up to 50 lbs. The
following precautions must be taken for safety,
and to ensure that your fan is securely mounted
to the ceiling.
!
CAUTION
!
• Do not use a lubricant on the screws.
!
CAUTION
!
• Do not use a lubricant on the screws.
!
CAUTIONS
!
• Be sure to tighten the pipe nipple shown in Fig-
ure 2 into the fan, tighten the hanger bracket
onto the pipe, and tighten the two set screws
as described in sub-step 2 to prevent the fan
from falling.
• Your fan may weigh up to 50 lbs. All of the fol-
lowing steps must be followed in order to en-
sure a secure mounting. Perform sub-steps 1-
4 with the motor resting in the liner for protec-
tion.
1. Take the hanger bracket from the sack parts
and locate the pipe nipple (See Figure 2.). Feed the
wires from the top of your motor through the pipe.
2. Back out the set screw in the neck of the
motor housing and the hanger bracket so the pipe
can be screwed in. Screw the pipe into the fan until
tight (at least 4-1/2 turns). Feed the wire through
the canopy and the canopy insert and let the canopy
rest on the neck of the motor. Slide the canopy
insert over the pipe.Feed the wire through the
hanger bracket and screw the hanger bracket onto
the pipe until tight (at least 3 turns). Then use pliers
to tighten both the hanger bracket and the pipe
together. Tighten the set screw in the motor housing
with pliers. Securely tighten the set screw in the
hanger bracket. See Figure 5.