


1
41556-01 8/08/03 © 2003 HUNTER FAN CO.
SINCE 1 8 8
6
®
INSTALLATION INSTRUCTIONS FOR
HUNTER ORIGINAL
®
CEILING FANS
!
WARNINGS
!
• To avoid possible electrical shock, before wir-
ing fan, disconnect power by turning off the cir-
cuit breakers both to the outlet box and to its
associated wall switch location. If you cannot
lock the circuit breakers in the “OFF” position,
securely fasten a prominent warning device,
such as a tag, to the service panel.
• All wiring must be in accordance with national
and local electrical codes. If you are unfamiliar
with wiring, you should use a qualified electri-
cian.
• To reduce the risk of personal injury, install the
fan to the building structure according to these
instructions and use only the hardware sup-
plied.
IMPORTANT!
READ AND SAVE THESE
INSTRUCTIONS!
!
CAUTIONS
!
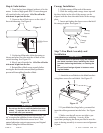
• NEVER REST THE FAN ON THE SWITCH HOUS-
ING. As you prepare the fan for installation, rest
the motor in the liner in which it was packed.
• Be sure to put full contents of the oil tube into
the fan according to the instructions.
• If this fan is used as a replacement for an Origi-
nal
®
Old-Tyme non-reversible fan, it must be in-
stalled per the instructions included with this
fan. Failure to do so could result in the fan fall-
ing. DO NOT HANG THIS FAN ON A SINGLE
“J” HOOK.
• To reduce the risk of noise and to ensure proper
fan operation, do not use a solid-state speed
control with this fan. Use Hunter speed con-
trols for Hunter Original
®
ceiling fans only.
• Do not use an abrasive cleaner on the fan. A
mild detergent will clean and restore most units
to their original beauty.
Installing Your Hunter
®
Ceiling
Fan
Note To Installers: Please leave this manual with
the home owner.
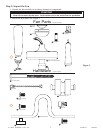
Tools needed:
• Pliers • 3/8” Socket Wrench
• Flat blade screwdriver • Phillips screwdriver
• Electric drill • 11/64” drill bit
• 4” x 1-1/2” standard octagon electrical box
Step 1: Pre-Installation
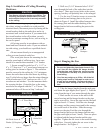
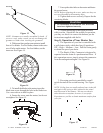
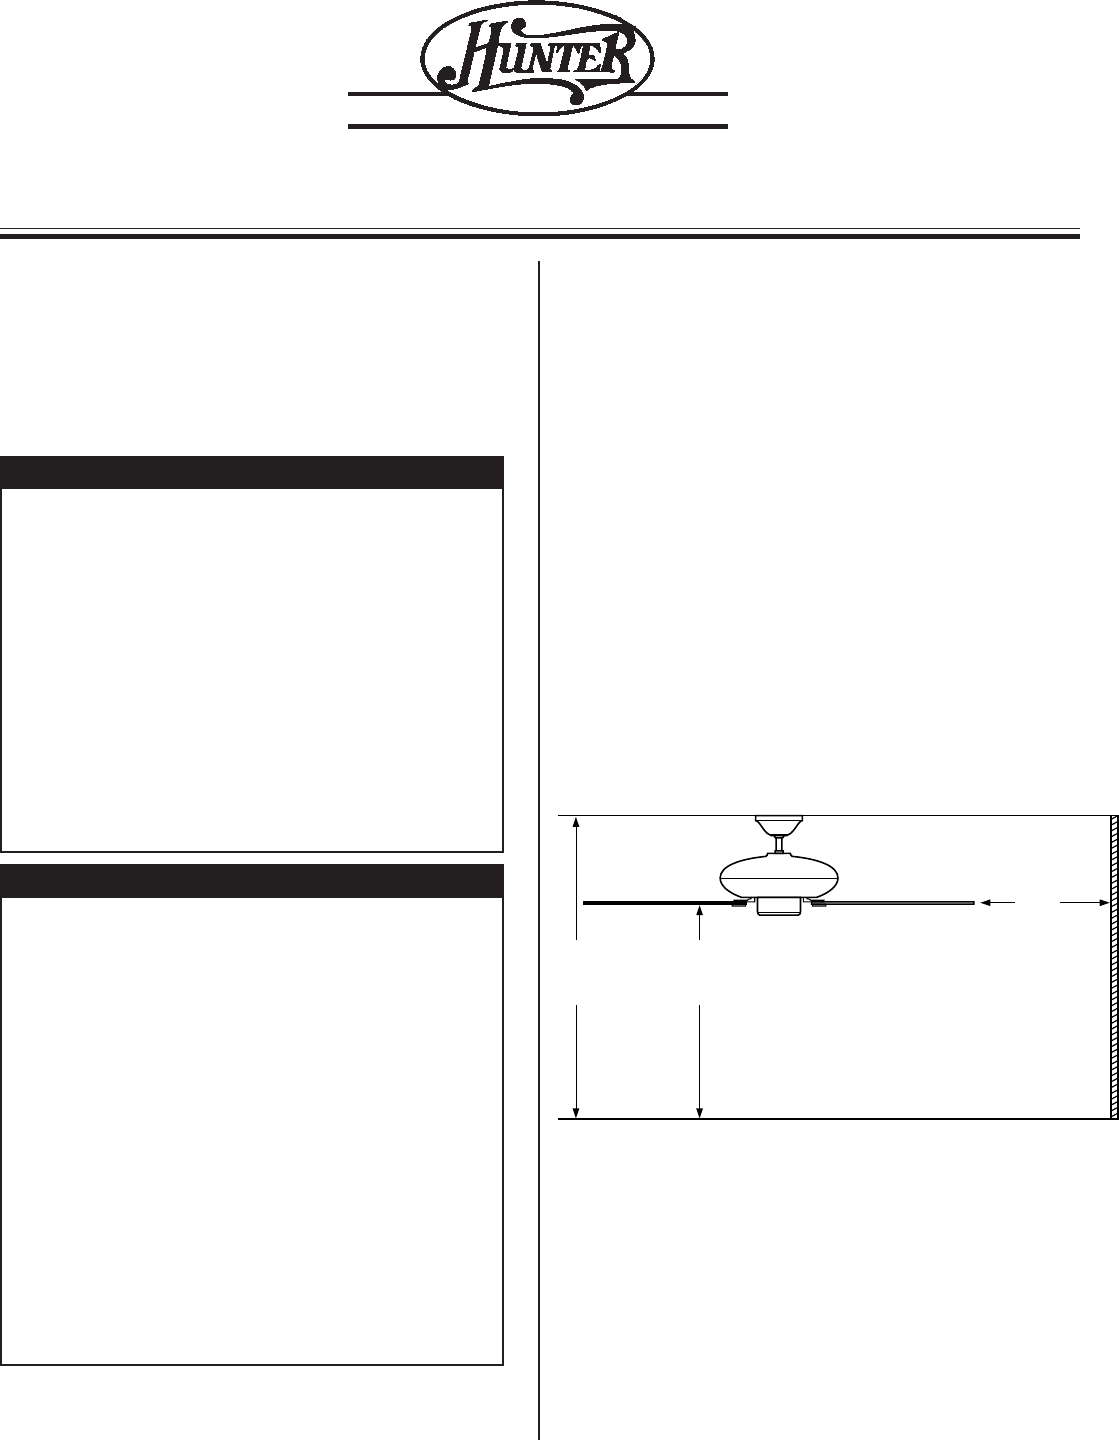
1. Select the installation site: Normally this is
near the center of the room, often replacing a light
fixture. Make certain that ample clearance is left
for the rotating fan blades. For maximum effi-
ciency, no obstructions (walls, posts, etc.) should be
within 24” of the tips of the blades. See Figure 1.
NOTE: Mounting should also meet the precautions listed
in Step 3.
Read this entire manual thoroughly before begin-
ning installation.
24”
Minimum
Clearance
7’ Minimum
Clearance To
Floor
8’Minimum
to Ceiling
Figure 1
2. Fan mounting height: Your Hunter fan
comes with the proper hardware to hang the fan
from a standard 8 foot ceiling so that the fan blades
will be 12” from the ceiling and approximately 7
feet from the floor. See Figure 1.
NOTE: On vaulted ceilings, up to 45° pitch, you must
use the Hunter Vaulted Ceiling Mounting Kit.