


11
NOTE:
Only work on a generator that has cooled completely.
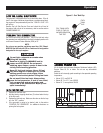
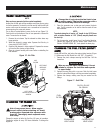
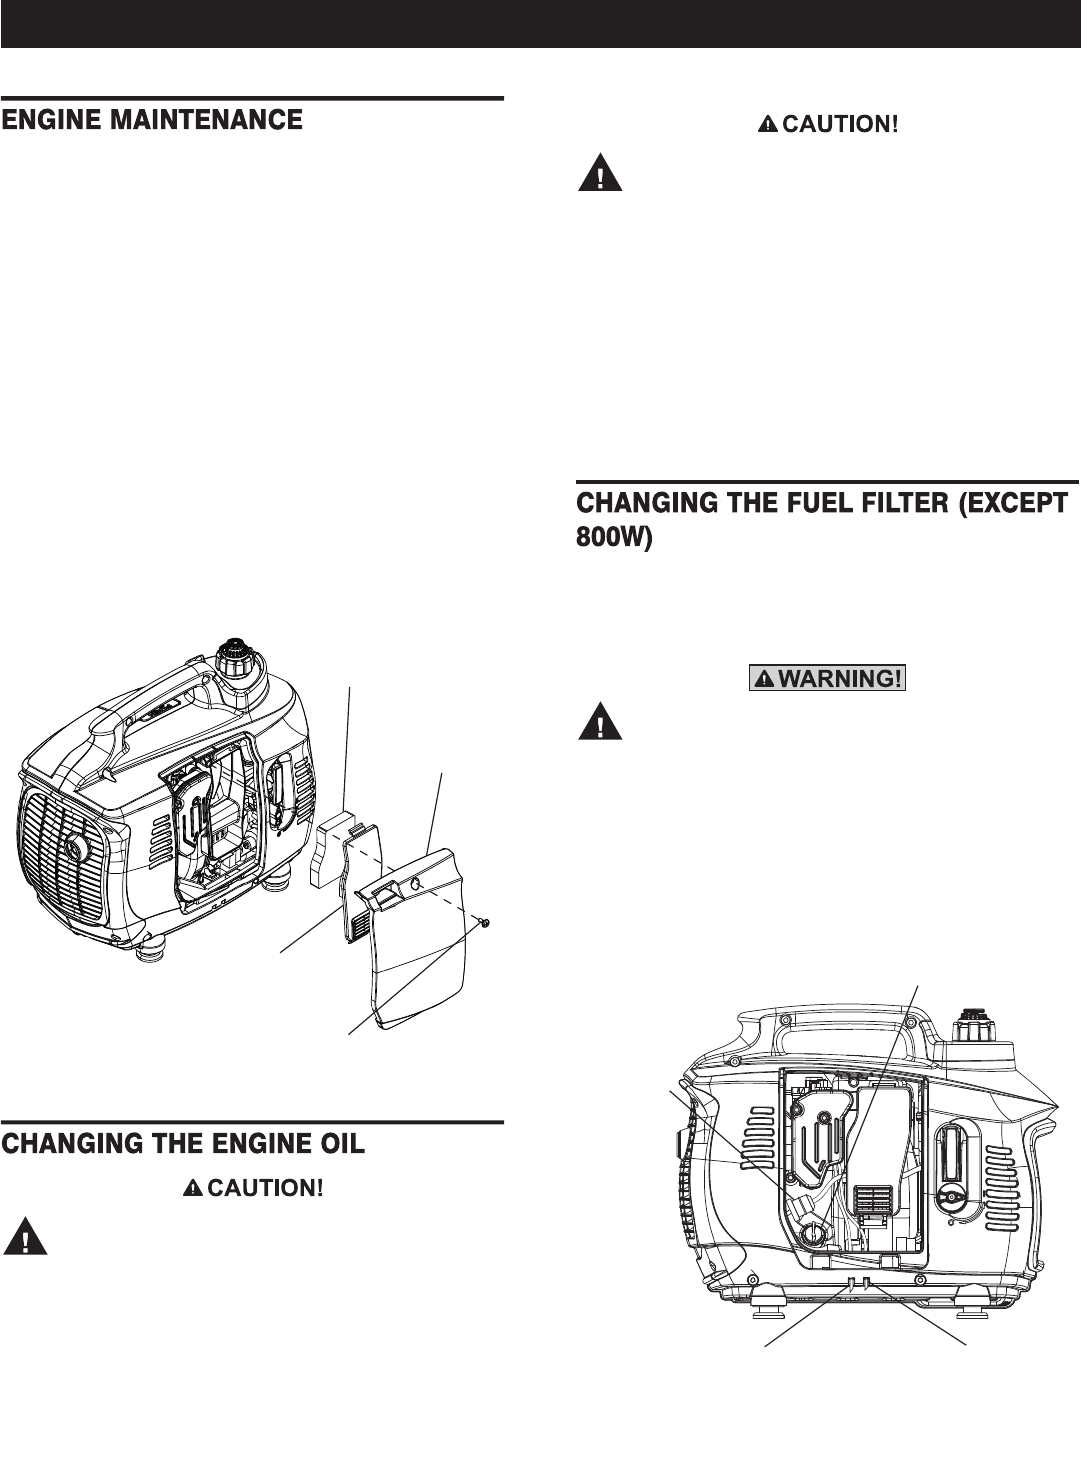
Inspect the oil level and air filter condition each time you are going
to use the generator. To check the air filter and oil level the left side
service cover must be removed; use a screwdriver to loosen the
screw securing the cover and remove.
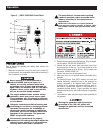
The air filter is located behind a cover for the air box (Figure 10).
Push the tab on the bottom of the air box upwards to release the
cover. To service the air cleaner:
1. Remove the air cleaner. Tap the element to shake loose any
large particles.
2. Wash the element in soapy water. Squeeze the filter dry in
clean cloth (DO NOT TWIST).
3. Soak the filter element in clean engine oil. Squeeze the excess
oil from the filter, leaving a light coating.
4. Clean air cleaner housing and cover before re-installing the
filter element.
Figure 10 - Air Filter
%-6
*-08)6
*-08)6
,397-2+
'3:)6
0)*87-()
7)6:-')'3:)6
7'6);
0)*87-()
7)6:-')
'3:)6
Hot oil may cause burns. Allow engine
to cool entirely before draining oil. Avoid
prolonged or repeated skin exposure with
used oil. Thoroughly wash exposed areas
with soap.
Change the engine oil after the first five (5) hours of operation.
Change the engine oil every 100 hours thereafter. To change the
engine oil:
Change the oil only when the fuel tank is low
or nearly empty. Tipping the generator with a
full fuel tank may cause fuel leakage.
1. Place the generator over a drain pan and remove the drain
plug. Tip the generator on its side to drain the used oil from
the crankcase.
NOTE:
To make draining the oil easier, a 6” length of vinyl (PVC) hose
with an inside diameter of 1.25” (32mm) may be placed over
the drain lip.
2. Tip the generator upright once the oil has finished draining.
Replace the engine oil with the proper grade called out in
Section “ADDING ENGINE OIL”, then replace the drain plug.
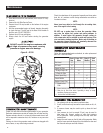
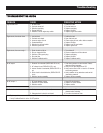
Locate the fuel filter, just below the engine intake housing (Figure
11). Make sure the Fuel Shutoff is in the “OFF” (O) position.
1. Remove the pinch clamps securing the fuel filter. Pull the
hoses free.
Wipe up any fuel spills immediately! Do not
smoke or replace the fuel filter near sparks
or open flame!
2. Replace the used filter with a new one. Push the fuel hoses
onto the barbed filter fittings until they are seated completely.
3. Replace the clamps, making sure they are seated on the
fittings.
Figure 11 - Fuel Filter
*9)0
*-08)6
3-0*-00409+
3-0(6%-2
'6%2/'%7)
:)28,37)
'%6&96)836
:)28,37)
Maintenance