


GB
15
1740520
3. To start again, make sure the shift lever is in
the slowest speed. Move the throttle control
to the SLOW position. Slowly release the
pedal.
4. If you must stop or start on a hill, always
have enough space for the unit to roll when
you release the brake and engage the clutch.
5. Be very careful when you change directions
on a hill. When on a slope or in a turn on a
hill, move the throttle control to the SLOW
position to help prevent an accident.
How To Use The Grass Bagger
WARNING: Do not ride up or down
slopes that are too steep to back
straight up. Never ride the unit
across a slope.
Operation
To operate with the grass bagger, follow the
steps below.
1. Start the engine.
2. Move the throttle control to FAST position.
3. Move the shift lever to FIRST (1) position. To
fill the grass bag, always operate at the
slowest speed.
4. If the height of the grass is more than 3
1
/2
inches (9cm), cut the grass with the mower
housing in the highest position. Then, lower
the mower housing and cut the grass again.
You can also cut at
1
/2 to
2
/3 of the full cutting
width of the mower housing.
How To Clear The Connector Tube And
The Extension Tube
If the connector tube or the extension tube
becomes filled with grass, clear as follows.
1. Move the
blade rotation control to the DIS-
ENGAGE position.
2. Move the shift lever to the neutral (N) posi-
tion.
3. Engage the parking brake.
4. Stop the engine.
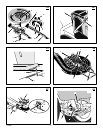
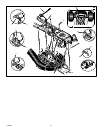
5. (Figure 8) Remove the grass bagger (9).
6. (Figure 11) Usealongstick (1) to push any
grass and debris from the connector tube
(2) or the extension tube.
7. If the connector must be removed, see “How
To Remove The Connector Tube” in the
maintenance section.
How To Empty The Grass Bagger
1. Move the blade rotation control to the DIS-
ENGAGE position.
2. Move the shift lever to the neutral (N) posi-
tion.
3. Engage the parking brake.
4. (Figure 12) Raise the rear of the grass bag
(9).
Before Starting The Engine
Check the oil
NOTE: The engine was shipped from the fac-
tory filled with oil. Check the level of the oil.
Add oil as needed. See the engine manufac-
turer’s instructions for the type of petrol and
oil to use.
1. Make sure the unit is level.
NOTE: Do not check the level of the oil
while the engine runs.
2. Check the oil. Follow the procedure in the
engine manufacturer’s instructions.
3. If necessary, add oil until the oil reaches the
FULL mark on the dipstick. The quantity of oil
needed from ADD to FULL is shown on the
dipstick. Do not add too much oil.
Add Petrol
WARNING: Always use a safety
petrol container. Do not smoke
when adding petrol to the fuel tank.
Do not add petrol when you are inside an
enclosure. Before you a dd petrol, stop the
engine and let the engine cool for several
minutes.
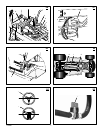
1. (Figure 14) Fill the fuel tank (1) to the FULL
(2) position with regular unleaded petrol. Do
not use premium unleaded petrol. Make sure
the petrol is fresh and clean. Leaded petrol
will increase deposits and shorten the life of
the valves.
2. (Figure 35) Some models have a fuel shut--
off valve located under the fuel tank. If
equipped, turn the fuel shut--off valve (1)
1/4 turn to the OPEN position.
How To Start The Engine
WARNING: The electrical system
has an operator presence system
that includes a sensor switch for
the seat. These components tell the
electrical system if the operator is sitting
on the seat. This system will stop the
engine when the operator leaves the seat.
For your protection, always make sure this
system operates correctly.
NOTE: The engine will not start unless you
depress the clutch/brake pedal or engage the
parking brake and move the blade rotation
control to the DISENGAGE position.
1. Push the clutch/brake pedal completely for-
ward. Keep your foot on the pedal.
2. Move the shift lever to the neutral (N) posi-
tion.
3. Make sure the blade rotation control is in the
DISENGAGE position.
4. Move the throttle c ontrol completely forward
to the CHOKE or FAST position. Some mo-
dels have a separate choke knob. Pull the
choke knob to the full CHOKE position.
5. Turn the ignition key to the START position.
NOTE: If the engine does not start after
four or five tries, move the throttle control
to the FAST position. Again try to start the
engine. If the engine will not start, see the
TROUBLE SHOOTING CHART.
6. Slowly move the throttle control to the SLOW
position.
7. To start a hot engine, move the throttle con-
trol to a position between FAST and SLOW.
Mowing And Bagging Tips
1. For a lawn to look better, check the cutting
level of the mower housing. See “How To
Level The Mower Housing” in the Mainten-
ance section.
2. For the mower housing to cut level, make
sure the tyres have the correct amount of air
pressure. The correct air pressure is shown
onthesideofthetyres.
3. Every time you use the unit, check the blade.
If the blade is bent or damaged, immediately
replace the blade. Also, make sure the nut
for the blade is tight.
4. Keep the blade(s) sharpened. Worn blades
will cause the ends of the grass to turn
brown.
5. If the grass is very high, cut two times to de-
crease the load on the engine. First cut with
the mower housing in the highest position
and then lower the mower housing for the
second cut.
6. Operate the engine with the throttle in FAST
position and the shift lever in first or second
gear.
7. For better cutting performance and a quality
cut, mow with the shift lever in one of the
slower speeds.
8. After each use, clean the bottom and top of
the mower housing for better performance.
Also, a clean mower housing will help pre-
vent a fire.
MAINTENANCE
NOTE: Illustrations and pictorials begin on
page 2.
General Recommendations
1. The owner’s responsibility is to maintain this
product. This will extend the life of the prod-
uct and is also necessary to maintain war-
ranty coverage.
2. Check the spark plug, drive brake, lubricate
the unit, and clean the air filter once a year.
3. Check the fasteners. Make sure all fasteners
are tight.
4. Follow the Maintenance section to keep the
unit in good operating condition.
WARNING: Before you make an in-
spection, adjustment, or repair to
the unit, disconnect the wire to the
spark plug. Remove the wire from the
spark plug to prevent the engine from
starting by accident.
NOTE: Torque is measured in metric N--m
(foot pounds). This measurement describes
how tight a nut or bolt must be. The torque is
measured with a torque wrench.
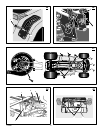
How To Remove The Connector Tube
For good bagging performance, the connector
tube must be clean and free from grass and
debris. Remove and clean the connector tube
as follows.