


32
7.0 Maintenance and Handling
7.1 Load Limiter
7.1.1 The purpose of the load limiter is to prevent using the hoist in an overload situation. When lifting, the
hoist will stop automatically if the load is above the rated capacity of the hoist.
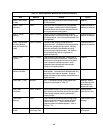
7.1.2 The adjustment is factory set to actuate at approximately125% of rated capacity (based on supply air
pressure of 90 PSI). Note: the load limiter may need adjustment to compensate for air supply
pressures significantly less than 90 PSI.
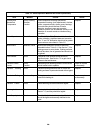
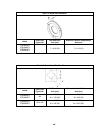
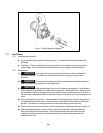
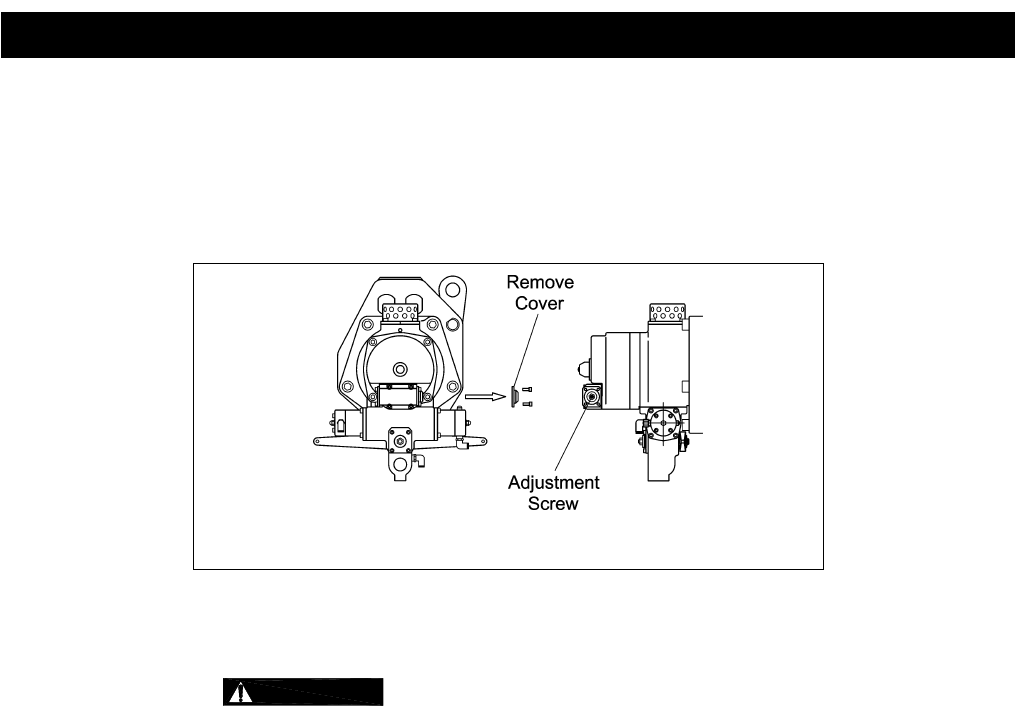
Figure 7-1 Load Limiter screw adjustment location
7.1.3 Adjustment Procedure
1) Before proceeding with the load limiter adjustment, note the following:
a.
WARNING
Adjusting the load limiter involves operating the hoist. Personnel involved
in the adjustment procedure should read, understand, and follow Section 4, "Operation".
b. For the adjustment procedure, the hoist should be connected to an air supply (see Section 3.1)
and it should initially be without a load on its hook.
c. Start this procedure with an unloaded hoist. All adjustments to the load limiter should be made
with the load in a resting position so that the load chain is not tensioned.
d. For the adjustment procedure: OUT means the counter-clockwise (CCW) direction, and IN
means the clockwise (CW) direction.
e. The pressure of the air supply at the hoist’s inlet port (acceptable range is 60 to 90 PSI) affects
the performance of your air hoist, including the actuation point of the load limiter. Therefore,
ensure that during the adjustment procedure the air pressure at the hoist's inlet port is the
same as that which the hoist will experience in normal operation. The relationship between air
supply pressure and load limiter actuation is:
For a given load limiter setting, as pressure decreases, the actuation point increases.
f. When the load limiter is adjusted and working properly, the hoist will operate and lift the load a
short distance before the load limiter automatically stops lifting.
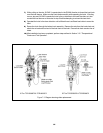
2) Refer to Figure 7-1. Loosen the lock nut and slowly turn the adjustment screw OUT until it is loose and
no longer is in contact with the internal load limiter spring – as this occurs the screw should become
easier to turn. Stop turning the screw once it is loose and easier to turn.
3) Turn the adjustment screw IN just enough so that it begins to contact the internal load limiter spring –
as this occurs the screw should become slightly harder to turn.