SKU 47761 PAGE 11
For technical questions, please call 1-800-444-3353;
Troubleshooting section at end of manual.
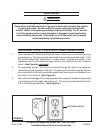
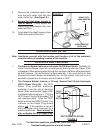
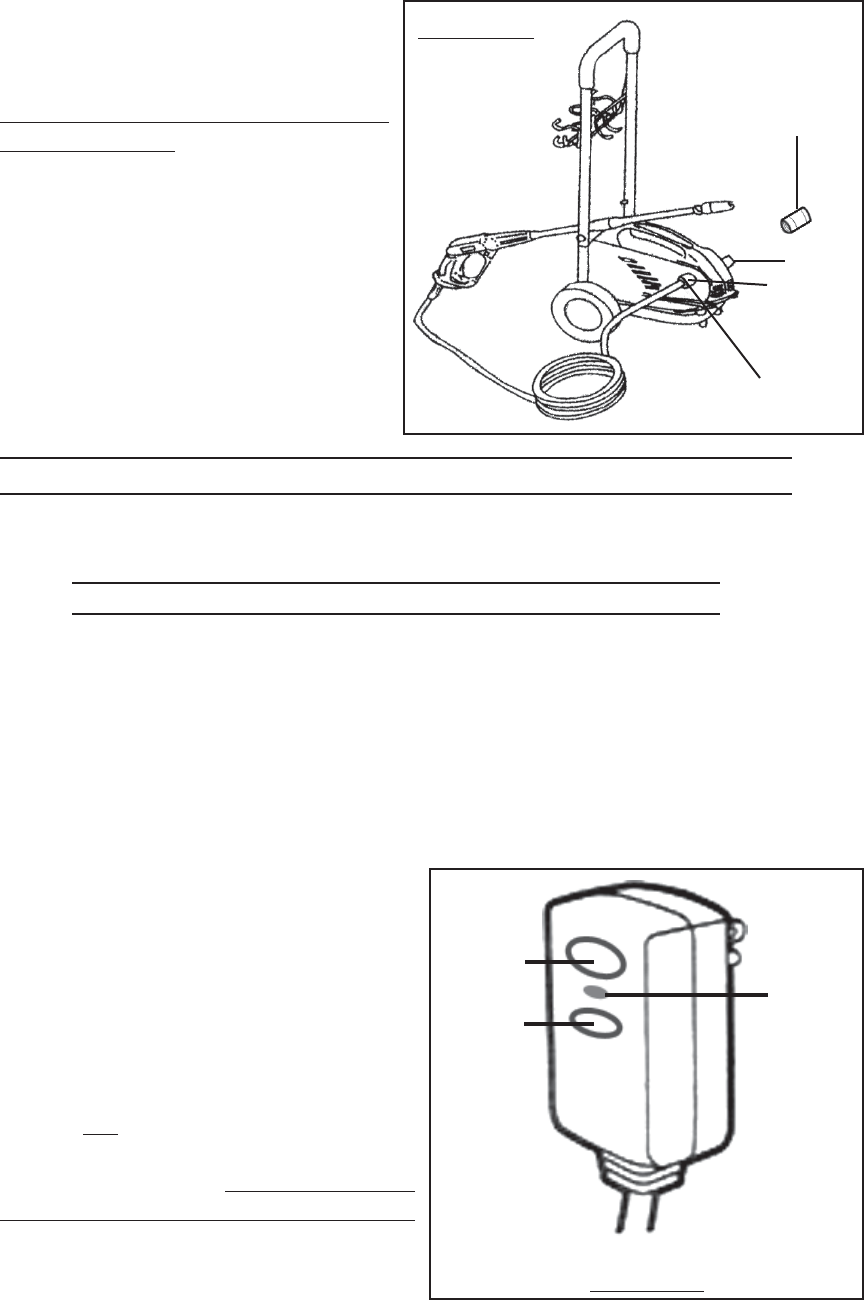
8. Remove the protective plastic caps
from the unit’s water Inlet Port and
water Outlet Port. (See Figure D.)
9.
Ensure the inlet water strainer is
free of debris. Firmly attach the
Heavy Duty Hose Adapter (G) to the
water Inlet Port.
10. Firmly attach the High Pressure Hose
(26A) to the water Outlet Port.
HEAVY DUTY
HOSE ADAPTER
(G)
INLET
HIGH PRESSURE
HOSE (26A)
OUTLET
FIGURE D
CONTROLS AND SETUP
Note: Familiarize yourself with the location and function of all of the machine’s
controls before proceeding to setup of the machine.
CONTROLS AND FEATURES
1. The Pressure Washer features an automatic On/Off Micro Switch. The Motor (C)
of the Pressure Washer does not run continuously, but only when the Trigger (23A)
is squeezed. When spraying water through the unit stops, the Motor will automatically
shut off. However, the unit will build up heat while idle. If the unit is left to sit, then
the electrical circuit’s beaker will eventually trip. For this reason, if the unit is not to
be used for longer than 2 minutes, shut the Switch to “OFF”.
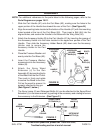
2. The Pressure Washer features a 3-Prong, Ground Fault Circuit Interrupter
(GFCI) Power Plug (95). The GFCI
Power Plug provides additional
protection from the risk of electrical
shock. Make sure that the Trigger (23A)
is released before plugging in. Plug the
GFCI Power Plug into a grounded, 120
volt, electrical outlet. Press the TEST
button and then the RESET button. The
indicator
on the Power Plug should
appear
red. If the indicator is not red,
have the power plug inspected by a
qualified electrician. Never attempt to
alter or disable the GFCI Power Plug.
Should replacement of the GFCI Power
GFCI POWER PLUG (95)
FIGURE E
RED
INDICATOR
RESET
BUTTON
TEST
BUTTON


