


SKU 47761 PAGE 10
For technical questions, please call 1-800-444-3353;
Troubleshooting section at end of manual.
ASSEMBLY
NOTE: For additional references to the parts listed in the following pages, refer to the
Parts Diagrams on pages 18-21.
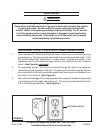
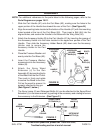
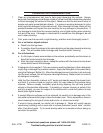
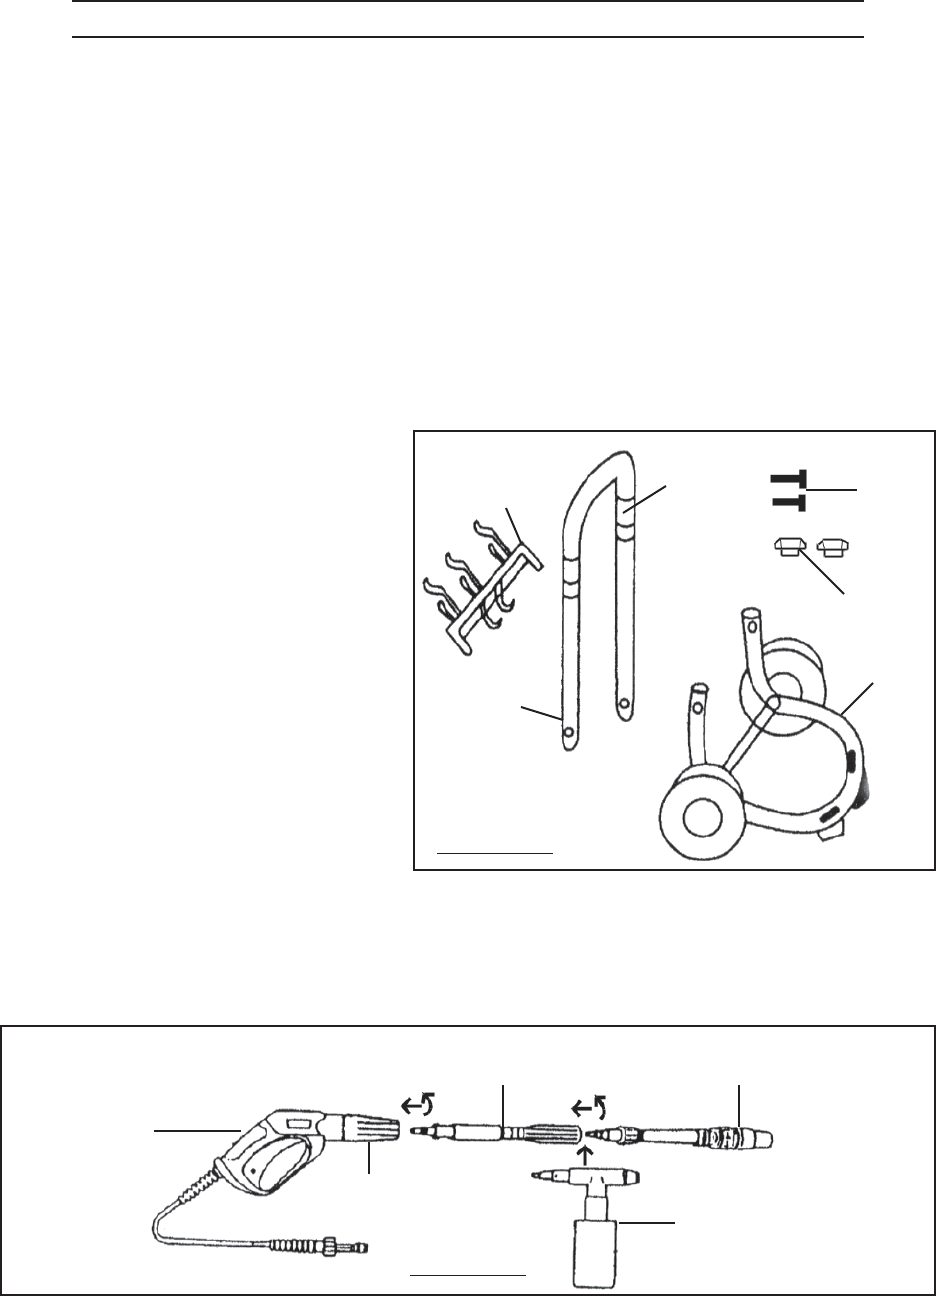
1. Slide the Cart Handle (A1) onto the Cart Base (A3), making sure the holes in the
upper
portion of the Handle face toward the rear of the Cart. (See Figure B.)
2. Align the mounting holes located at the bottom of the Handle (A1) with the mounting
holes located at the top of the Cart Base (A3). Then insert a Bolt (A4) into the
aligned holes, and secure the Handle to the Base with the Wing Nuts (A5).
3. Attach the Accessory Holder (B) to the Cart Handle (A1) by inserting the prongs of
the Accessory Holder into the holes located in the upper/rear portion of the Cart
Handle. Then slide the Accessory Holder Bands (A2) down over the Accessory
Holder rack to secure the
Accessory Holder to the Cart
Handle.
4. Place the Pressure Washer unit
evenly onto the Cart Base (A3).
5. Insert the Pressure Washer
accessories into the Accessory
Holder (B).
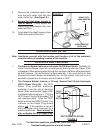
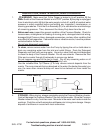
6. Attach the Spray Wand
Extension (J) to the Gun
Assembly (E) by inserting the tip
of the Wand into the Gun Collar.
Then push in firmly and rotate
to secure the Wand to the Gun.
Pull on the wand to ensure it is
properly attached to the gun.
(See Figure C, below.)
7. The Spray Lance (K) and Detergent Bottle (H) can be attached to the Spray Wand
Extension (J) in the same manner, by pushing in the accessory and rotating to secure
the accessory to the Extension. (See Figure C.)
HANDLE
(A1)
ACCESSORY
HOLDER
(B)
BOLTS
(A4)
WING
NUTS (A5)
BASE
(A3)
ACCESSORY
HOLDER
BAND (A2)
FIGURE B
SPRAY LANCE
EXTENSION (J)
SPRAY
LANCE (K)
GUN
COLLAR
GUN
ASSEMBLY
(E)
DETERGENT
BOTTLE (H)
FIGURE C