


6
9. DISENGAGE POWER
to attachment and stop
engine prior to making any adjustment or clearing
the unit.
10. DO NOT WEAR LOOSE
fitting clothing.
11. KEEP HANDS
, feet, hair, clothing, etc., away
from moving parts.
12. KEEP BYSTANDERS
and pets removed from the
work area.
13. EXERCISE CAUTION
to avoid slipping or falling,
especially when operating in reverse with two
wheel tractors.
14. DIRECT DISCHARGE
so as not to endanger life
or property; such as people, pets, structures,
cars, etc.
OPERATION
1. Refer to the tractors Owners Manual for safety
and operating instructions to engage and
disengage the PTO (power take-off).
2. Operate the engine at full speed. In thick, lush
growth reduce ground speed (not engine speed)
to allow the mower enough time to cut and
discharge.
REMOVAL FROM TRACTOR
1. Reverse the procedure for attaching; see
INSTALLATION, paragraphs 1 through 3.
ADJUSTM ENTS
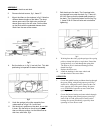
1. SWIVEL ACTION: The swivel action is regulated
by the nut and bolt on the swivel casting, fig 5.
Loosening allows more action, tightening reduces
the action. The swivel action should allow the
mower to follow ground contour.
2. CASTERS: The caster wheels should be
adjusted (if necessary) after
the mower is
attached to a tractor. Raise or lower the casters,
by use of the spacers, to make the mower level
with the ground, fig 6 , Item 46.
ROUTINE MAINTENANCE
1. Perform the lubrications as described in
LUBRICATION, paragraphs 1 through 4.
2. Check each rotor shaft nut to insure tightness fig
1 , Item 15. See ADJUSTMENTS, paragraph 6.
3. Check all nuts and bolts to insure tightness.
4. Sharpen and balance the blades.
5. Clear the mower of cuttings and debris.
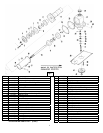
fig 9
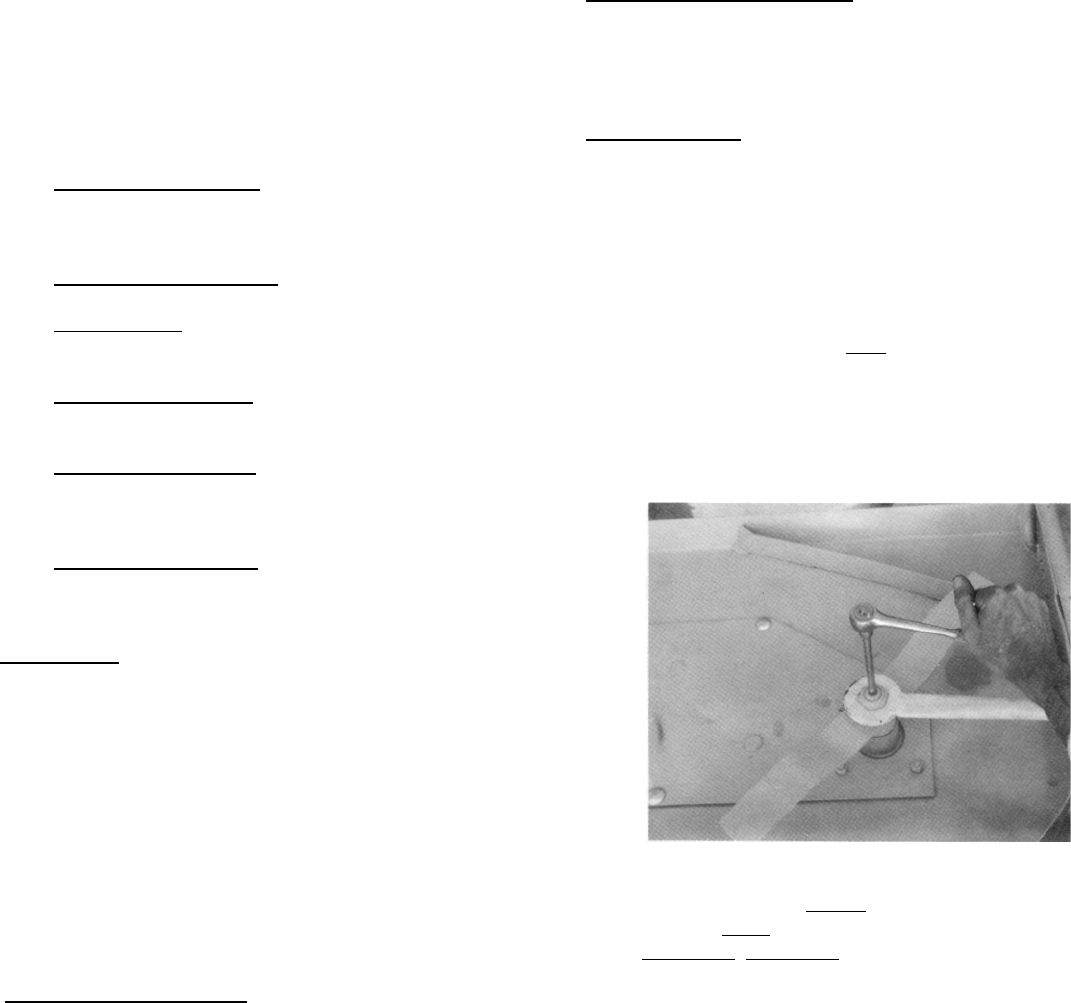
3. BLADE REMOVAL: STOP the engine, Put the
PTO in the OUT
position. Put the operating levers
in NEUTRAL
. BE SURE the blades have stopped.
Remove the mower from the tractor. Turn the
mower upside down. Hold the rotor shaft with a
3/8” socket drive and remove the nut with a
15367E1 Gravely Wrench or equivalent fig 9. Do
not use the top spindle nut to hold the spindle form
spinning
4. BLADE SHARPENING: Sharpen the blades.
Balance after sharpening.
5. CUTTING HEIGHT: Place the collars above and/or
below the blade for adjustment, fig 1, Items 19, 20,
21. Note that the collars are not the same
thickness. Keep the same combination on both
rotors.