


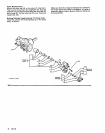
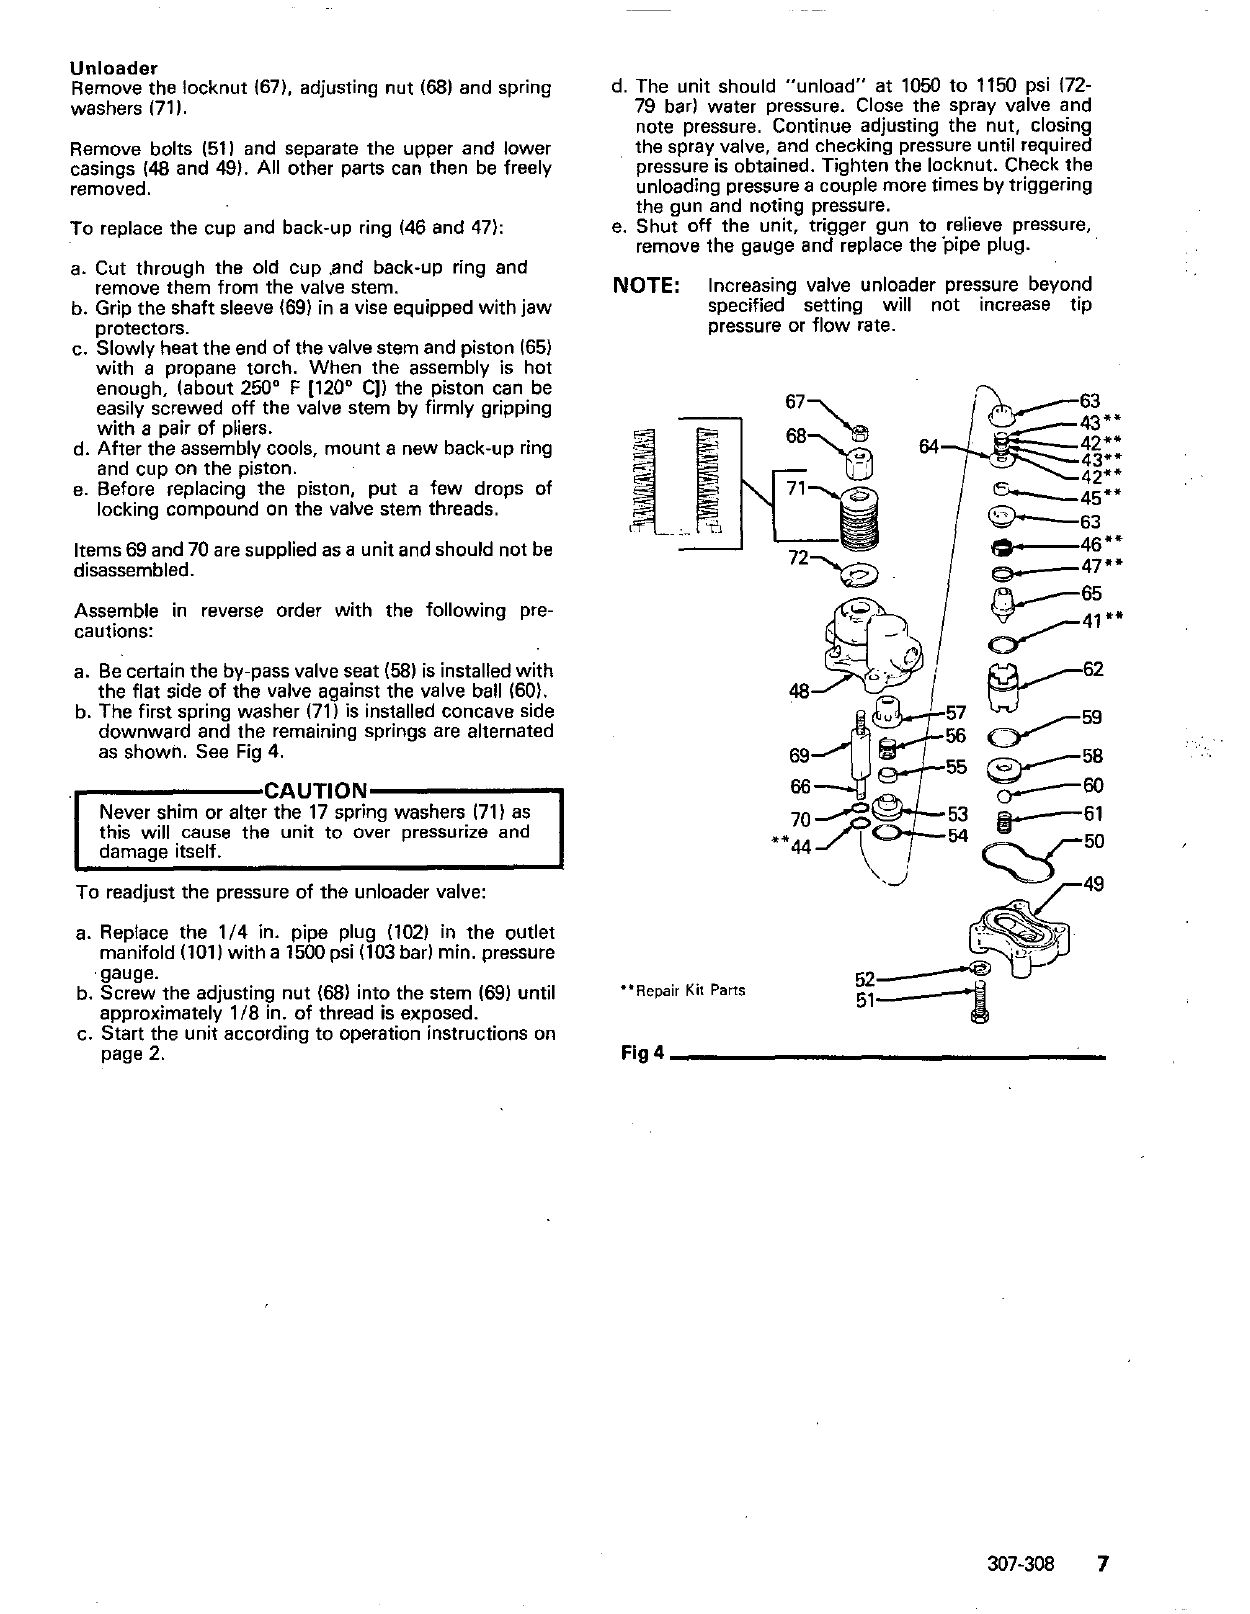
Unloader
Remove the locknut
(67).
adjusting nut
(68)
and spring
washers
(71).
Remove bolts
(511
and separate the upper and lower
casings
(48
and
49).
All other parts can then be freely
removed.
To replace the cup and back-up ring
(46
and
47):
a.
Cut
through the old cup and back-up ring and
b.
Grip the shaft sleeve
(69)
in
a
vise equipped with jaw
remove them from the valve stem.
c. Slowly heat the end of the valve stem and piston
165)
protectors.
with
a
propane torch. When the assembly is hot
enough, (about
250"
F
[120"
C]) the piston can be
easily screwed
off
the valve stem by firmly gripping
with
a pair of pliers.
d. After the assembly cools, mount a new back-up ring
and cup on the piston.
e. Before replacing the piston, put a few drops of
locking compound on the valve stem threads.
disassembled.
Items
69
and
70
are supplied as
a
unit and should not be
Assemble in reverse order with the following pre-
cautions:
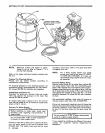
a. Be certain the by-pass valve seat
(58)
is installed with
b. The first spring washer
(71)
is installed concave side
the flat side of the valve against the valve
ball
(60).
downward and the remaining springs are alternated
as shown. See Fig
4.
'ICAUT'ON1
Never shim or alter the
17
spring washers
171)
as
this will cause the unit to over pressurize and
damaae itself.
To readjust the pressure of the unloader valve:
a. Replace the
1/4
in. pipe plug
(102)
in
the outlet
manifold
(101)
with a
1500
psi
(103
bar) min. pressure
b. Screw the adjusting nut
(68)
into the stem
(69)
until
gauge.
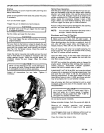
c. Start the unit according to operation instructions on
approximately
118
in. of thread is exposed.
page
2.
~~ ~
d. The unit should "unload" at
1050
to
1150
psi
(72-
79
bar) water pressure. Close the spray valve and
note pressure. Continue adjusting the nut, closing
the spray valve, and checking pressure until required
pressure is obtained. Tighten the locknut. Check the
the gun and noting pressure.
unloading pressure a couple more times by triggering
e. Shut
off
the unit, trigger gun to,relieve pressure,
remove the gauge and replace the pipe plug.
NOTE:
Increasing valve unloader pressure beyond
specified setting will not increase tlp
pressure or flow rate.
. ...
..
"Repair
Kit
Parts
52
51
307-308
7