


14 15
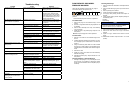
STORAGE & MAINTENANCE
INSTRUCTIONS
Engine
The engine instructions that accompany your unit detail
specic procedures for maintenance of the engine. Fol-
lowing the engine manufacturer’s recommendations will
extend engine work life.
Pump
The pump oil must be changed after the rst 25 hours
of operation on all units. Once the initial oil change has
been completed, it is recommended the oil be changed
every 3 months or 250 hour intervals. If oil appears
dirty or milky, changes may be required at a greater
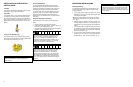
frequency. Add pump oil and ll only to the center of
the sight glass (Refer to the parts listing for the correct
pump oil). Do not overll.
Nozzles
Water ow through the spray nozzle will erode the ori-
ce, making it larger, resulting in a pressure loss. Noz-
zles should be replaced whenever pressure is less than
85% of the maximum. The frequency of replacement
will depend upon such variables as mineral content in
the water and number of hours the nozzle is used.
Quick Couplers
There is an o-ring seal inside the female quick coupler.
This o-ring will deteriorate or, if the unit is allowed to
pump without the high pressure hose or nozzle at-
tached, the o-ring may be blown out occasionally.
Simply insert a replacement o-ring to correct the leak.
(Additional o-rings can be purchased from your dealer.)
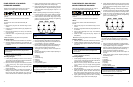
STORAGE & MAINTENANCE
INSTRUCTIONS
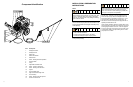
Winterizing
For storage and transportation purposes in subfreezing
ambient temperatures, it will be necessary to winter-
ize this unit. This unit must be protected to the lowest
incurred temperature for the following reasons:
• If any part of the pumping system becomes frozen;
excessive pressure may build up in the unit which
could cause the unit to burst resulting in possible
serious injury to the operator or bystanders.
• The pumping system in this unit may be permanently
damaged if frozen. Freeze damage is not covered by
warranty.
If you must store your unit in an area where the tem-
perature may fall below 32°F, you can protect your unit
by following the procedure outlined below.
NOTICE
Do not store/operate unit in a freezing environment.
Damage to washer could occur.
Gather the following items:
• Two 5 gallon containers.
• One gallon of antifreeze. (Graco® recommends an
environmentally safe antifreeze.)
• Water supply.
• Three foot hose, 1/2-3/4 I.D. with a 3/4 inch male
garden hose tting.
Procedure:
1. To start winterizing, unit must be run and primed
according to the “Start-up Procedures” listed on page
12.
2. After running and priming, shut off the unit and water
supply.
3. Relieve system pressure by pointing the trigger gun in
a safe direction and squeezing the trigger until water
ow ceases to exit the nozzle.
4. Lock the trigger gun in an OFF position and remove
the nozzle.
5. In one 5 gallon container, mix the antifreeze and water
according to manufacturer’s recommendations for the
temperature to which you are winterizing.
Note: Proper winterizing is based on the recommend-
ed manufacturer’s instructions listed on the “Protec-
tion Chart” shown on the back label of most antifreeze
containers.
6. Remove the water supply hose from the unit and
attach the 3 foot hose securely to the inlet connection.
Submerge the other end into the antifreeze solution.
7. Shut off the detergent injector if applicable.
8. Point the wand into the empty container and start the
unit.
9. Trigger the gun until the antifreeze begins to exit the
wand. Release the trigger for 3 seconds, then trigger
the gun for 3 seconds. Continue cycling the gun
several times until all the antifreeze mixture is siphoned
from the container.
10 Stop the unit.
11. Detach the 3 foot hose from the unit and drain any
excess antifreeze back into the 5 gallon container.
12 Disconnect the hose/gun/wand assembly from the unit
and drain any excess antifreeze back into the 5 gallon
container.
13. Store the hose, gun and wand with the unit in a safe,
non-freezing area.
14. Store antifreeze solution for next use or dispose of
according to state EPA laws.
Optional Procedure:
1. Shut the unit and water supply off.
2. Relieve system pressure by pointing the trigger gun in
a safe direction and squeezing the trigger until water
ow ceases to exit the nozzle.
3. Disconnect and drain the hose, gun and wand.
4. Start the unit and allow it to run until all the water exits
the unit. Once the water has stopped owing from the
unit, turn the unit off.
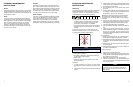
NOTICE
When using this procedure, caution should be used
as ice chips can form from drops of water which
could cause the unit to burst if starting before com-
pletely thawed.
32˚F 0˚C