11
4. Remove the bump knob
completely and remove the
spool from the spool shaft.
Discard any short lengths of
remaining cutting line.
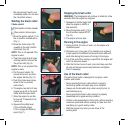
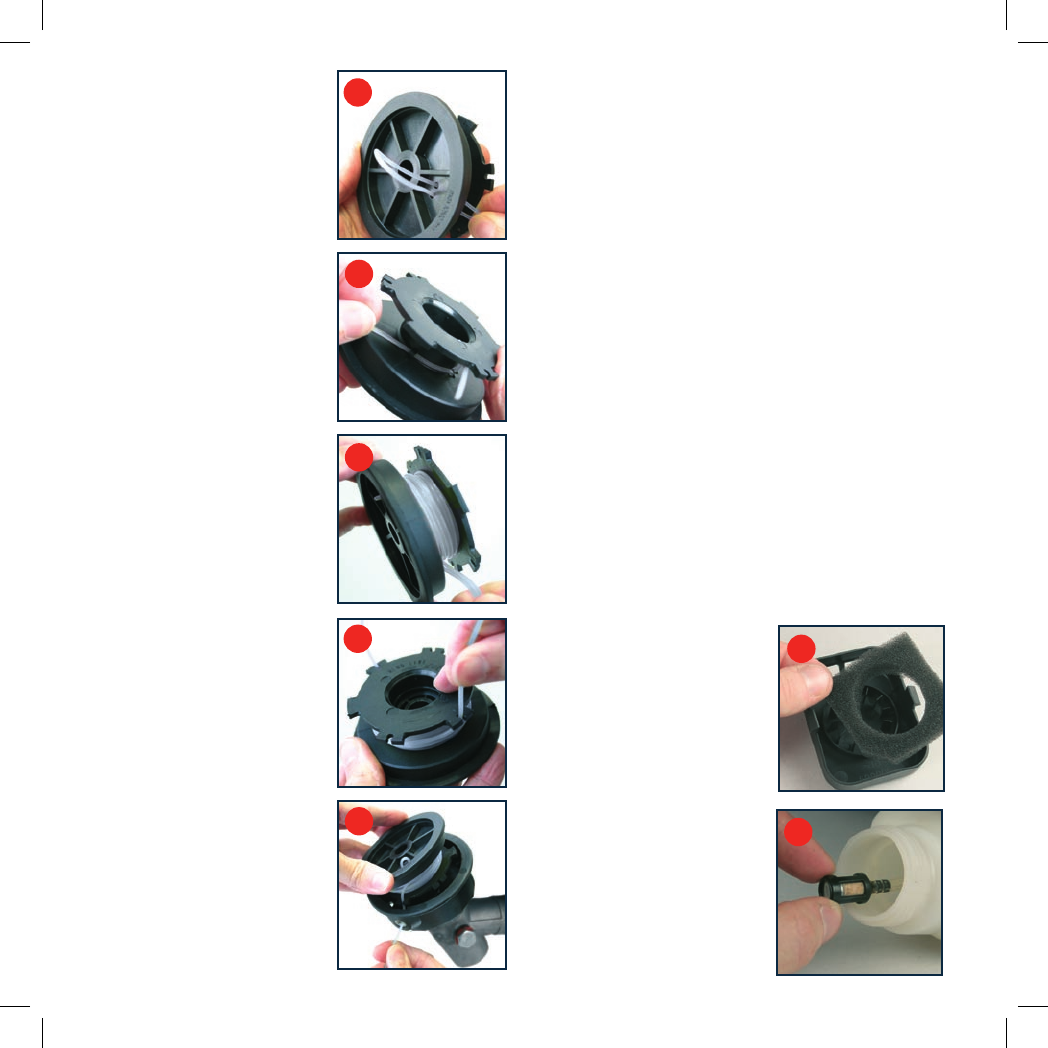
5. Take a 6 metre length of
Ø2mm line and thread the
ends through the two holes
in the bottom of the spool
assembly and pull them
(together) all the way through
(Fig. T). Then thread one of
the ends through the loop in
the spool, as shown (Fig. Q).
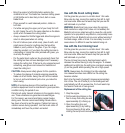
6. Wind the lines (together)
tightly onto the spool head in
the direction indicated by the
arrow on the spool (Fig. V).
7. When there is approximately
150mm of line left, lock one of
the lines into one of the line
location notches in the spool
head and the other into the
opposing notch (Fig. W).
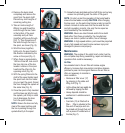
8. With the spring fitted onto the
shaft of the spool holder insert
the spool back into the holder.
As you insert the spool, thread
the lines through the eyelets at
the same time (Fig. X).
9. Once the spool is fully inserted
and the lines are fully through
the eyelets, pull firmly on each
line to disengage the lines
from the spool notches.
NOTE. Ensure the lines are fully
clear of the spool notches and
the line is passing through the
eyelets directly to the spool.
10. Screw the bump knob back on the shaft firmly and cut any
excess line protruding past the cutter of the guard.
NOTE. On start up test the operation of the bump feed to
ensure the line feeds correctly.CAUTION. After changing
the line spool, run the petrol line trimmer under no load for
at least a minute to make sure that the line and the tool
are both operating correctly. Use only the line spool as
recommended by the manufacturer.
WARNING. Never use steel threads and/or three teeth
blade other than those provided by the manufacturer.
Always use tools in perfect condition, free of damage.
WARNING. In high-speed rotation, parts could be projected
at very high speed and could involve serious injury and
damages to persons and property.
Maintenance
WARNING. The engine of the petrol brush cutter must be
at a complete stop during assembling, repair and cleaning
operations that could be necessary.
Air filter
Accumulated dust in the air filter will reduce engine
efficiency. Increase fuel consumption and allow abrasive
particles to pass into the engine. Remove the air filter as
often as necessary to maintain a
clean condition.
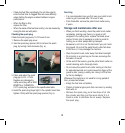
• Remove air filter cover (17)
by pressing in the sides and
lifting it off (Fig. Y).
• Light surface dust can readily be
removed by tapping the filter.
• Heavy deposits should be
washed out in suitable solvent.
Fuel Filter
• Fuel tank (12) is fitted with a
filter.• Filter is situated at the
free end of fuel pipe and can
be picked out through fuel port
with a piece of hooked wire or
the like (Fig. Z).
T
Q
V
W
X
Y
Z


