


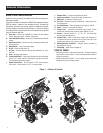


5
Set-up
PRODUCT SPECIFICATIONS
CONSUMER
Outlet Pressure - (PSI / BAR) 2500/172 2700/186 3000/207
Flow Rate - (GPM / LPM) 2.3/7.6 2.7/10.2
Water supply temperature - (°F / C°) 100/38 Max
Hose length - (Feet / Meters) 25/7.6 25/7.6 30/9.1
Chemical Tank(s) - Number per unit 0 1 2
Chemical Tank - Capacity (Gal) N/A 0.75 0.75
Nozzles - Number per unit 3 4 5
Lance Length (Inches / cm) 20/51
Gun Standard Deluxe
Engine Displacement - (Cubic Inch / cc) 11.9/196 12.9/212
Spark Plug Type F7RTC or equivalent
Spark Plug Gap - (Inches / mm) 0.028-0.031/0.70-0.80
Fuel Capacity - (Quarts / Liters) 3.8/3.6 3.2/3.0
Oil Capacity - (Oz / Liters) 20/0.6
Low Oil Shut Down System Yes
On/Off Switch Yes
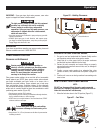
UNPACKING
1. Remove the parts bag, accessories, and inserts included with
power washer.
2. Open carton completely by cutting each corner from top to
bottom.
3. Ensure you have all included items prior to assembly.
• Main Unit
• Handle Assembly
• High Pressure Hose
• Siphon Hose & Filter
• Spray Gun
• Lance with Quick Connect Fitting
• Oil Bottle
• Hose Hook Wireform
• Parts Bag (which includes the following):
~ Chemical Tank Cap with hole if model is equipped with a
Chemical Tank
~ Operator’s Manual
~ Owner’s Registration Card
~ Bag containing Color-coded Nozzles
4. If you are missing any items from your carton, please call
Generac Customer Service at 1-888-436-3722. When calling
for assistance, please have the model and serial number from
the data tag available.
5. Fill out and send in registration card. Write Model number,
Serial number & date of purchase in the table located in the
"Where to Find Us" section.
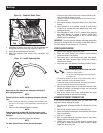
ASSEMBLY
Read entire operator’s manual before you attempt to assemble or If
you have any problems with the assembly of your power washer,
please call Generac Customer Service at 1-888-436-3722. When
calling for assistance, please have the model and serial number
from the data tag available.
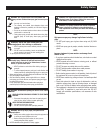
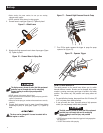
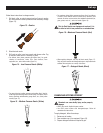
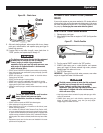
1. Place handle (A) onto handle supports (B). Push in latch
buttons and allow handle to slide into position (C). Button will
lock handle into place (Figure 2).
Figure 2 – Attach Handle