


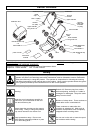
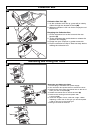


Wheel Assembly (A)
1. Insert the wheel bolt into the threaded hole.
2. Fully tighten the bolts using a screwdriver.
Assembly of Lower Handles to Deck
1. Place the hole in the lower handle over the end of
the bolt (B)
2. Place the wing knob onto the end of the bolt and
firmly tighten. (B)
3. Repeat on the other side.
Assembly of Upper Handles to Lower Handles.
1. Ensure the upper handle is located correctly with
the lock-off button on the switchbox uppermost.
2. Ensure the upper handle and the lower handle
are aligned correctly.(C)
3. Fit the bolts, washers and wing knobs.(C)
4. Fit the cable to the handles with the clips provid-
ed. Make sure the cable is not trapped between
the upper and lower handles.
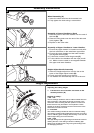
Height Adjust Handle Assembly
1. Insert the height adjust arm into the slot at the
base of the height adjust handle (D)
2. Firmly push the handle on to the arm.
3. The handle will automatically lock on to the arm.
Assembly Instructions
B
C
A
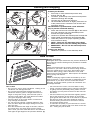
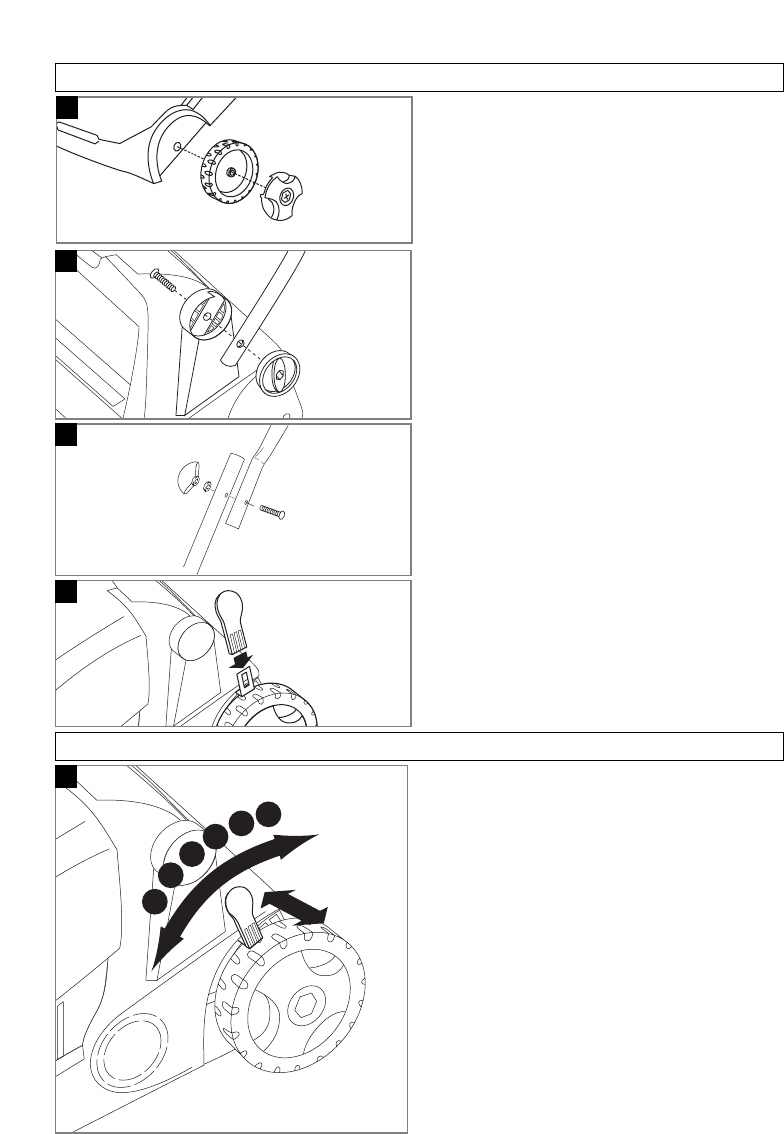
Height Adjustment
1
2
3
4
5
6
E
Adjusting the raking height
1. Lift the lever out of location and rotate to the
desired position. (E)
Heights of raking:-
1 & 2 - low
The low settings should be used to collect material from the
base of the lawn. This setting is ideal for removing moss
and thatch. After removing the thick patches of moss and
thatch the lawn may look bare in some patches. These
patches in the lawn will start to recover now that the moss
and thatch has been removed.
3 - 4 medium
The medium settings should be used for moderate raking.
This setting is ideal for lifting flattened grass prior to mowing
and for collecting grass cuttings after mowing. It can also be
used for light raking of moss and thatch.
5 & 6 - high
The high settings are for light raking and should be used for
clearing the lawn. This setting is ideal for collecting light
debris such as fallen leaves, twigs and grass cuttings with-
out damaging the lawn.
D