


38
00
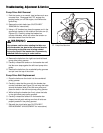
Troubleshooting, Adjustment & Service
BELT REMOVAL & REPLACEMENT
Mower Drive Belt Removal & Replacement
1. Park the tractor on a smooth, level surface such as a
concrete floor. Disengage the PTO, engage the
parking brake, turn off the engine, and remove the
ignition key.
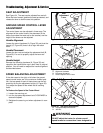
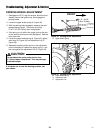
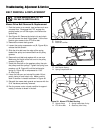
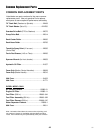
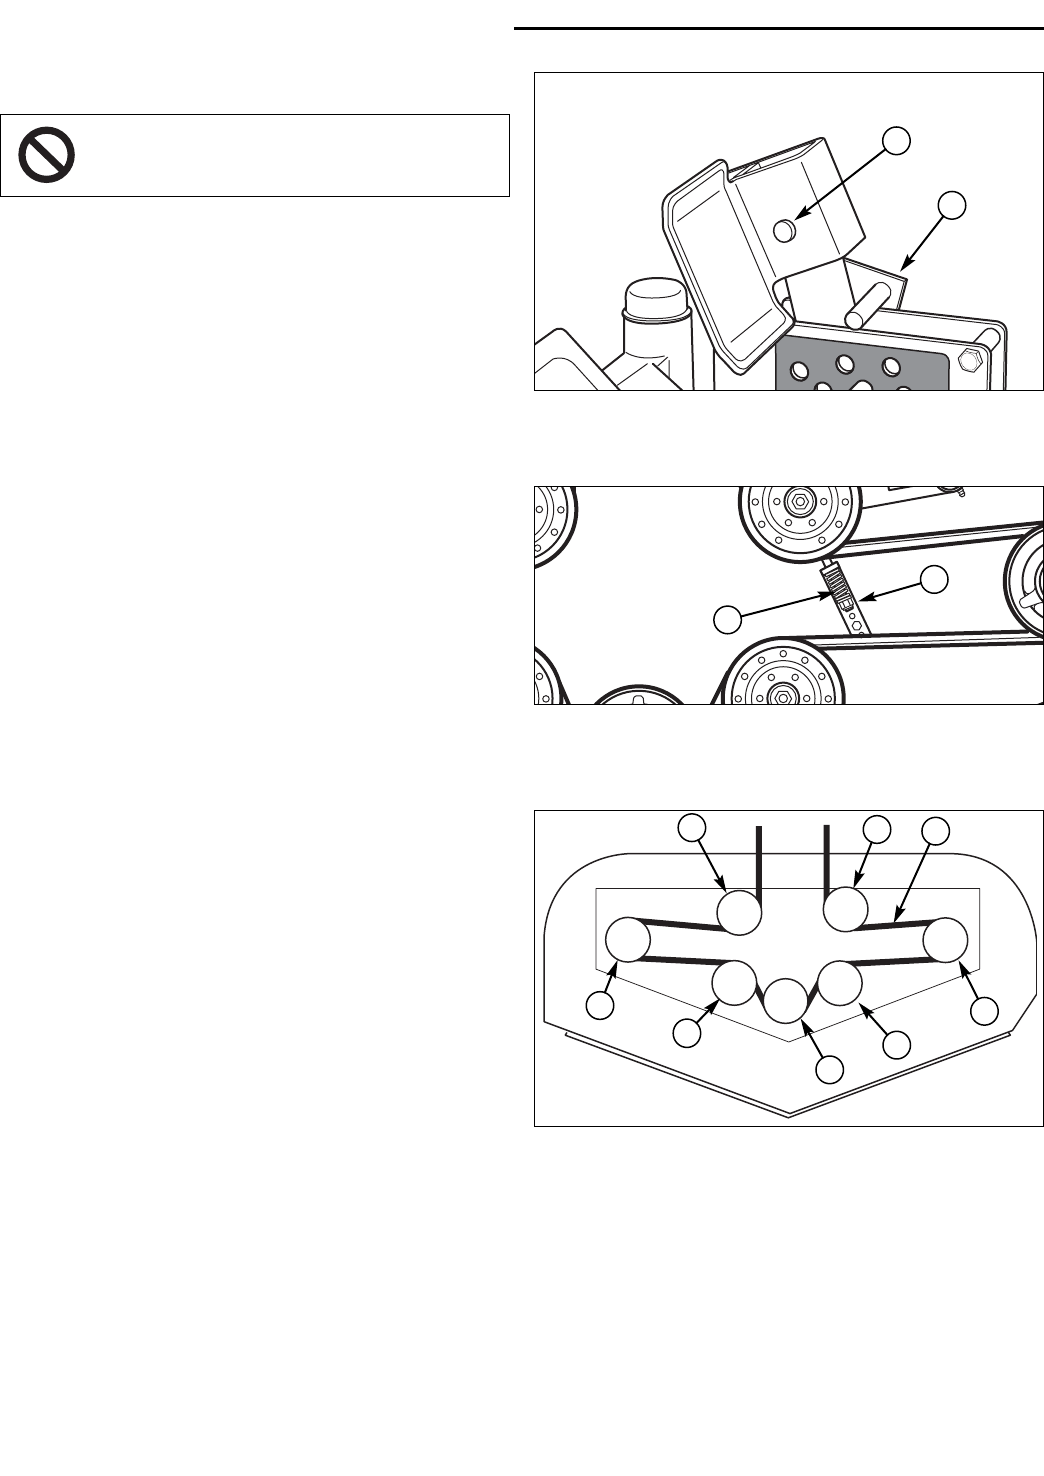
2. See Figure 48. Remove the hairpin clip and clevis
pin and remove the deck lift foot pedal. Lift the floor
plate to gain access to the PTO drive belt.
3. Remove the mower deck guards.
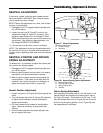
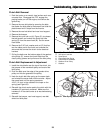
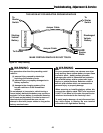
4. Loosen the spring compression nut (B, Figure 49) to
release the belt tension.
5. Slide the drive belt over the edge of the spring-
loaded idler pulley and remove belt from all pulley
grooves.
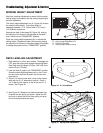
6. Remove the old belt and replace with a new one.
Make sure the V-side of the belt runs in the pulley
grooves (Figure 50).
7. Install the drive belt on the gearbox pulley, the spin-
dle pulleys and idler pulleys. Tighten the spring com-
pression nut (B, Figure 49) until the belt tension
spring (A, Figure 49) is compressed to 1-5/8”
(4,12cm) long.
8. Lower the floor pan and reinstall the deck lift foot
pedal, clevis pin and hairpin clip. Make sure the
deck lift lock bar is located as shown in Figure 48.
9. Reinstall the mower deck guards and secure with the
5/16” hardware previously removed.
10.Run the mower under no-load condition for approxi-
mately 5 minutes to break in the belt.
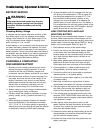
Figure 50. Mower PTO Belt Routing
A. Spindle Pulley C. Spring-loaded Idler Pulley
B. PTO Drive Belt D. Stationary Idler Pulley
C
B
D
A
A
A
D
D
Figure 49. Mower PTO Belt
A. Belt Tension Spring
B. Spring Compression Nut
B
A
To avoid damaging belts, DO NOT
PRY BELTS OVER PULLEYS.
Figure 48. Remove Lift Pedal
A. Clevis Pin
B. Deck Lift Lock Bar
A
B