


Maintenance
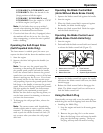
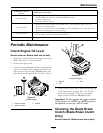
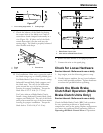
Figure 23
1. Inner cutting edge radius
2. Cutting angle
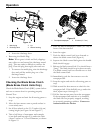
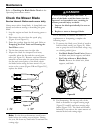
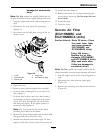
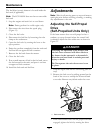
C. Check the balance of the blade by placing
the center hole of the blade over a nail or
screwdriver shank clamped horizontally in a
vise (Figure 24). If either end of the blade
rotates downward, le that end (not the
cutting edge). The blade is properly balanced
when neither end drops.
Figure 24
1. Blade
3. Screwdriver
2. Vise
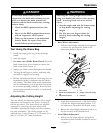
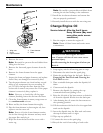
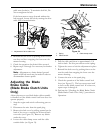
D. For Installation: Make sure to grasp the end of
the blade using a rag or a thickly padded glove.
For Blade Brake Clutch Units: Install a sharp,
balanced Exmark blade, blade support, and
the blade nuts. The sail of the blade must
point toward the top of the lawn mower
housing for proper installation. Torque the
blade nuts to 23-27 ft-lb (31-37 N m).
For Units without a Blade Brake Clutch:
Install a sharp, balanced Exmark blade, blade
support, and blade bolt. The sail of the blade
must point toward the top of the lawn mower
housing for proper installation. Torque the
blade bolt to 35-45 ft-lb (47-61 N m).
Figure 25
1. Blade Brake Clutch Units
2. Units without a Blade Brake Clutch
6. Return the lawn mower to its upright position.
7. Connect the wire to the spark plug.
Check for Loose Hardware
Service Interval: Before each use or daily
1. Stop engine, wait for all moving parts to stop.
2. Visually inspect machine for any loose hardware
or any other possible problem. Tighten hardware
or correct the problem before operating.
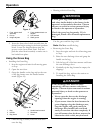
Check the Blade Brake
Clutch Bail Operation (Blade
Brake Clutch Units Only)
Service Interval: Before each use or daily
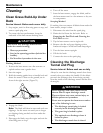
Check the Blade Brake Clutch (BBC) bail operation
for any operation problems or deteriorating
components, such as the spring. Replace components
or correct any problems before operating. Refer to
Operating the Blade Control Lever in Operation.
25