


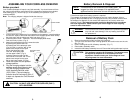
CLEANING THE DUST CONTAINER
To achieve the best performance, empty the dust container after each use.
Fig. 6
5
CAUTION: Do not accidentally turn unit on while cleaning. Do not clean
while unit is charging.
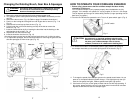
1. Pull the dust
container straight
out from the side.
(Fig. 6)
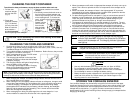
2. Empty dust
container contents.
(Fig. 7) If desired-
you may rinse with
water to clean the
dust container –
but dry thoroughly
before replacing on the sweeper.
Fig. 7
3. Replace dust container on cordless
sweeper.
4. Periodically remove the brush cover on
the front of the cordless sweeper and
remove any build up of lint, hair or fiber
on the rotating brush. To remove the
cover - grip the cover from the bottom,
pull out and
upward until the
cover unlocks
from the side
slots and tabs
located on the
top of the
sweeper. (Fig. 8)
Fig. 8
CHARGING THE CORDLESS SWEEPER
Fig. 9
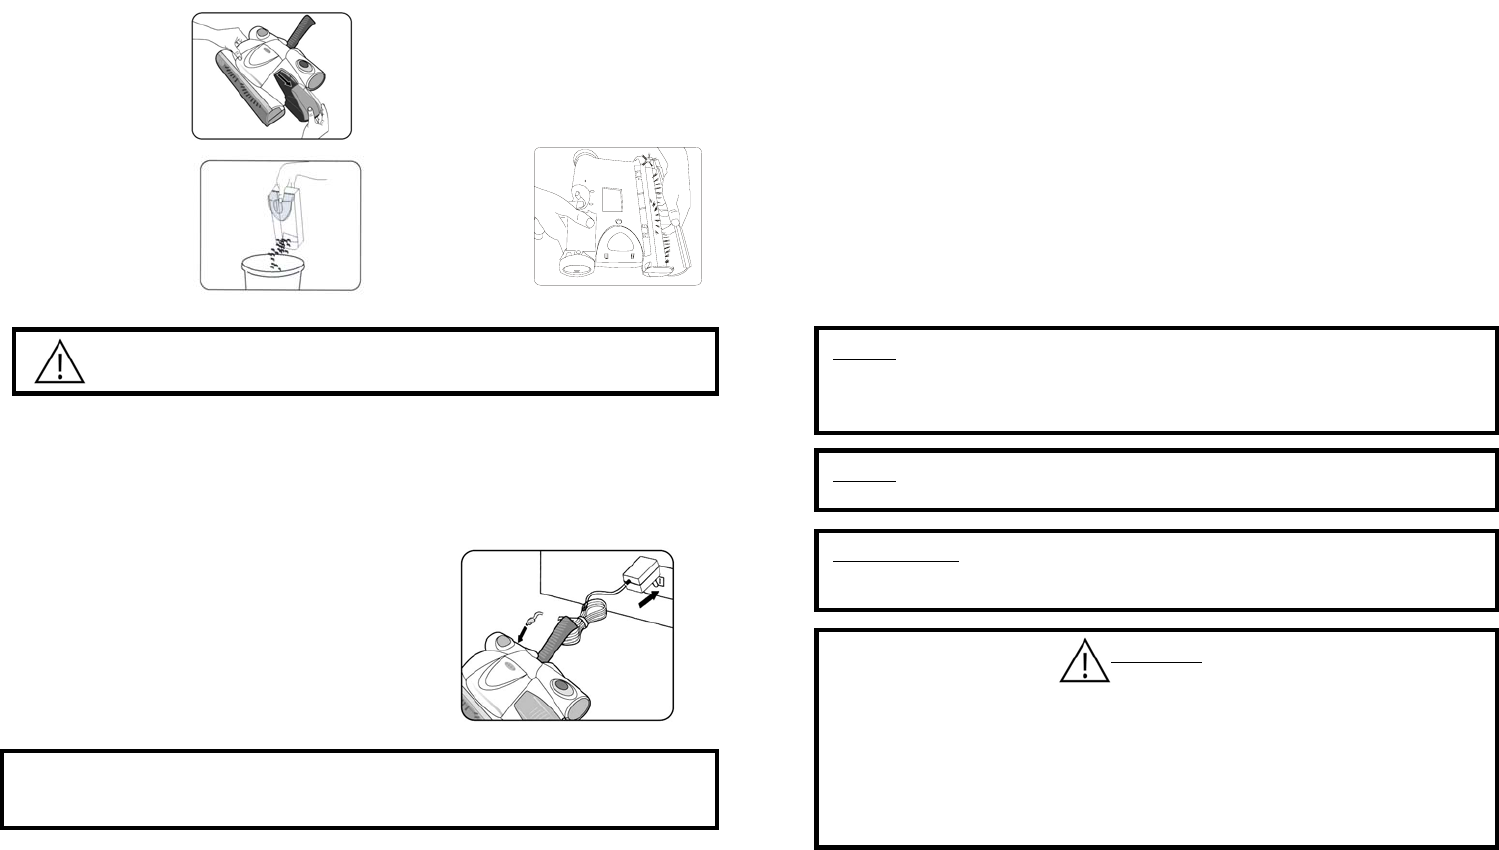
1. Connect the charger plug to the charging jack or hole on the back of the
sweeper. Plug the the charging adapter into the wall outlet. (120V., 60Hz.) Use only
TechWorld Charger AD-1215-UL8. (Fig. 9)
2. This cordless sweeper is powered by Ni-Cd batteries. Before first use, they must be
charged for a minimum of 24 hours.
3. When recharging the unit, the "On/Off" switch
must be in the "OFF" position.
4. The charging light indicator on the top of the
sweeper will flash to indicate that the sweeper
is properly charging.
5. The charging indicator will light will stop flashing
when the battery is fully charged.
6. To recharge, repeat step #1 above. Charging
times will vary depending upon the amount
of usage between charging cycles.
Note: Your sweeper is highly advanced and has electronic controls that optimize the
cleaning ability and durability of the sweeper. Please review the following instructions
carefully to ensure that all features are utilized for best performance.
1. When charging the sweeper, the battery/charge indicator will flash until the unit is
fully charged and then turn steady.
2. When running the unit, the battery indicator will start as solid green, change to solid
orange when approximately 70% of the battery life is used, and blink orange when
in need of charging. The sweeper will prevent the batteries from being deeply
discharged and will indicate this by the battery indicator flashing, the headlights
flashing, and the sweeper wil
l stop operating. This is normal and all that needs
done is to recharge the sweeper fully.
3. When recharging from being fully discharged, the unit must charge for 1 hour
minimum before it’s electronics will allow the unit to operate again.
4. When the sweeper on/off switch is depressed the sweeper will slowly come up to
speed. This is done to optimize the life of all components of the sweeper and is
normal.
5. When first started, the sweeper will start in the highest speed “III” to prevent
overloading the unit when starting on heavy carpets. Other speeds can then be
selected by depressing the speed selector switch.
6. For best cleaning performance, use speed “I” (low) on hard surfaces, speed “II”
(medium) on low carpets/rugs, and use speed “III” (high) on deeper carpets.
These are guide lines and you will find the optimum speed settings for your
surfaces and debris to be picked up through use and experience.
7. The sweeper will automatically try to maintain speeds on all surfaces. The unit
may appear to be pulsing during use to maintain it’s speed, this is normal. If this
occurs, please select the next highest speed to gain optimum performance.
8. To protect your sweeper and it’s components, the sweeper is provided with an
electronic overload circuit. If something were to jam or overload the brush bar
system, the units speed indicators will flash and the unit will stop operating, this
is normal. If this occurs, please switch the unit off, clear the obstruction from the
brush bar and then depress On/Off switch to start sweeper again.
6
NOTE: Peak performance may only be realized after the unit has been
charged and discharged two (2) or three (3) times.
IMPORTANT: To maintain peak performance of your cordless sweeper, it is
recommended that the unit be fully discharged, then
completely re-charged at least once a month.
CAUTION
• Use only with the battery pack supplied with the unit. (Item # X9730)
• Do not attempt to remove the battery pack from the unit to charge it.
• Never attempt to throw the battery pack or unit into a fire or incinerate it.
• Do not attempt to remove or damage the battery casing.
• Battery must be recycled or disposed of in accordance with local regulations
at the end of it's service life. Please consult your Yellow Pages or local
recycling center for more information.
STORING THE CORDLESS SWEEPER
Your cordless sweeper may be stored by using the slot on the back of the upper
handle and hanging it from a screw secured to a wall or other vertical surface. Use
a #6 flat or pan head screw with the appropriate hardware for the surface that the
sweeper wil
l be mounted on, (i.e. gyproc). Allow the screw head to extend a
approximately 3/16" from the mounting surface. Always empty your sweeper before
hanging up for storage.
NOTE: If, when you place the sweeper to recharge and the charging
indicator light does NOT illuminate, then press the On/Off button
once to turn the sweeper off. The charging indicator light should
now light up.