


HOW TO OPERATE YOUR CORDLESS SWEEPER
4
1. Before using, please ensure that the cordless sweeper has been initially
charged for 16-24 hours.
Your cordless sweeper will only operate properly when the batteries are fully
charged. Your sweeper will operate for varying lengths of time on a full charge.
This will depend upon the type of surface being cleaned. (Longer operating time on
bare floors vs carpets.)
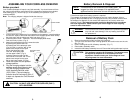
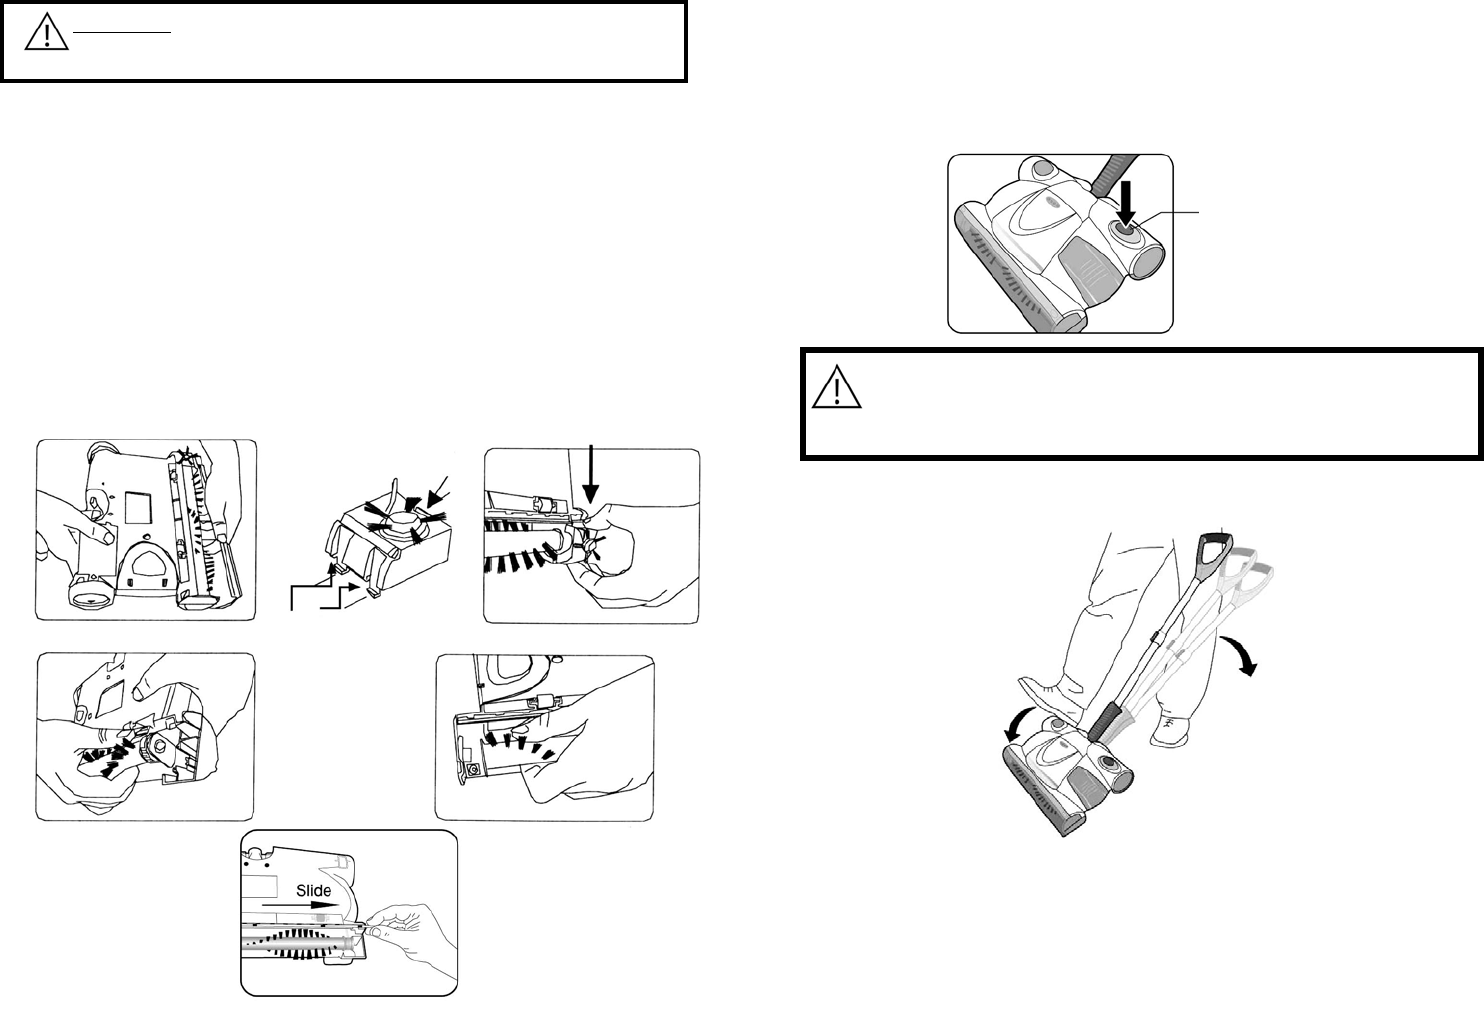
2. Push the On/Off switch to operate the unit. To turn off, press switch again. (Fig. 4)
3. To release the handle to a comfortable position, apply pressure to the top of
the sweeper head with your foot while pulling back on the handle. (Fig. 5)
"On/Off" switch
Fig. 4
Fig. 5
CAUTION: Any electronic or electrical appliance should not be
stored in or exposed to areas of high heat or humidity. Do
not store your cordless sweeper close to stoves,
radiators, furnaces or in a bathroom or bathing area.
4. To change the speed of the sweeper, press on the speed control button. As you
press on it, the speed indicator light will change. If one light lights up, then you
have the low speed; two lights, medium speed; three lights, high speed.
5. If the brush roll will jam, all the lights will flash and the unit will stop operating. If
this occurs, please switch the unit off, clear obstruction from brush bar and then
depress On/Off switch to start the sweeper again.
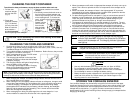
Changing the Rotating Brush, Gear Box & Squeegee
7
WARNING: Use caution when changing the rotating brush and gear
box so that the unit does not turn ON when pressing
down on the sweeper power head.
1. Remove the extension tube handle from the sweeper power head.
2. Turn sweeper power head upside down being careful Not to accidentally turn the
unit ON.
3. Remove the brush cover. (Fig. 10) (Refer to page 5 for detailed instructions.)
4. Push in on the locking tab of the gear box and lift gear box to remove. (Fig. 11 &
Fig. 12)
5. Lift the brush bar end cap up from the slot. (Fig. 13)
6. Pull the brush bar out from the bushing and slip off the belt to remove the
brush bar. (Fig. 14)
7. Insert the new brush bar by first inserting the brush bar into the bushing on the
end opposite the driver belt. (Fig. 14)
8. Slip the belt over the brush bar cap.
9. Insert the brush bar into the slot. (Fig. 13)
10.Insert the gear box tabs into the tab slots and push down until it clicks into place.
11.To replace the squeegee, follow instructions above for removing the gear box and
slide the squeegee out from left to right. (Fig. 15)
Gear box
tabs
Locking
tab
Lift
Fig. 13 Fig. 14
Gear box
Fig. 10
Fig. 11
Fig. 12
Fig. 15