


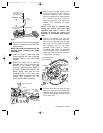
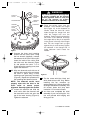
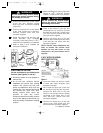
9. Place the second wall control into the
wall box. Screw in place and install
decorator style faceplate (included).
Leave switch in “OFF” mode until fan
installation is completed.
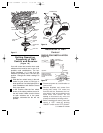
10. Refer to page 5 and complete the
ceiling fan installation .
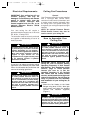
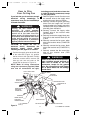
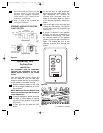
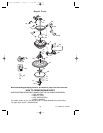
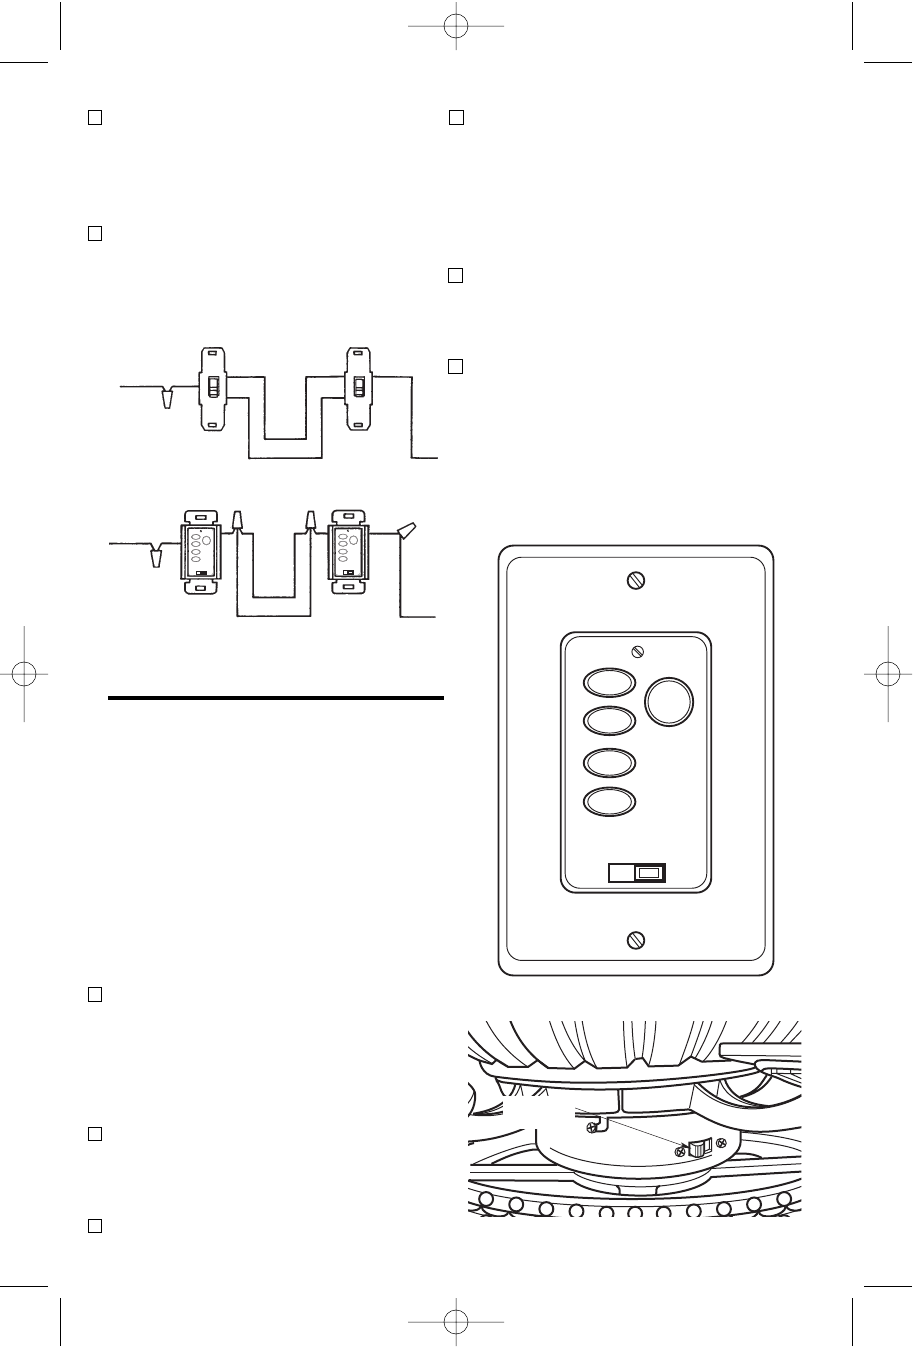
STANDARD WIRING FOR EXISTING
3-WAY CONTROL
15
HOT
BLK
FAN/LIGHT
WALL CONTROL
BLK
TRAVELER WIRES
BLK
BLK
BLACK
LOAD
BLACK
LOAD
TRAVELER WIRES
HOT BLK
EXISTING
WALL CONTROL
EMERSON
®
EMERSON
®
HI
MED
LOW
FAN OFF
LIGHT
ONOFF
HI
MED
LOW
FAN OFF
LIGHT
ONOFF
Figure 22
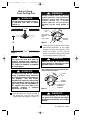
Operating Your
Ceiling Fan
IMPORTANT
Fan installation must be completed,
including the installation of the fan
blades, before testing of the remote
control.
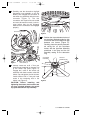
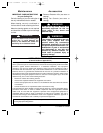
Your Fan/Light Wall Control (Figure 23)
has full control of your fan and light.
However, airflow direction is controlled by
a slide switch on the switch housing.
1. Restore electrical power to the outlet
box by turning the electricity on at the
service panel.
NOTE: Make sure that the ON/OFF slide
switch on the Fan/Light Wall Control is
in the ON position.
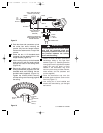
2. To set the desired fan speed, press the
HI, MED, or LOW buttons to operate
your fan on high, medium, or low speed
(Figure 23).
3. To turn your fan off, press the OFF
button.
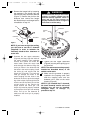
REVERSING
SWITCH
EMERSON
®
HI
MED
LOW
FAN OFF
LIGHT
ONOFF
Figure 23
Figure 24
4. To set the level of light brightness,
press and hold the LIGHT button. The
light brightness will continue to
increase then decrease while the
button is held down. When the light is
at the desired brightness, release the
button.
5. To turn the light on and off, press and
release the LIGHT button. The light will
turn on at the light level previously set
(see step 4).
6. If airflow is desired in the opposite
direction, turn the fan off and wait for
the blades to stop turning. Then slide
the reversing switch to the opposite
position (Figure 24) and turn the fan on
again. The blades will turn in the
opposite direction and reverse the
airflow.
U.L. Model No.: CF220
BP7360 JULIANNE 9/19/07 11:15 AM Page 15