


9
OPERATION
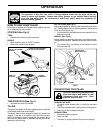
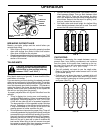
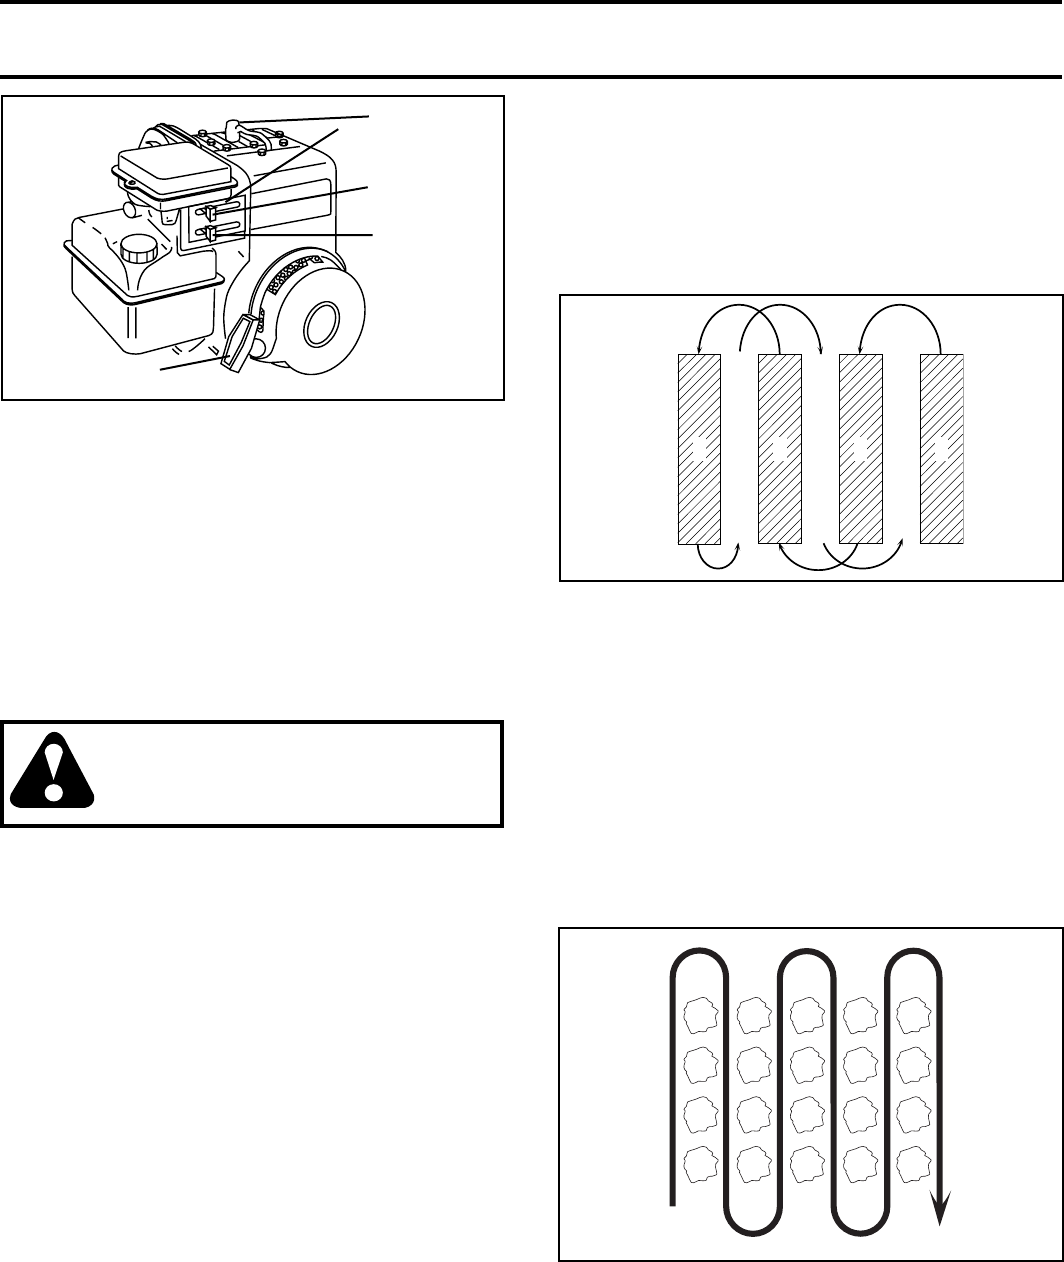
• You will fi nd tilling much easier if you leave a row un-
tilled between passes. Then go back between tilled
rows. (See Fig. 9) There are two reasons for doing
this. First, wide turns are much easier to negotiate than
about-faces. Sec ond, the tiller won’t be pulling itself,
and you, toward the row next to it.
• Set depth stake and wheel height for shallow tilling
when working extremely hard soil or sod. Then work
across the fi rst cuts at normal depth.
321
5
4
67
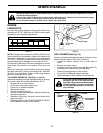
FIG. 10
FIG. 9
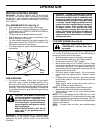
CULTIVATING
Cultivating is destroying the weeds between rows to
pre vent them from robbing nourishment and moisture
from the plants. At the same time, breaking up the up-
per layer of soil crust will help retain moisture in the soil.
Best digging depth is 1" to 3" (2.5-7.5 cm).
• You will probably not need to use the depth stake.
Begin by tipping the depth stake forward until it is held
by the stake spring.
• Cultivate up and down the rows at a speed which will
allow tines to uproot weeds and leave the ground in
rough con di tion, promoting no fur ther growth of weeds
and grass (See Fig. 10).
BREAKING IN YOUR TILLER
Break-in your belts, pulleys and tine control before you
actually begin tilling.
• Start engine, tip tines off ground by pressing handles
down and engage tine control to start tine rotation.
Allow tines to rotate for fi ve minutes.
• Check tine operation and adjust if necessary. See “TINE
OPERATION CHECK” in the Service and Ad just ments
sec tion of this manual.
TILLING HINTS
CAUTION: Until you are accustomed to
handling your tiller, start ac tu al fi eld use
with throttle in slow po si tion (mid-way
be tween “FAST” and “IDLE”).
To help tiller move forward, lift up the handles slightly (thus
lifting depth stake out of ground). To slow down the tiller,
press down on handles.
If you are straining or tiller is shaking, the wheels and depth
stake are not set properly in the soil being tilled. The proper
setting of the wheels and depth stake is through trial and
error and depends upon the soil con di tion. (The harder or
wetter the ground, the slower the engine and tine speed
needed. Under these poor con di tions, at fast speed the
tiller will run and jump over the ground).
A properly adjusted tiller will dig with little effort from the
operator.
• Tilling is digging into, turning over, and breaking up
packed soil before planting. Loose, unpacked soil helps
root growth. Best tilling depth is 4" to 6" (10-15 cm).
A tiller will also clear the soil of unwanted vege ta tion.
The decomposition of this vegetable mat ter en rich es
the soil. Depending on the climate (rain fall and wind),
it may be advisable to till the soil at the end of the
growing season to further condition the soil.
• Soil conditions are important for proper tilling. Tines will
not readily penetrate dry, hard soil which may con trib ute
to excessive bounce and diffi cult handling of your tiller.
Hard soil should be mois tened before tilling; however,
extremely wet soil will “ball-up” or clump during tilling.
Wait until the soil is less wet in order to achieve the
best results. When tilling in the fall, remove vines and
long grass to prevent them from wrapping around the
tine shaft and slowing your tilling operation.
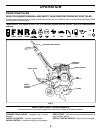
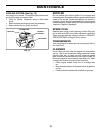
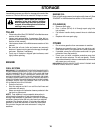
FIG. 8
RE COIL START ER
HAN DLE
THROT TLE
CON TROL
CHOKE
CON TROL
SPARK
PLUG