


24
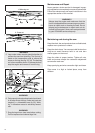
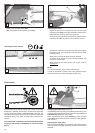
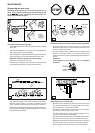
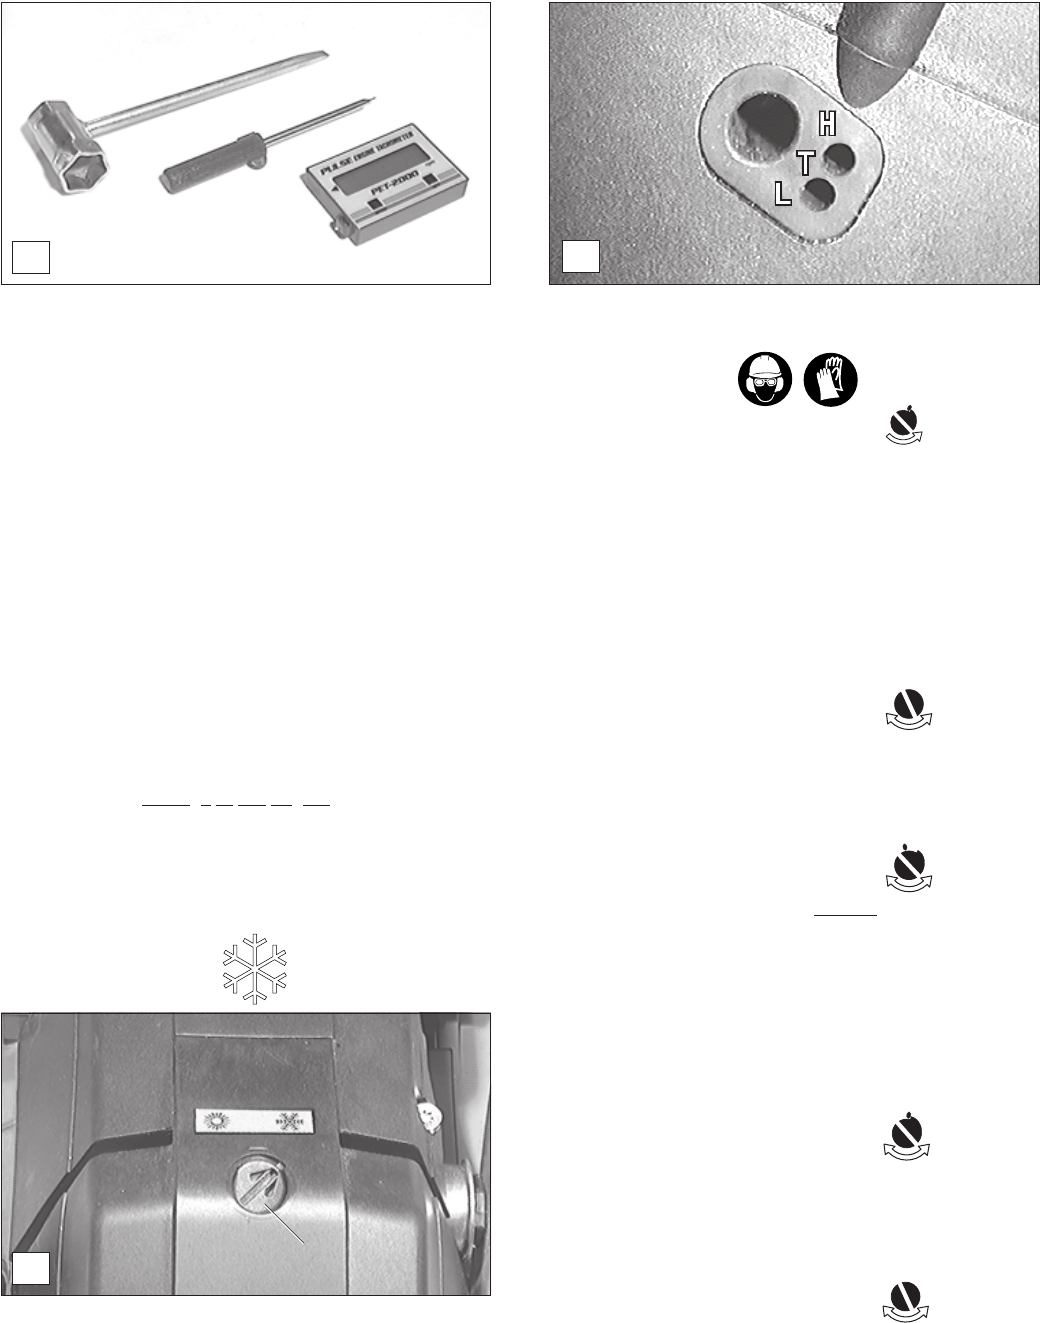
Working in winter
In order to prevent carburetor icing in winter, warm air can be
led from the cylinder to the carburetor.
- Use the universal wrench to turn the button (G/1) comple-
tely to the right.
- Now the carburetor heating is actuated.
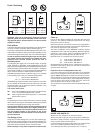
If the temperature is above 0
o
C, the carburetor heating must
be switched off.
Not following this instruction may result in damage at the
cylinder and piston.
E
F
1
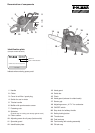
CAUTION:
Do not adjust the carburetor until the machine has been
completely assembled and checked! Do not adjust the car-
buretor without a tachometer!
Carburetor adjustment is necessary for optimum engine
performance, for safer and more economical operation.
Adjust the carburetor only with the engine warm, a clean
air filter, and properly installed cutting tool.
Carburetor adjustment may be done only by a DOLMAR
service centre. Improper adjustment can cause damage
to the engine.
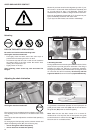
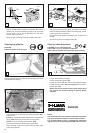
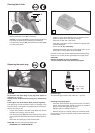
In order to comply with new emissions legislation, limits have
been placed on the carburetor adjusting screws (H) and (L).
This limitation (to about 180 degrees) prevents an exces-
sively rich mixture. This in turn ensures compliance with emis-
sions rules as well as optimum engine performance and eco-
nomical fuel consumption.
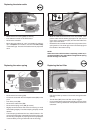
You will need a tachometer (part No. 950 233 210) for
optimum adjustment. Exceeding the maximum
permissible speed can lead to overheating and under-
lubricating, and
damage to the engine!
Factory setting of adjusting screws (H) and (L): Turned out
almost all the way (counterclockwise).
Use a screwdriver (blade width 4 mm, part No. 944 340 001)
and the universal wrench delivered with the chain saw.
G
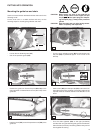
Adjusting the carburetor
For proper adjustment, proceed as follows:
Checking adjusting screw (H)
Before starting the engine make sure that adjusting screw (H)
is turned out counterclockwise until it reaches a noticeable
stop. The limitations do not prevent excessively lean (un-
der-lubricated) running!
1. Start engine and let it warm up (3-5 minutes)
2. Set idle
3. Set maximum permissible speed
4. Check acceleration
5. Check idle speed
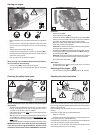
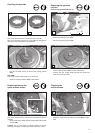
2.Set idle
Set the idle speed per the technical specifications.
Turning the adjusting screw (T) in (clockwise) increases the
idle speed. Turning it out (counter-clockwise) lowers the
idle speed. The cutting tool must not rotate!
3. Set maximum permissible speed
Set the maximum speed by
minimal adjustments of the
adjusting screw (H) in accordance with the technical speci-
fications. Turning the adjusting screw (H) clockwise increa-
ses the speed. Never exceed the maximum permissible
speed!
For units with electronic engine speed limitation: No
tachometer is necessary to determine the maximum
permissible speed, since exceeding this speed will
result in clearly audible ignition misses!
4. Check acceleration
When the throttle is pressed, the engine should go smooth-
ly from idle to high speed.
Turn adjusting screw (L) out (counterclockwise) in small
increments until acceleration is good.
5. Check idle speed
Check the idle speed after setting the top speed (the cutting
tool must not rotate!).
Repeat the adjustment procedure starting at Step 2, until
the engine runs with the correct idle speed, good accelera-
tion, and maximum permissible speed.
T
-
+
H
-
+
T
-
+
L
-
+
H