


35
• Attach the flexible tubing to the
drain valve. Place an appropriate
container below the open end of the
tubing to collect the old oil.
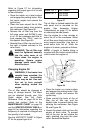
• To open the drain valve, push it
slightly inward and turn it
counterclockwise until it stops, then
pull it outward.
• Remove the filter by turning it coun-
terclockwise using an automotive
type filter wrench to loosen.
• Allow the old oil to completely drain
from the engine crankcase into the
container below. To close the drain
valve, push it inward, turn clockwise
until it stops and then release it.
• Remove the flexible tubing from the
drain valve. Clean the tubing and
store in a safe place for future use.
• Clean the drain valve and push the
plastic dust cap onto the valve.
• Turn the replacement filter open end
up and pour new oil into the filter
through the threaded center hole.
Fill to the bottom of the threads,
then wait a minute or two to allow
the oil to be absorbed into the filter
material.
• Apply a light coating of clean oil on
the gasket of the new oil filter.
Thread the filter on by hand until the
gasket contacts the oil filter adapter,
then tighten the oil filter an
additional 2/3 to 1 turn.
• Refill the crankcase with the
appropriate quantity and type of oil.
• Check oil level and make sure that
oil filler cap, dipstick and drain valve
are in place and closed.
Sparkplugs
WARNING: To avoid possi-
ble injury, be sure the en-
gine is off and has cooled
before making any adjust-
ments or repairs.
Remove all dirt from around the spark
plug before removing.
Use a spark plug wrench to remove
the spark plugs.
Check the gap after every 100 hours
of operation.
Replace a defective plug with a new
plug. Set the spark plug gap at .030
inch. Tighten the plug to 18-22 ft-lbs.
See your authorized dealer for the
correct replacement plug.
Changing Fuel Filter
WARNING: Do not replace
fuel filter when engine is hot.
The engine is equipped with an in-line
fuel filter. Visually inspect the filter
periodically for a build-up of residue
inside the filter body, and for a dirty
element which can be indicated by
discoloration. Replace the fuel filter
when dirty.
Changing Air Cleaner
Check the air cleaner daily or before
starting the engine. Check for loose or
damaged components and check the
condition of the filter element. Remove
any buildup of dirt and debris in the air
cleaner housing.
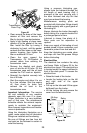
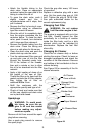
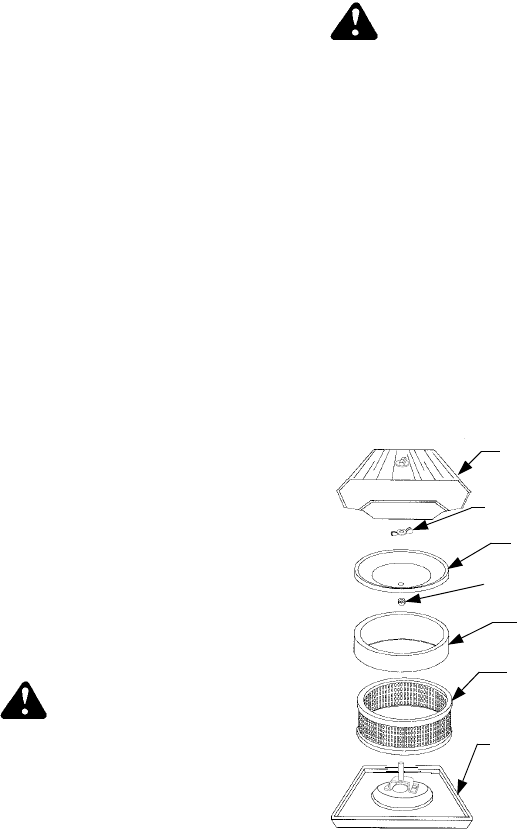
See Figure 29 for assembly of the Air
cleaner elements.
Figure 29
Air Cleaner
Cover w/Knob
Element Cover
Element Cover
Foam
Paper Element
Air Cleaner Base
Precleaner
Rubber Seal
Wing Nut