21
SECTION 8: ADJUSTMENTS
Seat Adjustment
WARNING: Do not adjust
the seat when the tractor is
moving, as this could cause
the operator to lose control
of the tractor.
For the comfort of the operator, the
tractor is equipped with an easy to
operate adjustable seat. There are
also three seat mounting positions to
provide additional adjustment.
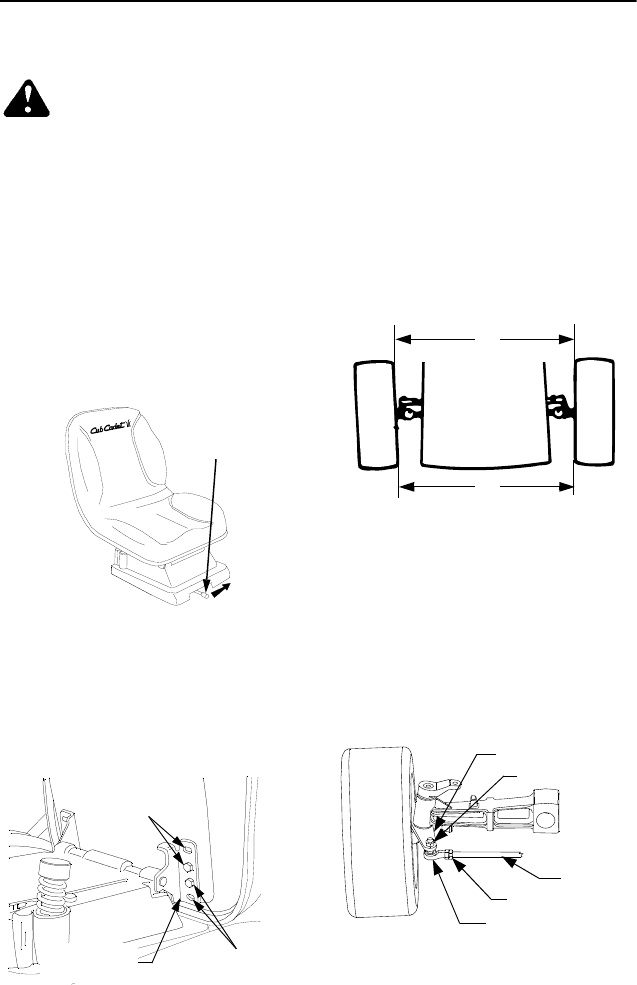
To adjust the seat forward or back,
slide the seat adjustment lever to the
left; reposition the seat to your most
comfortable position; and release the
seat adjustment lever. See Figure 14.
Figure 14
If additional adjustment is desired, flip
the seat forward, remove the four
screws fastening the seat, and re-
mount the seat on the hinge brackets
as follows (See Figure 15):
Figure 15
• Seat forward-use front two holes.
• Seat middle-use middle two holes.
• Seat rearward-use rear two holes
Front Wheel Alignment
Note: The left-hand ball joint is left-
hand threaded.
The front wheels should toe-in approx-
imately 1/8 inch. Measure distances A
and B. A should be approximately 1/8
inch less than B. See Figure 16.
Figure 16
To adjust toe-in, loosen left and right
ball joint jam nuts. See Figure 17.
Turn the tie rod in or out of the ball
joints as required to attain proper
adjustment. Tighten the jam nuts
against the ball joints.
Figure 17
Seat
Adjustment
Lever
Seat
Forward
Seat
Rearward
Seat Hinge
Bracket
A
Front
B
Steering Axle
Hex Lock Nut
Ball Joint
Hex Jam Nut
Tie Rod


