


15
5
IMPORTANT: It is not
recommended that you
operate this snow thrower
on gravel as loose gravel
can be easily picked up
and thrown by the auger
causing personal injury
or damage to the snow
thrower.
If for some reason, you
have to operate the snow
thrower on gravel, keep
the skid shoe in the high-
est position for maximum
clearance between the
ground and the shave
plate.
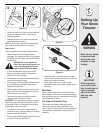
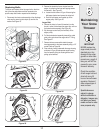
Making
Adjustments
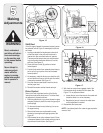
Figure 18
Skid Shoes
The space between the shave plate and the ground can
be adjusted by raising or lowering the skid shoes.
For close snow removal, as when using on a smooth
concrete or asphalt driveway, place the skid shoes in the
low position. Use the middle or high position when the
area to be cleared is uneven. When operating on gravel,
always put skid shoes in the high position.
See Figure 18.
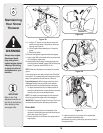
Adjust skid shoes as follows:
1. Loosen, but do not remove, the hex flange locknuts
which fasten the skid shoe to the auger housing.
2. Raise or lower the skid shoe to desired position.
3. Retighten the hex nuts loosened earlier.
NOTE: Make certain the bottom surface of skid shoe is
flat against the ground to avoid uneven wear.
4. Repeat on the other side of the snow thrower.
Auger Control
Refer to instructions on page 9 to adjust the auger
control. Make certain to check for correct adjustment as
instructed before operating the snow thrower.
Chute Assembly
The distance snow is thrown can be adjusted by adjusting
the angle of the chute assembly. Refer to page 9 for
instructions.
The remote chute control cables have been pre-adjusted
at the factory. Move the remote chute lever on the control
panel back and forward to adjust angle of the chute
assembly.
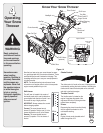
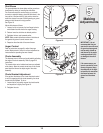
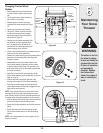
Chute Bracket Adjustment
If the spiral at the bottom of the chute directional control
is not fully engaging with the chute assembly, the chute
bracket can be adjusted. To do so:
1. Loosen the two nuts which secure the chute bracket
and reposition it slightly. See Figure 19.
2. Retighten the nuts.
Figure 19