


40
ENGINE MAINTENANCE
WARNING: Use care when servicing
any component in the engine area. If
the engine has recently been operated,
components will be hot and could
cause burns. Allow the engine to cool
before servicing.
WARNING: Before servicing the engine,
place the tractor on a level surface,
stop the engine, engage the parking
brake, and remove the key from the
ignition switch. For additional safety,
remove the spark plugs to prevent
accidental starting.
CLEANING THE ENGINE
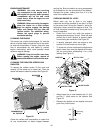
This tractor has a liquid-cooled engine. Air must be
able to circulate freely through the fins of the radia-
tor and the transmission oil cooler. Keep this area
free of accumulated dirt and debris to prevent
engine overheating, which could possibly cause
extensive engine damage.
WARNING: Keep the muffler area clean.
Before running the engine, remove all
combustible debris from the muffler area.
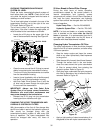
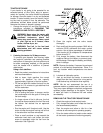
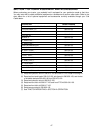
CLEANING THE RADIATOR SCREEN AND
RADIATOR
To remove the radiator screen, lift the hood and
carefully lift the screen by its center tab. Flush the
screen with water to clean its surface. See Figure 50.
Figure 50
Check the radiator and transmission oil cooler fins
for any accumulation of debris lodged between
cooling fins. Blow the debris out using compressed
air directed from the fan shroud side of the radiator.
Reinsert the screen, making sure that it is in the
slots of the radiator frame.
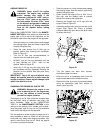
CHECKING ENGINE OIL LEVEL
Before each use, the oil level in the engine
crankcase should be checked to see that it is filled
to the correct level. During the "break in" period for
the engine, closely monitor the engine oil level. The
oil level should be checked hourly during the first 5
hours of operation.
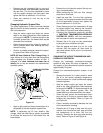
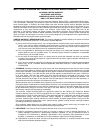
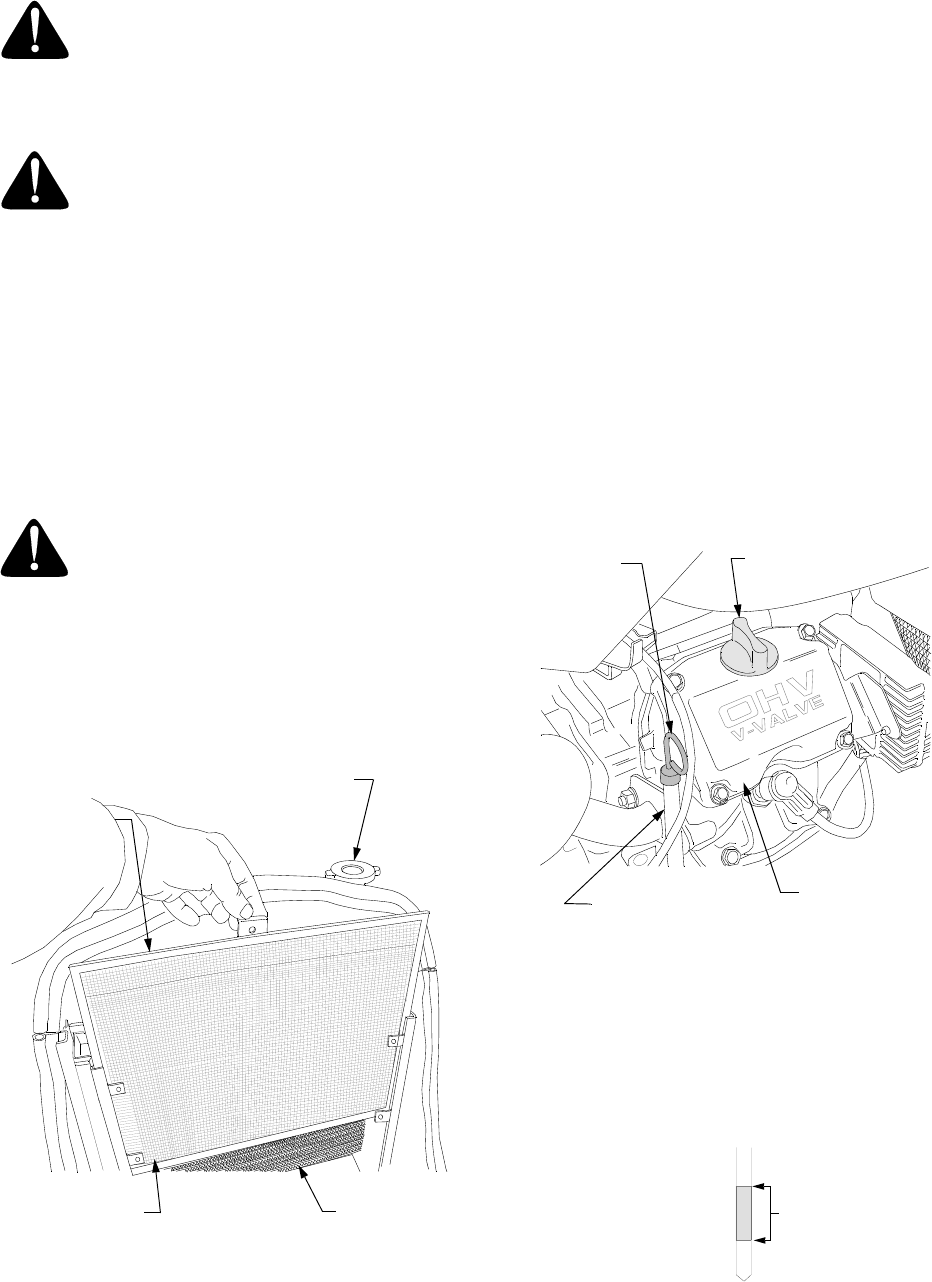
• Check the oil level only while the engine is
stopped and the tractor is level. Clean the area
around the oil level dipstick to prevent debris
from entering the crankcase. See Figure 51.
• If recently operated, allow the engine to cool
and the oil to drain back into the oil pan.
• To check the oil level, withdraw the dipstick and
wipe it clean; then insert the dipstick all the way
into the tube before withdrawing it for a true
reading. See Figure 51.
Figure 51
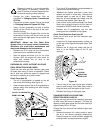
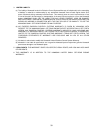
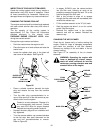
• Always keep the oil level between the ‘H’ (full)
and the ‘L’ (add) marks on the dipstick. See
Figure 52.
• Reinsert the dipstick into the dipstick tube and
push firmly into the tube.
Figure 52
RADIATOR
SCREEN
RADIATOR
CAP
RADIATOR
TRANSMISSION
OIL COOLER
DIPSTICK
OIL FILL CAP
DIPSTICK TUBE
VALVE COVER
H
L
Operating
Range
Full
Add