


31
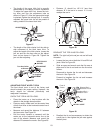
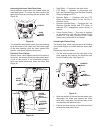
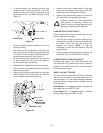
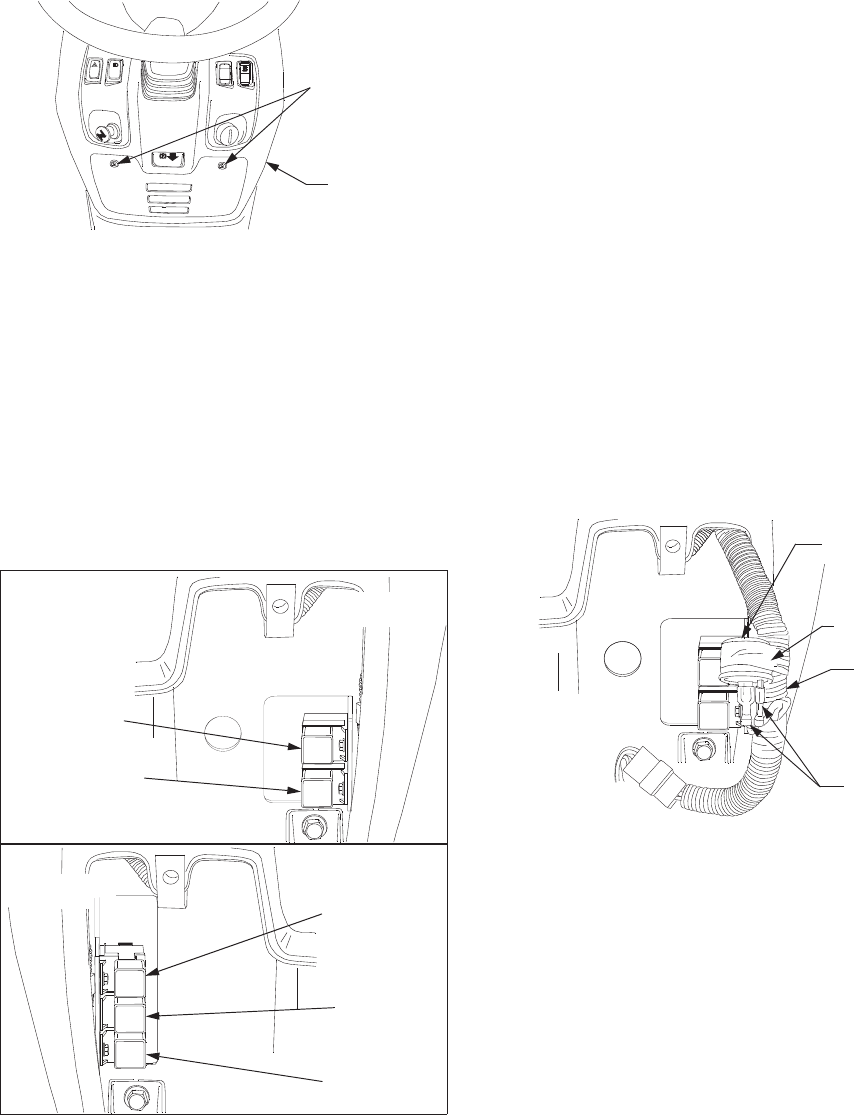
Accessing the Lower Dash Panel Area
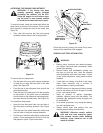
Some electrical components are housed inside the
lower dash panel. To access the area, remove the
dash panel insert by removing the two screws. See
Figure 39.
Figure 39
To reinstall the dash panel insert, hook the retaining
lip at the bottom of the insert over the bottom edge
of the dash opening, pivot the insert upward into
position, and secure with the two screws.
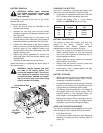
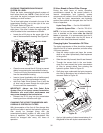
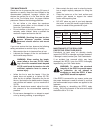
Electrical Circuit Relays
Several relays, which operate electrical functions of
the tractor, are located inside the lower dash panel.
If one of the circuits is not functioning properly,
have your dealer electrically check the relay. See
Figure 40.
Figure 40
• Start Relay — Functions in the start circuit.
• PTO Relay — Operates in conjunction with
both the Reverse Relay and Reverse Override
Relay to engage the PTO.
• Reverse Relay — Functions with the PTO
Relay and Reverse Switch in the "No Cut in
Reverse" circuit.
• Reverse Override Relay — Functions with the
Reverse Override Switch and PTO Relay to
maintain PTO engagement when driving in
reverse.
• Cruise Control Relay — This relay is installed
at the factory for use with the optional Cruise
Control Kit. The relay functions in the cruise
control circuit, when the kit is installed.
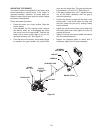
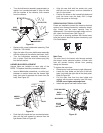
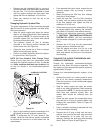
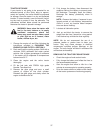
Hazard Light Flasher Relay
The flasher relay, which controls the on/off flashing
of the hazard lights, is located inside the lower dash
panel.
Replace the relay as follows:
• Pull the wire harness from the right side of the
dash opening and remove the electrical tape
from the flasher relay. See Figure 41.
Figure 41
• Note the position of the two harness leads, then
disconnect the leads and replace the faulty
relay with a new relay. Secure the relay to the
wire harness with electrical tape.
• Position the wire harness in the dash panel and
reinstall the dash panel insert.
SCREWS
DASH
PANEL
INSERT
Right Side
Left Side
START
RELAY
PTO
RELAY
CRUISE
CONTROL
REVERSE
OVERRIDE
RELAY
REVERSE
RELAY
RELAY
(OPTIONAL)
FLASHER
RELAY
TAPE
HARNESS
LEADS
WIRE
HARNESS