


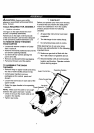
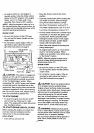
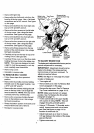

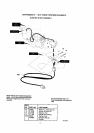

• Remove the gas cap.
• Remove the two bolts and nuts from the
front lip of the top cover. Use a flat head
screwdriver and a 3/8" wrench. See figure
c,nthis page.
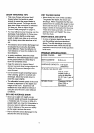
• Remove the Idolt from the front right side.
Use a 5/16" and 3/8" wrench.
• Remove the four screws on the left side
of the top cover. Use a large flat head
screwdriver. See figure on this page.
• Remove the bolt from the front left side.
Use a 5/16" and 3/8" wrench.
• Remove the four screws on the right side
of the top cover. Use a large flat head
screwdriver. See figure on this page.
• Remove the three screws from the top
portion of the control panel. Use a large
flat head screwdriver.
• Carefully pull up on the rear of top cover
making sure to clear gas tank.
• Carefully lift top cover over the three bolts
holding the lower chute to the chute ring.
NOTE: This area was designed to have
a tight fit, it will be necessary to rock top
cover carefully over these bolts.
• Remove top cover.
• Reinstall in reverse order.
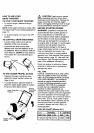
TO REMOVE BELT COVER
• Follow these steps from operator's
position.
• Remove the four bolts and nuts holding
the belt cover to the auger housing. Use
a 5/16" and 3/8" wrench.
• Remove the two screws holding the belt
cover to the top cover. Use a large flat
head screwdriver. NOTE: If the top cover
is already removed, omit this step.
• Remove the one screw holding the belt
cover to the bottom cover. Use a large
flat head screwdriver.
• Grasp the bottom portion of the belt cover
and pull down and out to remove.
• Reinstall in reverse order.
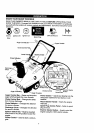
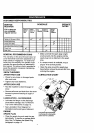
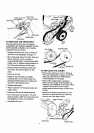
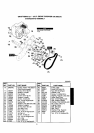
Screws to be
Boltsto be removed from Top
removedfrom
T,
Chute
Cover
Fasteners
Lower Chute
removed from
Belt Cover
tobe
removed
fromBelt
Cover
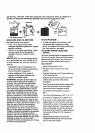
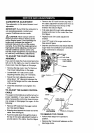
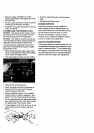
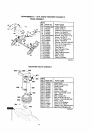
TO ADJUST BRAKE PAD
The brake pad isadjusted at the factory and no
periodic adjustment is necessary.
IMPORTANT: Adjustment should only be
made to the brake if the brake pad has
become loose or has been removed. To
adjust proceed as follows:
NOTE: See figure on next page for proper
location of brake pad.
•Tum engine off.
• Remove belt cover. See To Remove Belt
Cover paragraph on this page.
• Remove the top cover. See To Remove
Top Cover instructions on page 12-13.
NOTE: Make sure the belt is in proper
position. See To Replace the Drive Belt
paragraph on page 14.
• Tie the control bail to the upper handle
with a piece of string. NOTE: This will
engage the pulley and belt system.
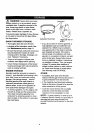
• Using a 7/16•wrench, 7/16 socket, and a
rachet loosen screw and nut on brake
pad. See first figure on page 14 for
location of screw and nut.
• Adjust brake pad up or down to have a
1/8" gap between the bottom of the brake
pad and the belt.
• Tighten screw and nut.
13