TO USE THE DEPTH CONTROL
LEVER
• Position your Edger in desired edging lo-
cation before operating.
• Start the engine and move the depth
control lever back to lower the cutting
blade.
• Select the edging depth you need.
There are 3 selections up to approxi-
mately 2 inches deep.
IMPORTANT: If very deep edging is
required, we recommend that a shallow
cut be made first, then cut at greater
depths until the desired depth is ob-
tained.
/_ WARNING: Keep away from the rotat-
ing blade. The blade can cause injury.
TO USE THE INDEX LEVER
(BEVELING OPERATION)
• Stop engine and disconnect the spark
plug wire from the spark plug.
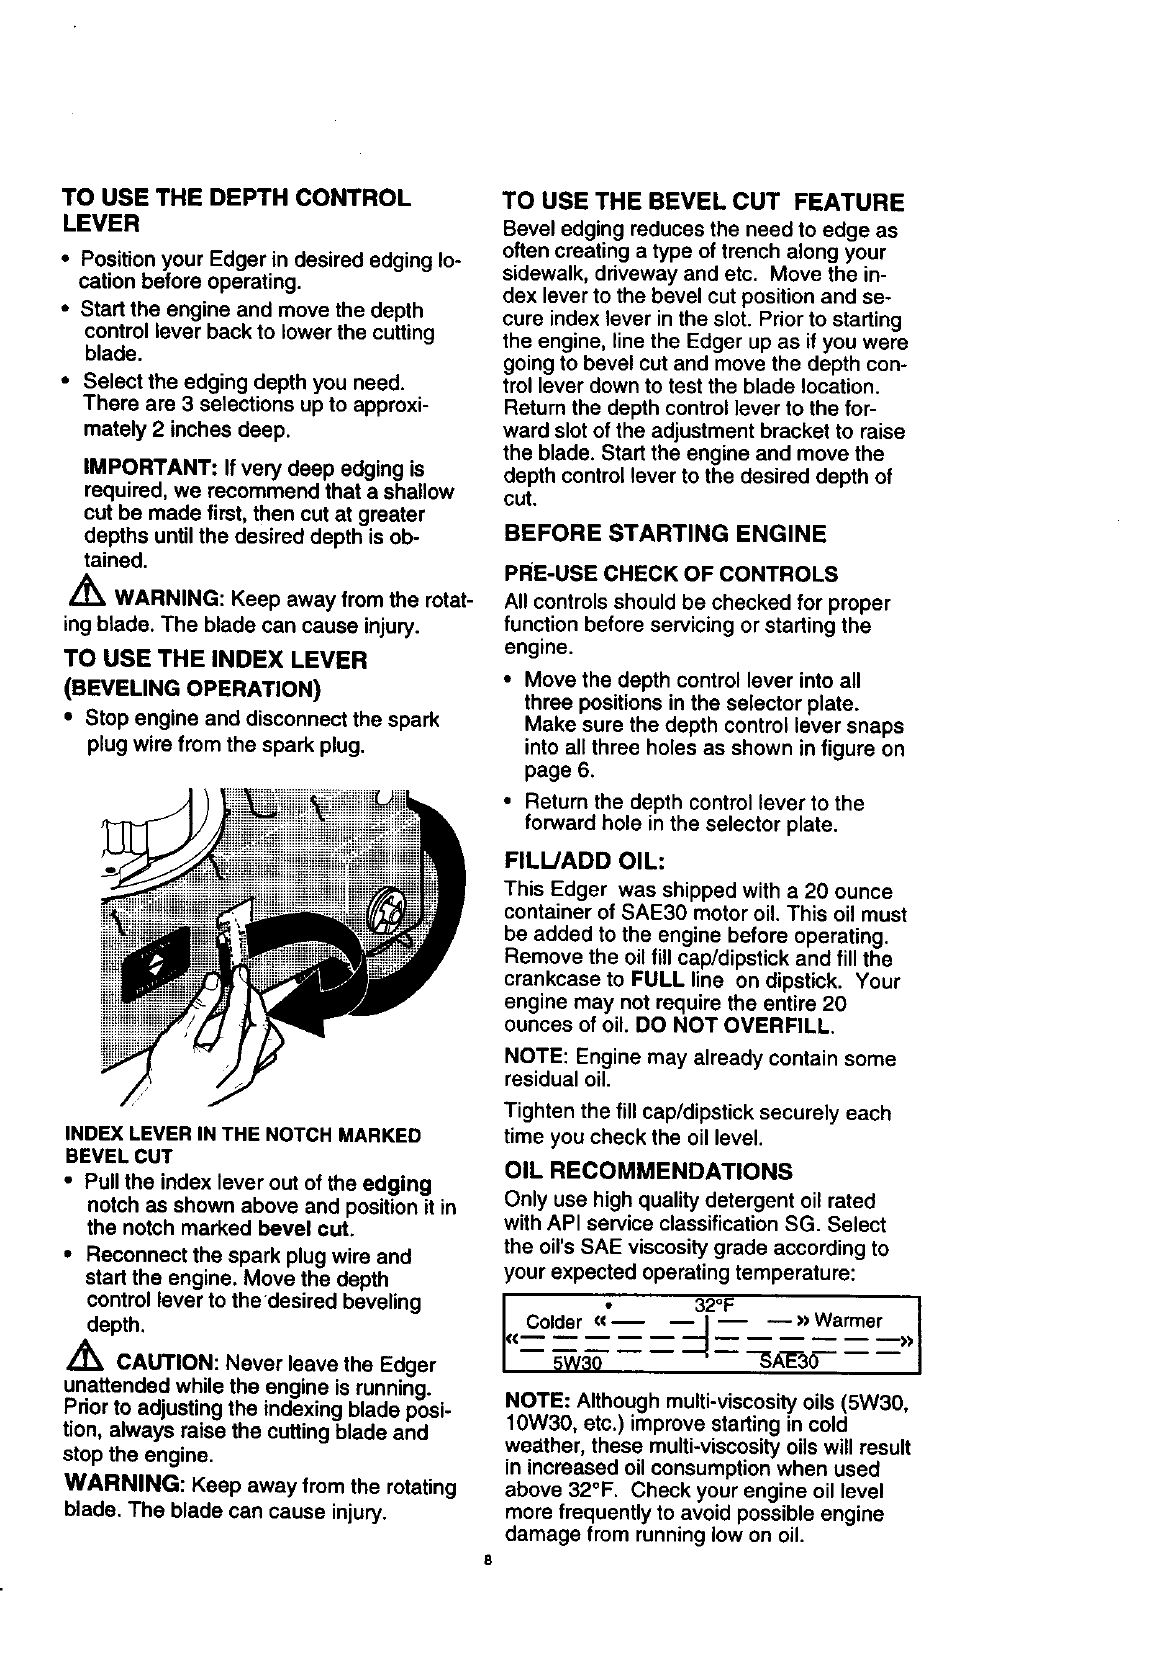
INDEX LEVER IN THE NOTCH MARKED
BEVEL CUT
• Pull the index lever out of the edging
notch as shown above and position it in
the notch marked bevel cut.
• Reconnect the spark plug wire and
start the engine. Move the depth
control lever to the desired beveling
depth.
_ CAUTION: Never leave the Edger
unattended while the engine is running.
Prior to adjusting the indexing blade posi-
tion, always raise the cutting blade and
stop the engine.
WARNING: Keep away from the rotating
blade. The blade can cause injury.
TO USE THE BEVEL CUT FEATURE
Bevel edging reduces the need to edge as
often creating a type of trench along your
sidewalk, driveway and etc. Move the in-
dex lever to the bevel cut position and se-
cure index lever in the slot. Prior to starting
the engine, line the Edger up as ff you were
going to bevel cut and move the depth con-
trol lever down to test the blade location.
Return the depth control lever to the for-
ward slot of the adjustment bracket to raise
the blade. Start the engine and move the
depth control lever to the desired depth of
cut.
BEFORE STARTING ENGINE
PRE-USE CHECK OF CONTROLS
All controls should be checked for proper
function before servicing or starting the
engine.
• Move the depth control lever into all
three positions in the selector plate.
Make sure the depth control lever snaps
into all three holes as shown in figure on
page 6.
• Return the depth control lever to the
forward hole in the selector plate.
FILL/ADD OIL:
This Edger was shipped with a 20 ounce
container of SAE30 motor oil. This oil must
be added to the engine before operating.
Remove the oil fill cap/dipstick and fill the
crankcase to FULL line on dipstick. Your
engine may not require the entire 20
ounces of oil. DO NOT OVERFILL.
NOTE: Engine may already contain some
residual oil.
Tighten the fill cap/dipstick securely each
time you check the oil level.
OIL RECOMMENDATIONS
Only use high quality detergent oil rated
with API service classification SG. Select
the oil's SAE viscosity grade according to
your expected operating temperature:
<<__Colder(<*--___W30 3--_2°F-_A'LL'35>>Warmer I>>
NOTE: Although multi-viscosity oils (5W30,
10W30, etc.) improve starting in cold
we_tther, these multi-viscosity oils will result
in increased oil consumption when used
above 32°F. Check your engine oil level
more frequently to avoid possible engine
damage from running low on oil.


