


:'RODUCT SPECIFICATIONS
HORSE POWER: 3.8
DISPLACEMENT: 10 cu. in. (163cc)
GASOLINE CAPACITY: 1.25 qt.
(unleaded regular)
LUBRICATION: 20 oz. SAE-30W
SPARK PLUG: Champion RJ19LM
(Gap .030) or Equivalent
GENERAL RECOMMENDATIONS
The warranty on this Edger does not cover
items that have been subjected to operator
abuse or negligence. To receive full value
from the warranty, the operator must main-
tain the Edger as instructed in this manual.
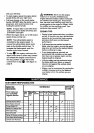
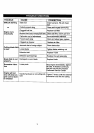
The above chart is provided to assist the
operator in propedy maintaining the Edger.
LUBRICATION
• After each 25 hours of use of your Edger,
apply light machine oil to all moving
parts.
• We recommend that the oil in the engine
crankcase be changed after each 25
hours of use thereafter.
NOTE: If the Edger is being used in sandy
or dusty areas, change the oil more fre-
quently to prevent premature engine wear.
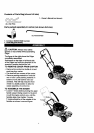
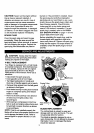
TO CHANGE ENGINE OIL
• Disconnect the spark plug wire from the
spark plug.
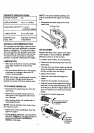
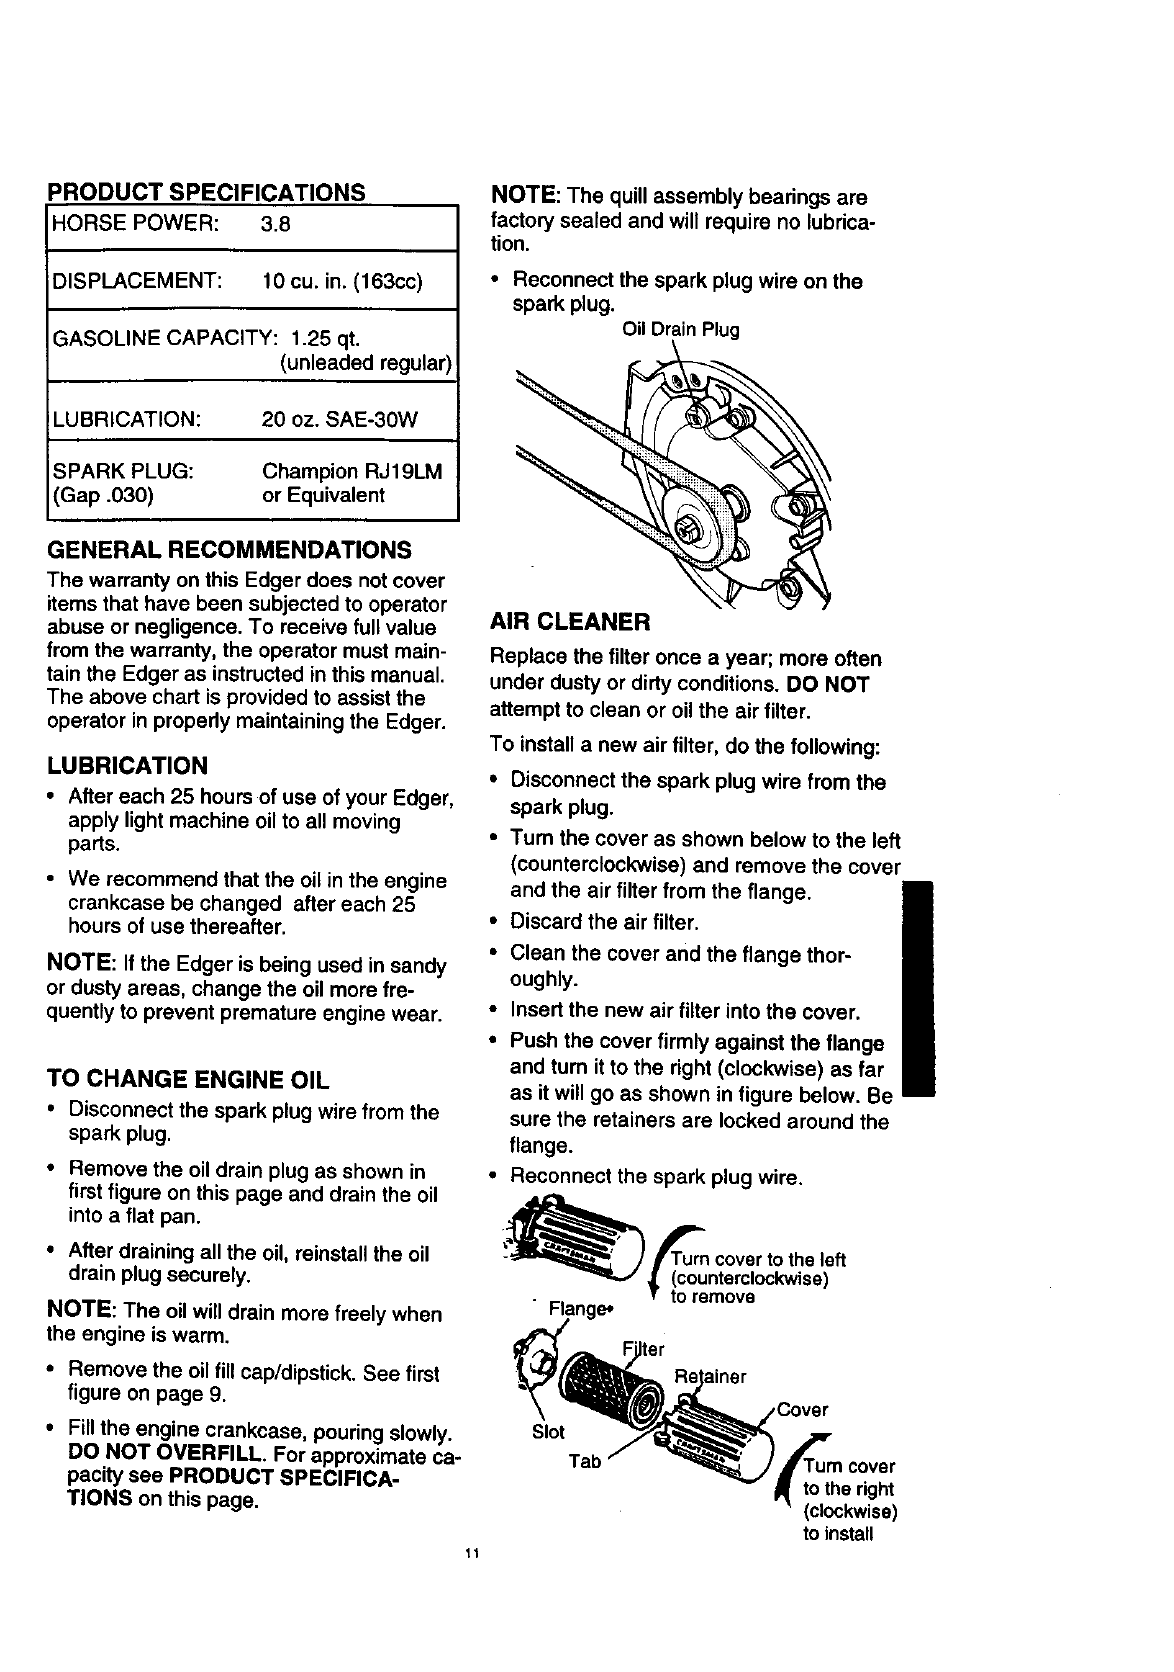
• Remove the oil drain plug as shown in
first figure on this page and drain the oil
into a flat pan.
• After draining all the oil, reinstall the oil
drain plug securely.
NOTE: The oil will drain more freely when
the engine is warm.
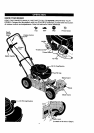
• Remove the oil fill cap/dipstick. See first
figure on page 9.
• Fill the engine crankcase, pouring slowly.
DO NOT OVERFILL. For approximate ca-
pacity see PRODUCT SPECIFICA-
TIONS on this page.
11
NOTE: The quill assembly bearings are
factory sealed and will require no lubrica-
tion.
• Reconnect the spark plug wire on the
spark plug.
Oil Drain Plug
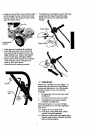
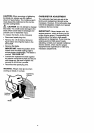
AIR CLEANER
Replace the filter once a year; more often
under dusty or dirty conditions. DO NOT
attempt to clean or oil the air filter.
To install a new air filter, do the following:
• Disconnect the spark plug wire from the
spark plug.
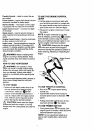
•Tum the cover as shown below to the left
(counterclockwise) and remove the cover
and the air filter from the flange.
• Discard the air filter.
• Clean the cover and the flange thor-
oughly.
• Insert the new air filter into the cover.
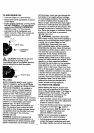
• Push the cover firmly against the flange
and tum it to the right (clockwise) as far
as it will go as shown in figure below. Be
sure the retainers are locked around the
flange.
• Reconnect the spark plug wire.
i_ T_PT'uumcover to the left
! coun, rc,ockw,s°
Flange,
liner
Slot
Tab
to the right
(clockwise)
to install