


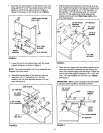
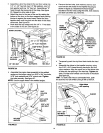

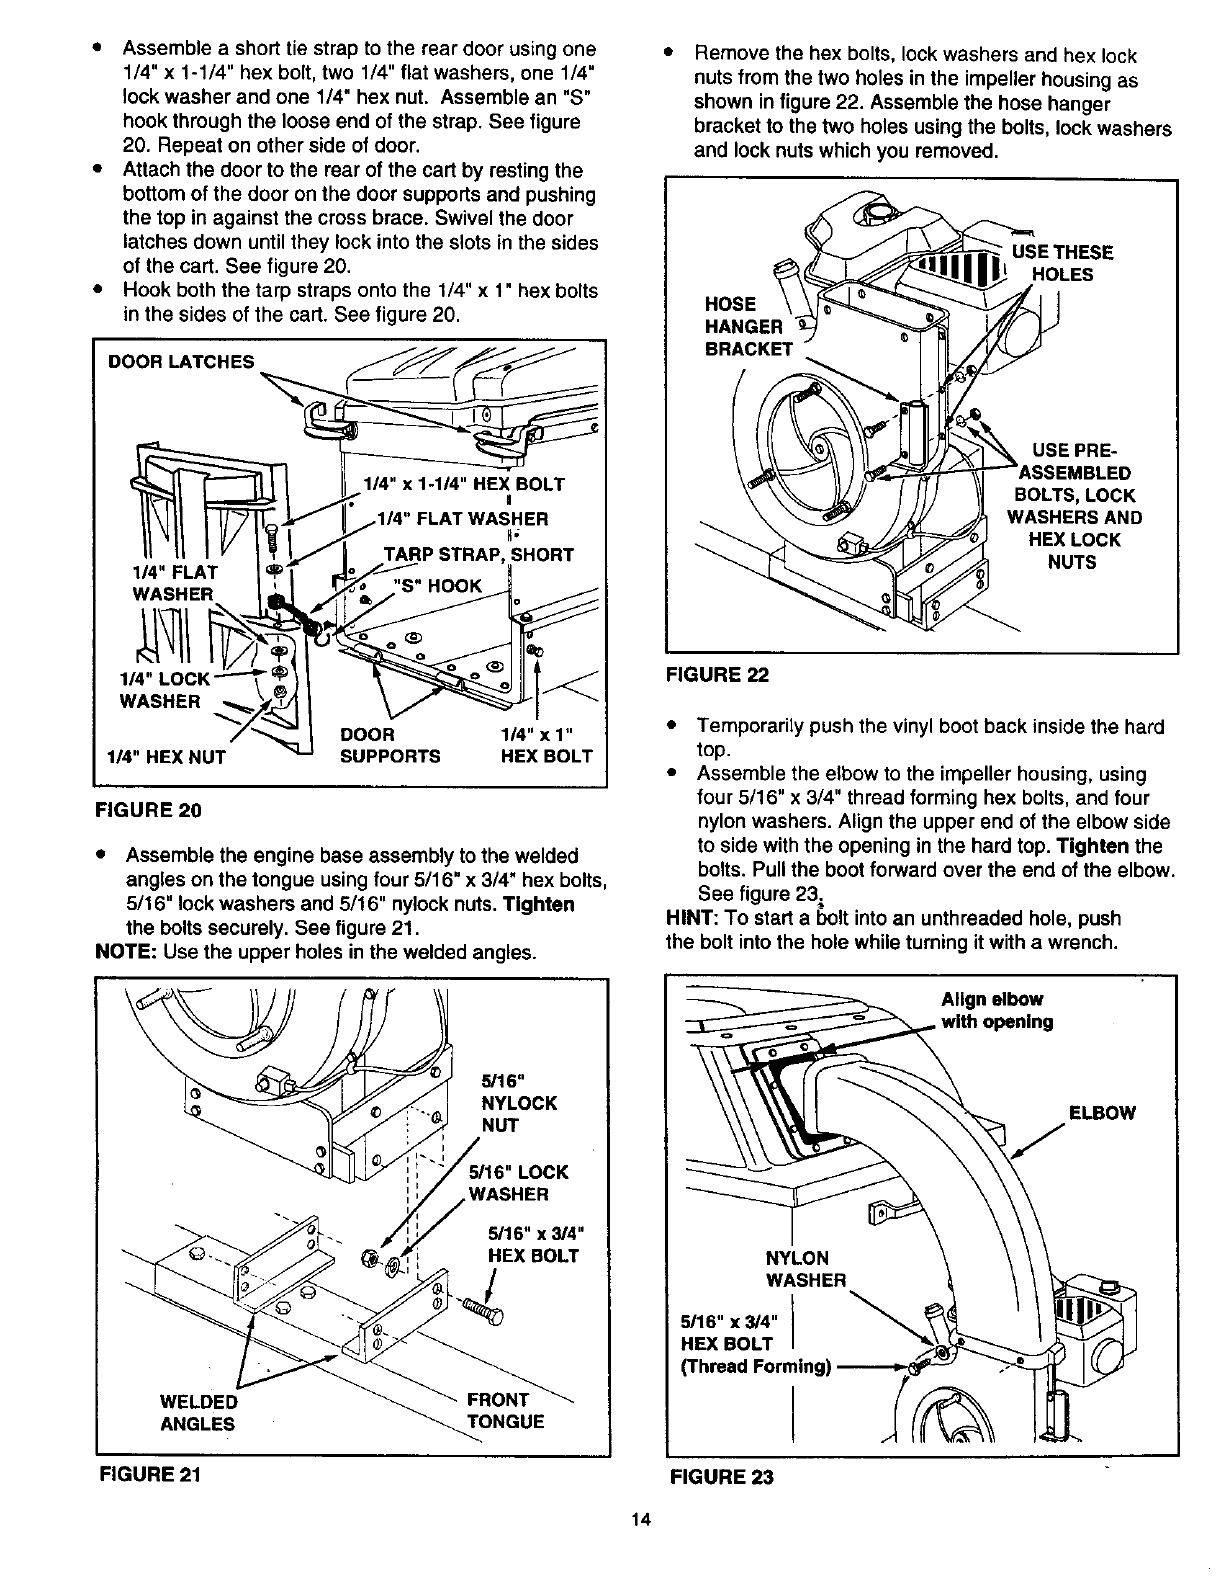
• Assemble a short tie strap to the rear door using one
1/4" x 1-1/4" hex bolt, two 1/4" flat washers, one 1/4"
lock washer and one 1/4" hex nut. Assemble an "S"
hook through the loose end of the strap. See figure
20. Repeat on other side of door.
• Attach the door to the rear of the cart by resting the
bottom of the door on the door supports and pushing
the top in against the cross brace. Swivel the door
latches down until they lock into the slots in the sides
of the cart. See figure 20.
• Hook both the tarp straps onto the 1/4" x 1" hex bolts
in the sides of the cart. See figure 20.
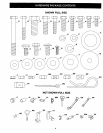
DOORLATCHES
114"FLAT
WASHER
WASHER "_
DOOR 1/4" x 1"
1/4" HEX NUT SUPPORTS HEX BOLT
FIGURE 20
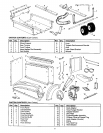
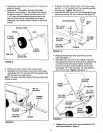
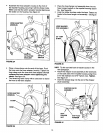
• Assemble the engine base assembly to the welded
angles on the tongue using four 5/16" x 3/4" hex bolts,
5/16" lock washers and 5/16" nylock nuts. Tighten
the bolts securely. See figure 21.
NOTE: Use the upper holes in the welded angles.
WELDED FRONT
ANGLES TONGUE
FIGURE 21
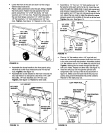
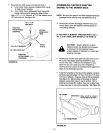
Remove the hex bolts, lock washers and hex lock
nuts from the two holes in the impeller housing as
shown in figure 22. Assemble the hose hanger
bracket to the two holes using the bolts, lock washers
and lock nuts which you removed.
HOSE
HANGER
BRACKET
USE THESE
HOLES
USE PRE-
BOLTS, LOCK
WASHERS AND
HEX LOCK
NUTS
FIGURE 22
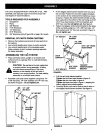
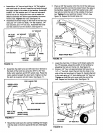
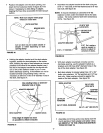
• Temporarily push the vinyl boot back inside the hard
top.
• Assemble the elbow to the impeller housing, using
four 5/16" x 3/4" thread forming hex bolts, and four
nylon washers. Align the upper end of the elbow side
to side with the opening in the hard top. Tighten the
bolts. Pull the boot forward over the end of the elbow.
See figure 23_
HINT: To start a bolt into an unthreaded hole, push
the bolt into the hole while turning it with a wrench.
Align elbow
ELBOW
NYLON
WASHER
_16"x _4"
HEX BOLT
(Thread Forming}
FIGURE 23
14