


7
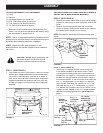
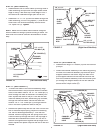
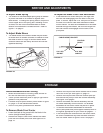
STEP 8: (SEE FIGURE 8)
•
Attach the R.H. hanger bracket to the three holes shown
on the side of the tractor frame using three 3/8" x 1" hex
bolts (D), 3/8" lock washers (R) and 3/8" fl at washers (N).
Use 3/8" nylock nuts (L) on inside of frame if bolts insert
freely into holes.
Tight en.
• Repeat for other side.
NOTE:
Use special 3/8" x 1" thread forming bolts (G) in any
holes that are too small for regular bolts.
INSTRUCTIONS FOR ALL TRACTORS
FIGURE 10
FIGURE 8
3/8" x 1" HEX BOLT (D)
(OR THREAD FORMING
BOLT (G) IF NEEDED)
3/8" LOCK
WASHER (R)
3/8" FLAT
WASHER (N)
3/8" NYLOCK NUT (L)
(IF NEEDED)
R.H. HANGER
BRACKET
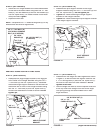
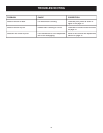
3/8" x 1"
HEX BOLT (D)
3/8" NYLOCK
NUT (L)
PIVOT SUPPORT
BRACKET
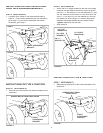
FIGURE 9
3/8" x 1"
HEX BOLT (D)
3/8" NYLOCK
NUT (L)
ANGLE SUPPORT
BRACKET
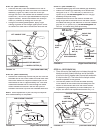
STEP 10: (SEE FIGURE 10)
• Assemble the pivot support bracket to the angle
support brackets using four 3/8" x 1" hex bolts (D) and
four 3/8" nylock nuts (L).
Do not tighten yet.
•
Tighten
the 4 bolts fastening the angle support
brackets to the hanger brackets.
•
Tighten
the 4 bolts fas ten ing the pivot support bracket
to the angle support brackets.
(Right Hand Side View)
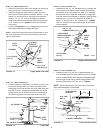
FIGURE 11
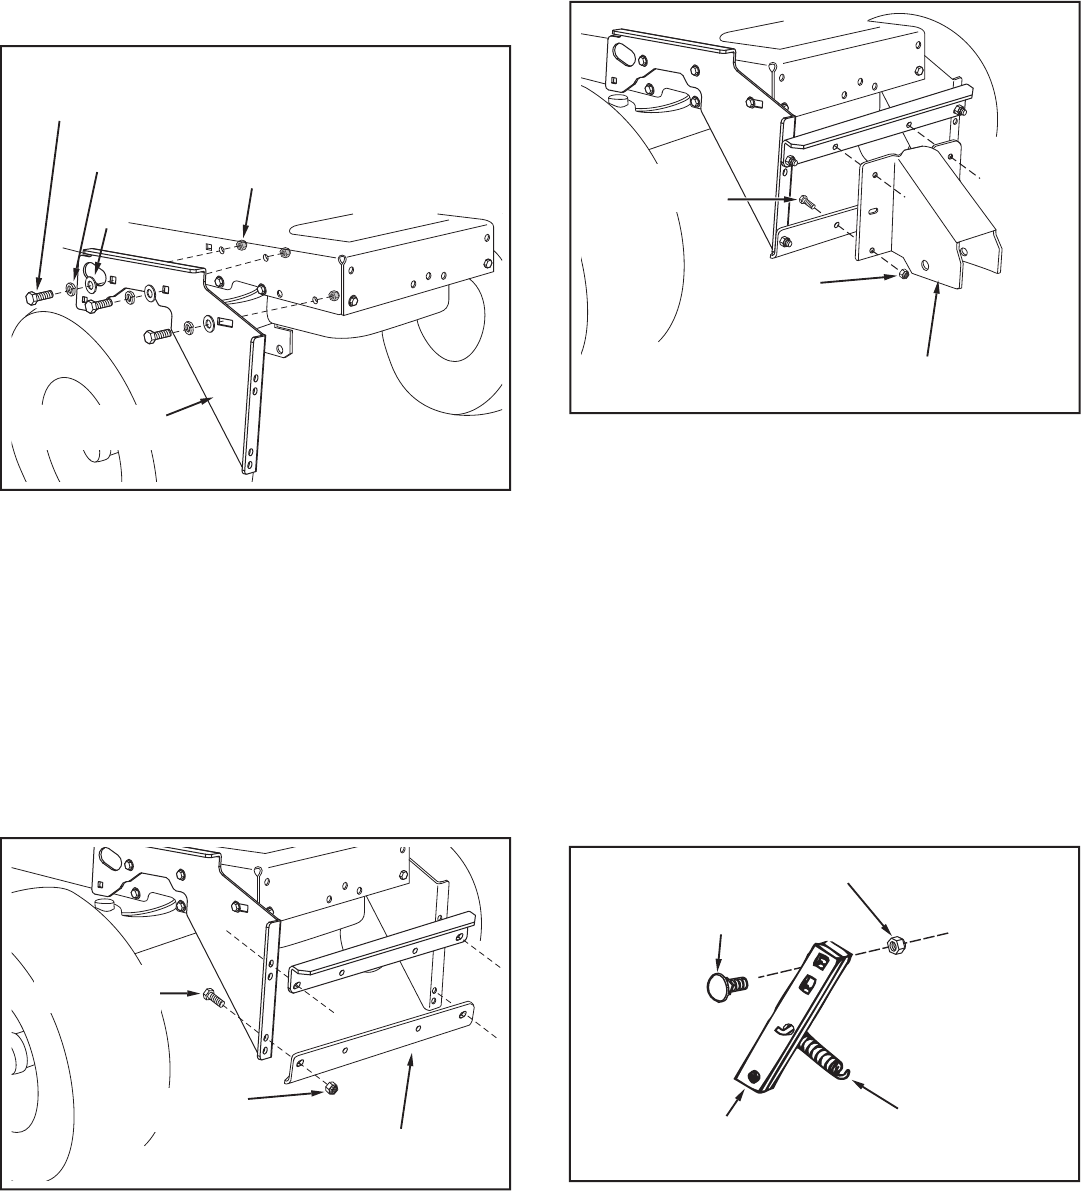
STEP 11: (SEE FIGURE 11)
• Assemble the two angle lock bars together as shown
in fi gure 6, so that all holes are aligned. Use one 3/8"
x 1-1/4" carriage bolt (E) and one 3/8" nylock nut (L).
Be sure to insert bolt from side indicated.
Do not
tighten at this time.
•
Hold the angle lock bars so that the square holes are
at the top. Insert the straight hook end of the angle
lock spring through the small middle hole in both
angle lock bars.
3/8" x 1-1/4"
CARRIAGE BOLT (E)
3/8" NYLOCK NUT (L)
ANGLE LOCK
BARS
ANGLE LOCK SPRING
STEP 9: (SEE FIGURE 9)
•
Assemble one angle support bracket to the topmost
set of holes in the hanger brackets using two 3/8" x
1" hex bolts (D) and 3/8" nylock nuts (L). Assemble
the second angle support bracket to the second from
the bottom set of holes in the hanger brackets using
two 3/8" x 1" hex bolts (D) and 3/8" nylock nuts (L).
Be sure the brackets are turned as shown.
Do not
tighten yet.