


6
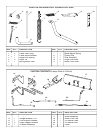
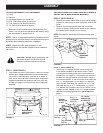
FIGURE 4
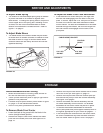
STEP 4: (SEE FIGURE 4)
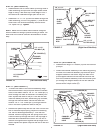
• Compare your tractor to the illustrations shown in
fi gure 4. If your tractor resembles the top illustration,
go to step 5. If your tractor resembles the bottom
illustration, go to step 7.
FRONT SUSPENSION
BRACKET
FRONT SUSPENSION
BRACKET
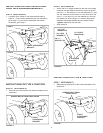
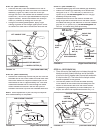
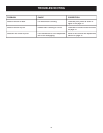
REMOVE BOLTS FROM THESE HOLES
FRONT
SUSPENSION
BRACKET
FIGURE 5
INSTRUCTIONS FOR TYPE A TRACTORS
STEP 5:
(SEE FIGURE 5)
• Remove any bolts found in the holes indicated in the
illustration.
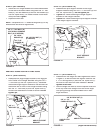
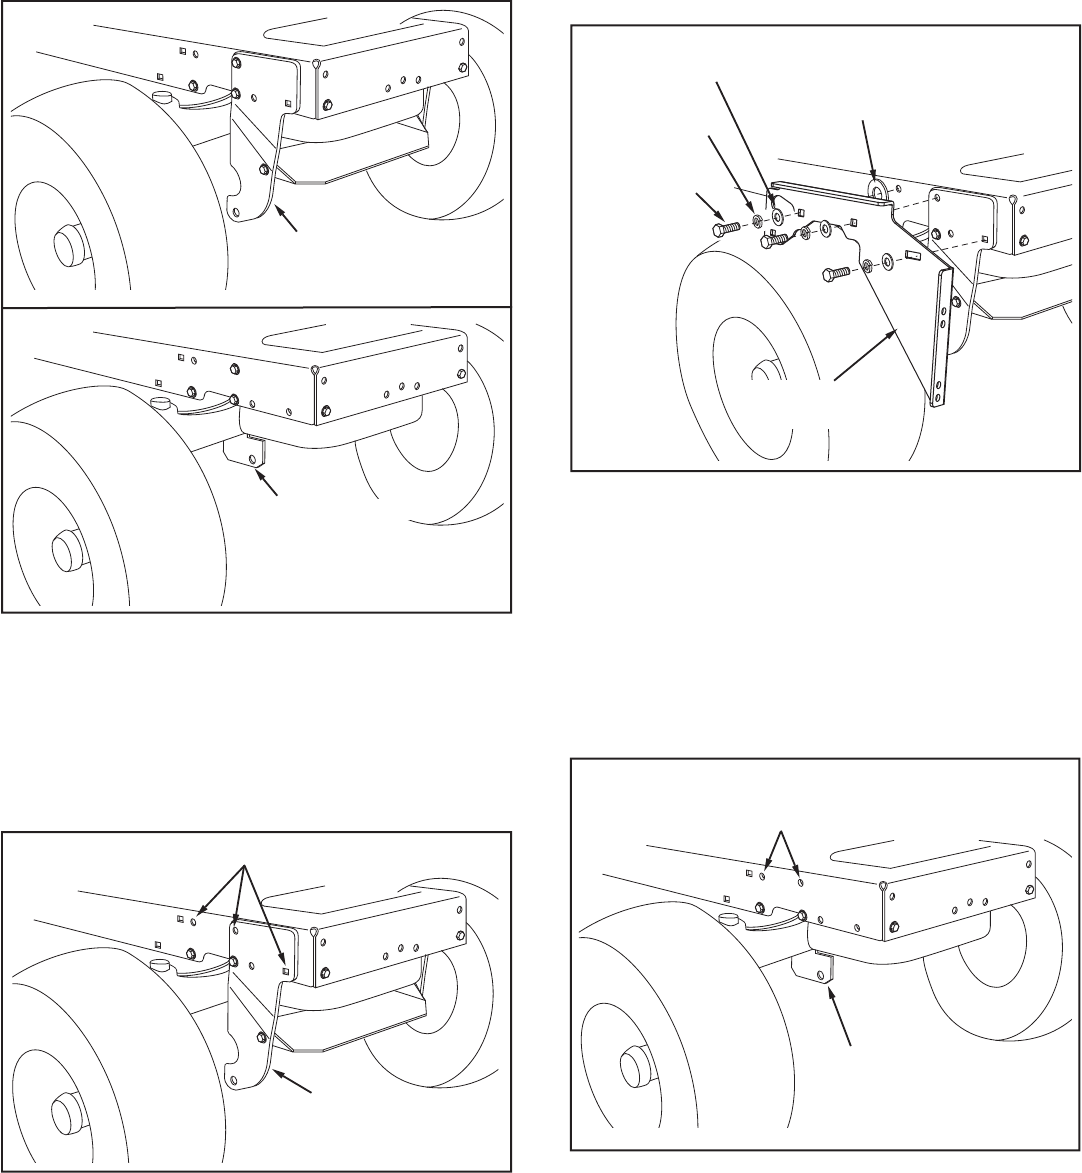
FIGURE 6
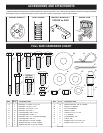
3/8" x 1"
HEX BOLT (D)
3/8" LOCK
WASHER (L)
3/8" FLAT
WASHER (N)
1/2" LARGE
WASHER (M)
R.H. HANGER
BRACKET
STEP 6: (SEE FIGURE 6)
• Attach the R.H. hanger bracket to the two front empty
holes on the right side of the tractor frame using two
new 3/8" x 1" hex bolts (D), 3/8" lock wash ers (L), and
3/8" fl at washers (N) as shown. For the rear hole, use
a 3/8" x 1" hex bolt (D), 3/8" lock washer (L) and 3/8"
fl at washer (N) with a large 1/2" washer (M) placed
between the hanger bracket and the tractor frame.
Tight en.
Repeat for the left side.
• Skip to step 9.
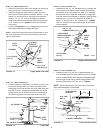
FIGURE 7
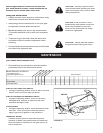
REMOVE BOLTS FROM
THESE HOLES
FRONT
SUSPENSION
BRACKET
INSTRUCTIONS FOR TYPE B TRACTORS
STEP 7: (SEE FIGURE 7)
• Remove any bolts found in the holes indicated in the
illustration.
INSTRUCTIONS FOR TRACTORS WITH DUAL
FRONT DECK SUSPENSION BRACKETS
TYPE A
TYPE B