


8
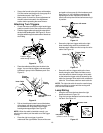
Attaching Chute Crank
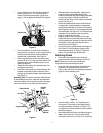
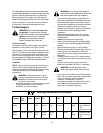
• On the left side of the handle panel, place the
upper chute crank bracket on to the inside of the
handle panel support. See Figure 5. You will find
this bracket and associated hardware in group F
of hardware pack.
• Insert hex bolt through the upper chute crank
bracket, handle panel support, and upper left
handle. Secure the bracket using cupped
washer and hex nut. Make sure that the cupped
side of the washer is set against the handle.
Figure 5
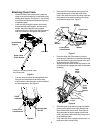
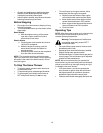
• You may have to loosen the carriage bolts and
hex lock nuts which secure the lower chute
crank bracket to the extension on the left side of
the chute assembly. See Figure 6.
Figure 6
Handle Panel
Support*
Upper Chute
Crank Bracket
Hex Bolt
Washer
Nut
* This part is already attached inside
the handle panel
Carriage Bolt,
Hex Nut
Lower Chute
Crank Bracket
Chute
Assembly
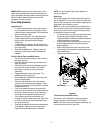
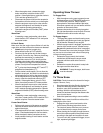
• Place one 3/8 ID flat washer (from group G of
the hardware pack) on the end of the chute
crank, then insert the end of the chute crank into
the eye hole in the plastic bushing in the lower
chute crank bracket. See Figure 7.
Figure 7
• Place the other 3/8 ID flat washer (from the
same group of hardware) on the end of the chute
crank and insert hairpin clip into hole at the end
of the chute crank. See Figure 7.
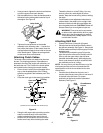
• Adjust the chute bracket so that the spiral on the
chute crank fully engages the teeth on the chute
assembly.
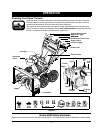
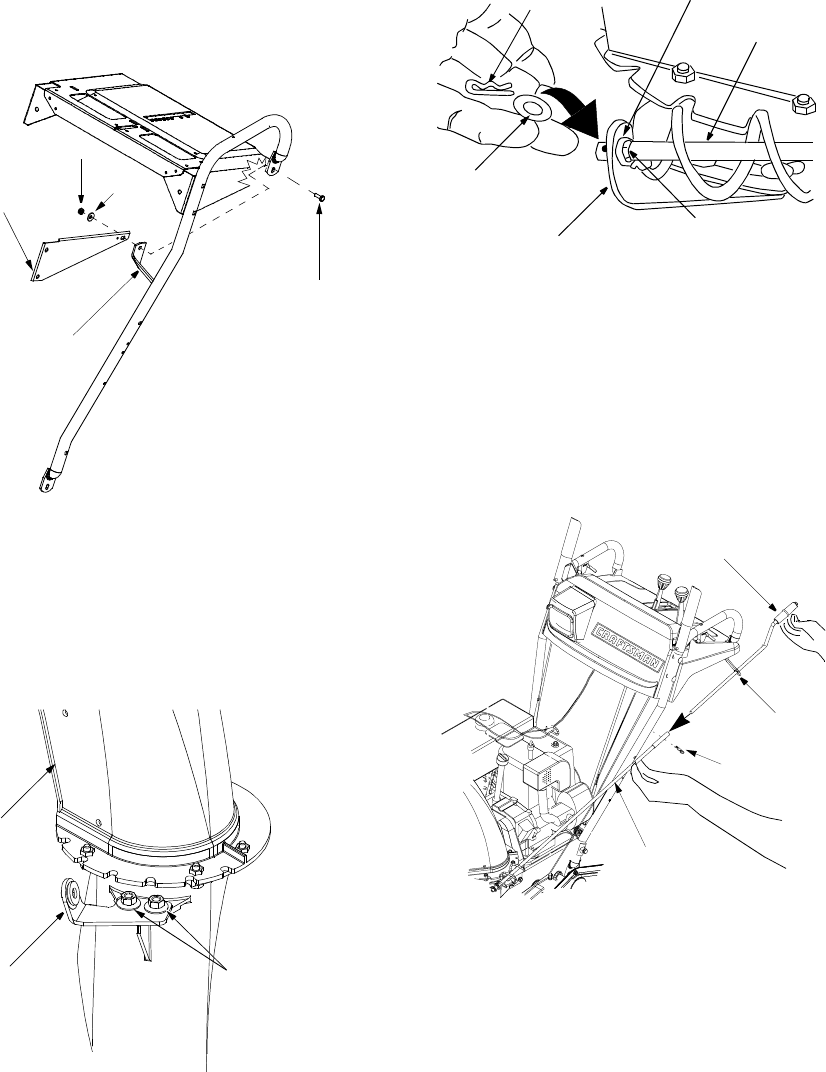
Figure 8
• Slide the upper chute crank through the plastic
bushing in the upper chute crank bracket and
then into the lower chute crank. See Figure 8.
Align the holes on the two pieces of the chute
crank, and secure with hairpin clip from group C
of the hardware pack.
• Fully rotate the chute, using the chute crank, to
make sure that it moves freely.
Chute Crank
Plastic
Lower Chute
Crank Bracket
Hairpin Clip
Flat
Flat
Washer
Bushing
Washer
Upper
Chute
Crank
Upper
Chute
Bracket
Crank
Crank
Lower Chute
Hairpin
Clip