


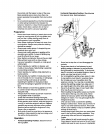

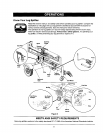
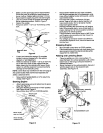

OPERATING CONTROLS
(See Figure6.)
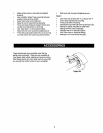
WARNING: Before usingyourlog splitter,
again referto thesafety rules on pages 3-6
ofthis manual. Always be careful,
Do not operate the logsplitterwithoutthe
properamount ofhydraulicoil inthe
reservoirtank. Failure to refillthe tank will
void yourwarranty.
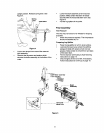
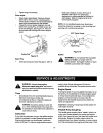
Beam Locks
Locatedon thetongue and reservoirtankassemblies,
these are usedtosecure the beam inthe horizontalor
the vertical position.
Choke Lever
Used to enrichthe fuel mixture inthe carburetorwhen
startinga coldengine.
Starter Handle
Used to manually startthe engine.
Throttle Control
Permits selectionof fast or slow engine speed.
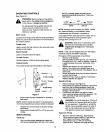
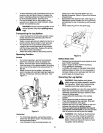
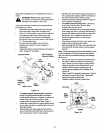
Control Handle
The control handle hasthree positions.See Figure7.
_" Neutral I To stop
/To ,p,tt,, od
Control I
Handle Forward L_._,.
Figure 7
• Move controlhandle FORWARD or DOWN to
spiltwood.
NOTE: Controlhandle willreturn to neutralposition
fromforward position as soonas handle is released.
Release thecontrol handle to stopthe wedge
movement.
• Move controlhandle BACK or UP to return the
wedge.
Before Starting
Oil Fill-Up
Only use highquality detergent oilrated with
APi service classificationSF, SG or SH. Select
the oil's viscositygrade accordingtothe
expected operating temperature. Followthe
chart below.
NOTE: Although multi-viscosity oils (514/30,10W30,
etc.) improve starting in coldweather, these
mu/tiviscosity oilswillresultin increased oil
consumptionwhen used above 40°1:. Check theoi/
level more frequentlytoavoidpossible engine
damage from running low on oil.
&
WARNING: SAE 30 oil, ifused below 40°F,
willresult in hard startingand possible
engine bore damage due to inadequate
lubrication.
NOTE: If the unit was shipped with oil in the engine,
check the oil level and refill ff necessary.
Fill engine with the appropriate oil as follows:
• Remove oil fill dipstick.
• With log splitter on level ground, use a funnel to
fill engine oil to FULL mark on dipstick. Capacity
is approximately 26 ounces. Be careful not to
overfill.
• Replace the dipstickonto the engine and
tighten.Then remove the dipstickagain and
wipe offthe oilfrom the end of thedipstickwith a
clean cloth.
• Screw the dipstickfirmly backto place. Remove
tocheck the oillevel.
Refill oilto FULL mark on dipstickifnecessary.
Replace dipstickand tighten.
Gasoline Fill-Up
&
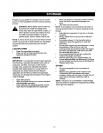
Remove fuel cap. See Figure 6.
Make certain the gasolinecontainer isclean and
free from rustorforeign particles.Never use
gasoline that may be stalefrom longperiodsof
storage inthe container.
Fillfuel tank with about one gallon ofclean,
fresh, lead-free grade automotive gasoline. DO
NOT use Ethyl or highoctane gasoline.
Replace fuel cap.
WARNING: Do not fill closer than 1/2 inchof
top offuel tank to prevent spillsand to allow
for fuel expansion. Ifgasoline is accidently
spilled, move log splitteraway from area of
spill.Avoid creating any sourceof ignition
untilgasolinevapors have disappeared.
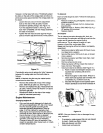
Reservoir Fill-Up
Remove reservoir vent plug. See Figure 8.
Fill the reservoirtank toabout 2" fromthe top
with 7 gallonsof Dexron III automatic
transmissionfluid, or 10W non-foaming
hydraulicfluid. Replace vent plug securely.
10