


Adjustments
Brake Pedal
The brake pedal needs to contact the PTO (power take
off) switch for the engine to start. During normal
operation of the riding mower, the brake is subject to
wear and tear. Periodically check the brake by carrying
out the following test:
1. Release the parking brake and place the riding
mower in neutral.
2. Depress the brake pedal and try to roll the riding
mower. The tractor should not move. If the tractor
moves, adjust the brake.
_ill ARNING: Do not adjust the brake while
the engine is running. Be sure to block the
wheels of the riding mower before making any
adjustments on the brake cable.
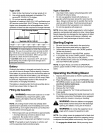
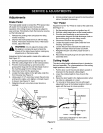
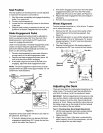
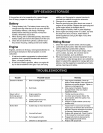
Adjustment to the brake pedal is made at the cable end.
See Figure 12.
1. Set the parking brake and turn ignition key off.
2. Shift the cutting height lever to the lowest position.
3. Pivot the hood assembly up and remove the
grasscatcher bag and the side-discharge chute or
the mulching plug from the riding mower.
4. Disconnect wire from the spark plug.
5. Locate the brake cable on the right side under the
front housing. See Figure 12.
6. Using a pair of 1/2' wrenches, loosen the jam nuts
and back the cable out to tighten or thread inward
to loosen. See Figure 12 inset.
7. Retighten the jam nuts when proper tension is
reached.
Brake
Cable
;ontrol
Figure 12
8. Unlock parking brake and repeat the test described
above. Readjust if necessary.
"Go" Pedal
Adjustment to the "Go" Pedal is made at the cable end.
See Figure 12.
1. Set the parking brake and turn ignition key off.
2. Shift the cutting height lever to the lowest position.
3. Pivot the hood assembly up and remove the
grasscatcher bag and the side-discharge chute or
the mulching plug from the riding mower.
4. Disconnect wire from the spark plug.
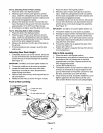
5. Locate the speed control cable under the front
housing. See Figure 12.
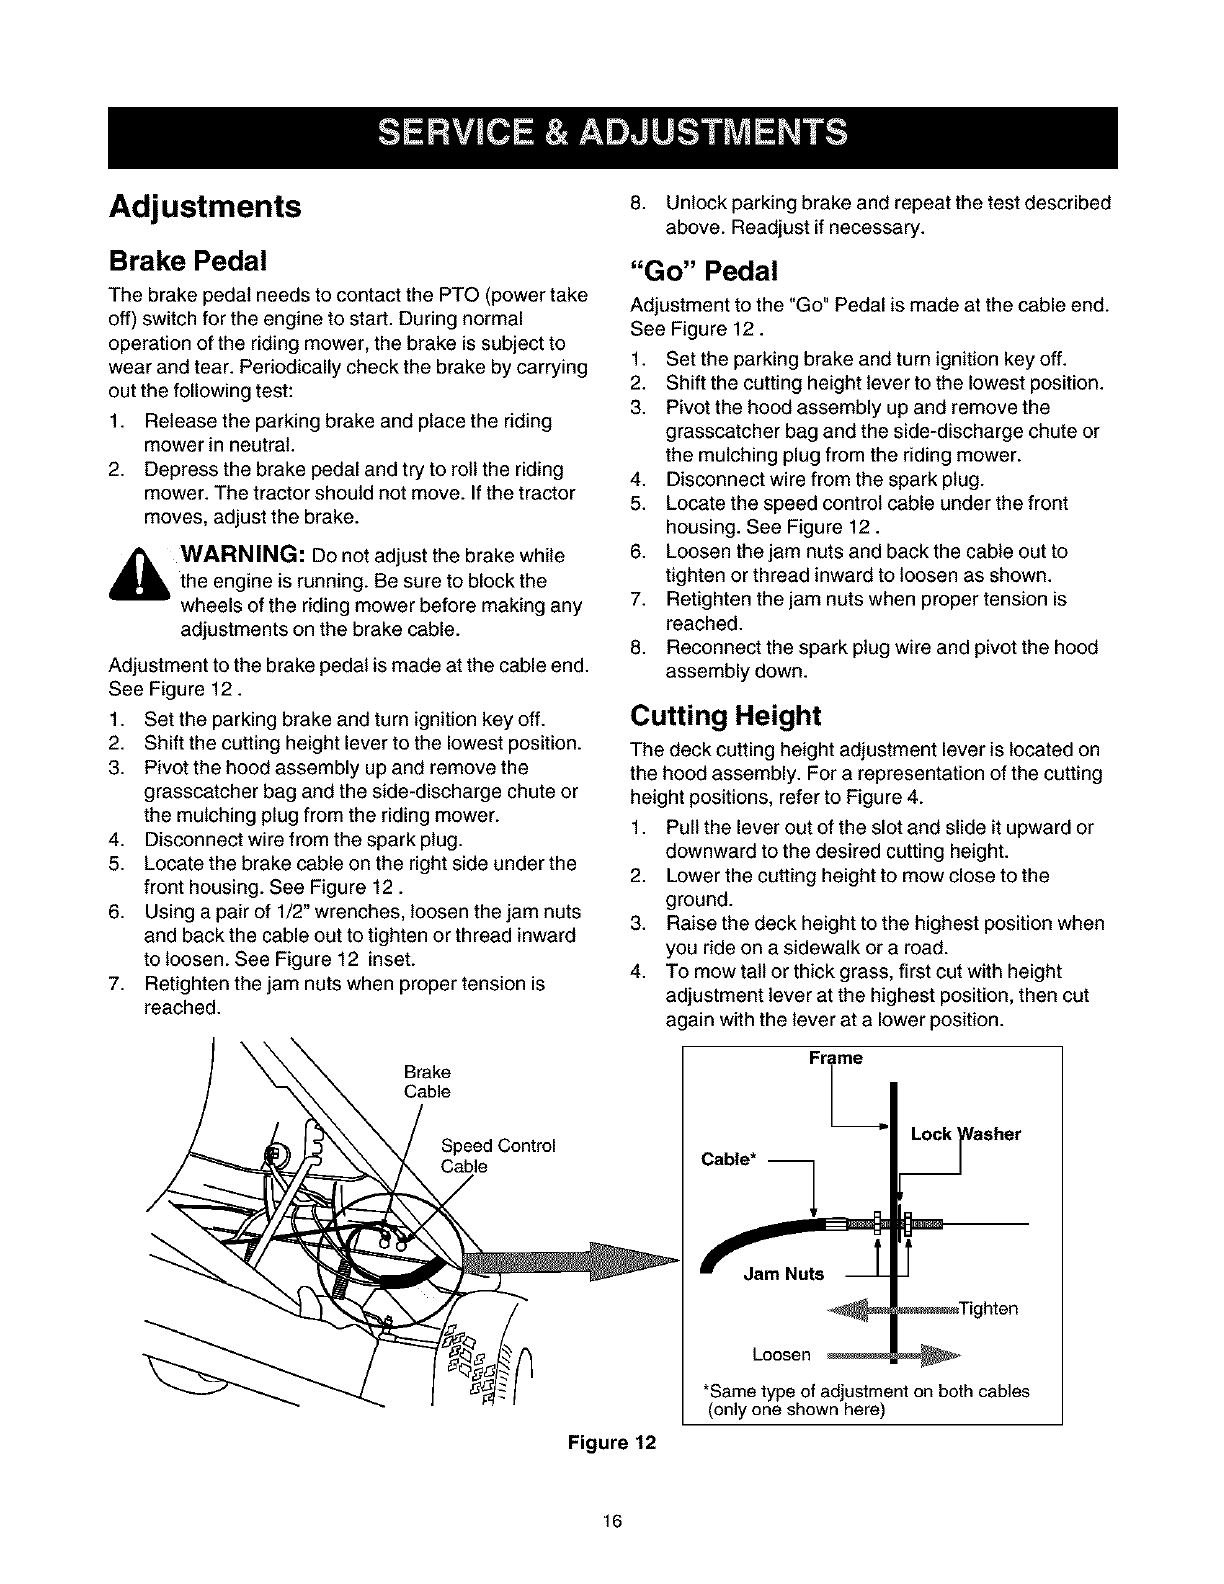
6. Loosen the jam nuts and back the cable out to
tighten or thread inward to loosen as shown.
7. Retighten the jam nuts when proper tension is
reached.
8. Reconnect the spark plug wire and pivot the hood
assembly down.
Cutting Height
The deck cutting height adjustment lever is located on
the hood assembly. For a representation of the cutting
height positions, refer to Figure 4.
1. Pull the lever out of the slot and slide it upward or
downward to the desired cutting height.
2. Lower the cutting height to mow close to the
ground.
3. Raise the deck height to the highest position when
you ride on a sidewalk or a road.
4. To mow tall or thick grass, first cut with height
adjustment lever at the highest position, then cut
again with the lever at a lower position.
Cable* 1
Loosen
asher
_Tighten
*Same type of adjustment on both cables
(only one shown here)
16