CALL TOLL FREE 1-800-DR-OWNER 35
Installing a New Clutch Assembly
If you have problems with the Clutch, we recommend replacing your Clutch as a complete assembly.
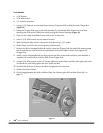
Tools and Supplies Needed:
• (2) 1/2" Wrench
• 9/16" Socket with Extension
• Anti-seize compound
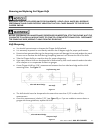
1. Remove the Belt Guard and loosen the Engine Bolts as outlined in Steps 1 and 2 on page 28.
2. After you have loosened the Engine Bolts, remove the Drive Belt and set it aside.
3. Remove the Clutch from the engine crankshaft by removing the 3/8" Bolt, Lock Washer, and Flat
Washer and then slide the Clutch Assembly from the crankshaft.
NOTE: The shim behind the Clutch remains on the engine crankshaft.
4. Remove the Key from the keyway in the engine crankshaft and set it aside.
5. Clean the engine crankshaft and remove any burrs, then apply anti-seize compound to the crankshaft.
6. Install the Key in the keyway of the new Clutch hub, align the Key with the slot in the engine crankshaft,
and then slide the new Clutch Assembly onto the crankshaft followed by the 3/8" Flat Washer, Lock
Washer, and the 3/8" Bolt. Tighten the Bolt securely.
7. Reinstall the Drive Belt and set the Drive Belt tension and alignment per Steps 3 through 5 on page 28.
8. Reinstall the Belt Guard.


