


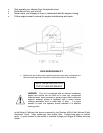

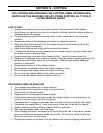

STEP IV – ATTACHING WIRE HARNESS
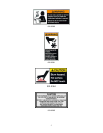
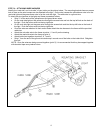
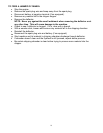
Identify the “road side” and “curb side” of your trailer per the picture below. The mounting brackets have an access
hole in them so the wire harness can be attached to the light. On the wire harness the yellow/brown wire is for the
road side light and the green/brown wire is for the curb side light. The white wire is a ground wire.
To attach the wire harness to the lights and frame proceed as follows.
• Strip ½” off the ends of the yellow/brown and green/brown wires.
• On the road side light put the yellow wire through the access hole and into the top left hole on the back of
the light. Push the brown wire into the top right hole.
• On the curb side light put the green wire through the access hole and into the top left hole on the back of
the light. Push the brown wire into the top right hole.
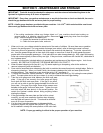
• Once the wires are attached in their correct holes attach the wire harness to the frame with the provided
cable ties.
• Attach the curb side wire to the frame at points 1, 2 and 3 per the drawing.
• Attach the road side wire to the frame at point 4.
• Attach both wires together at points 5, 6, 7 and 8.
• Strip 1” from the end of the ground wire and wrap it around one of the bolts on the trailer hitch. Retighten
this bolt.
NOTE: Once the wires are being secured together (point 5), it is recommended that they be wrapped together
with electrical tape every twelve inches.
12