


Page 8
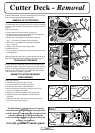
Cutter Deck - Removal
Either the Mulch Deck or the Rear Discharge Deck can be fitted
to the D18/50 using the following instructions:
REMOVAL OF CUTTER DECK
The cutter deck can be quickly removed for servicing or cleaning
or to give greater clearance when driving or towing over uneven
ground.
Follow this sequence:
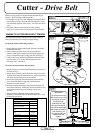
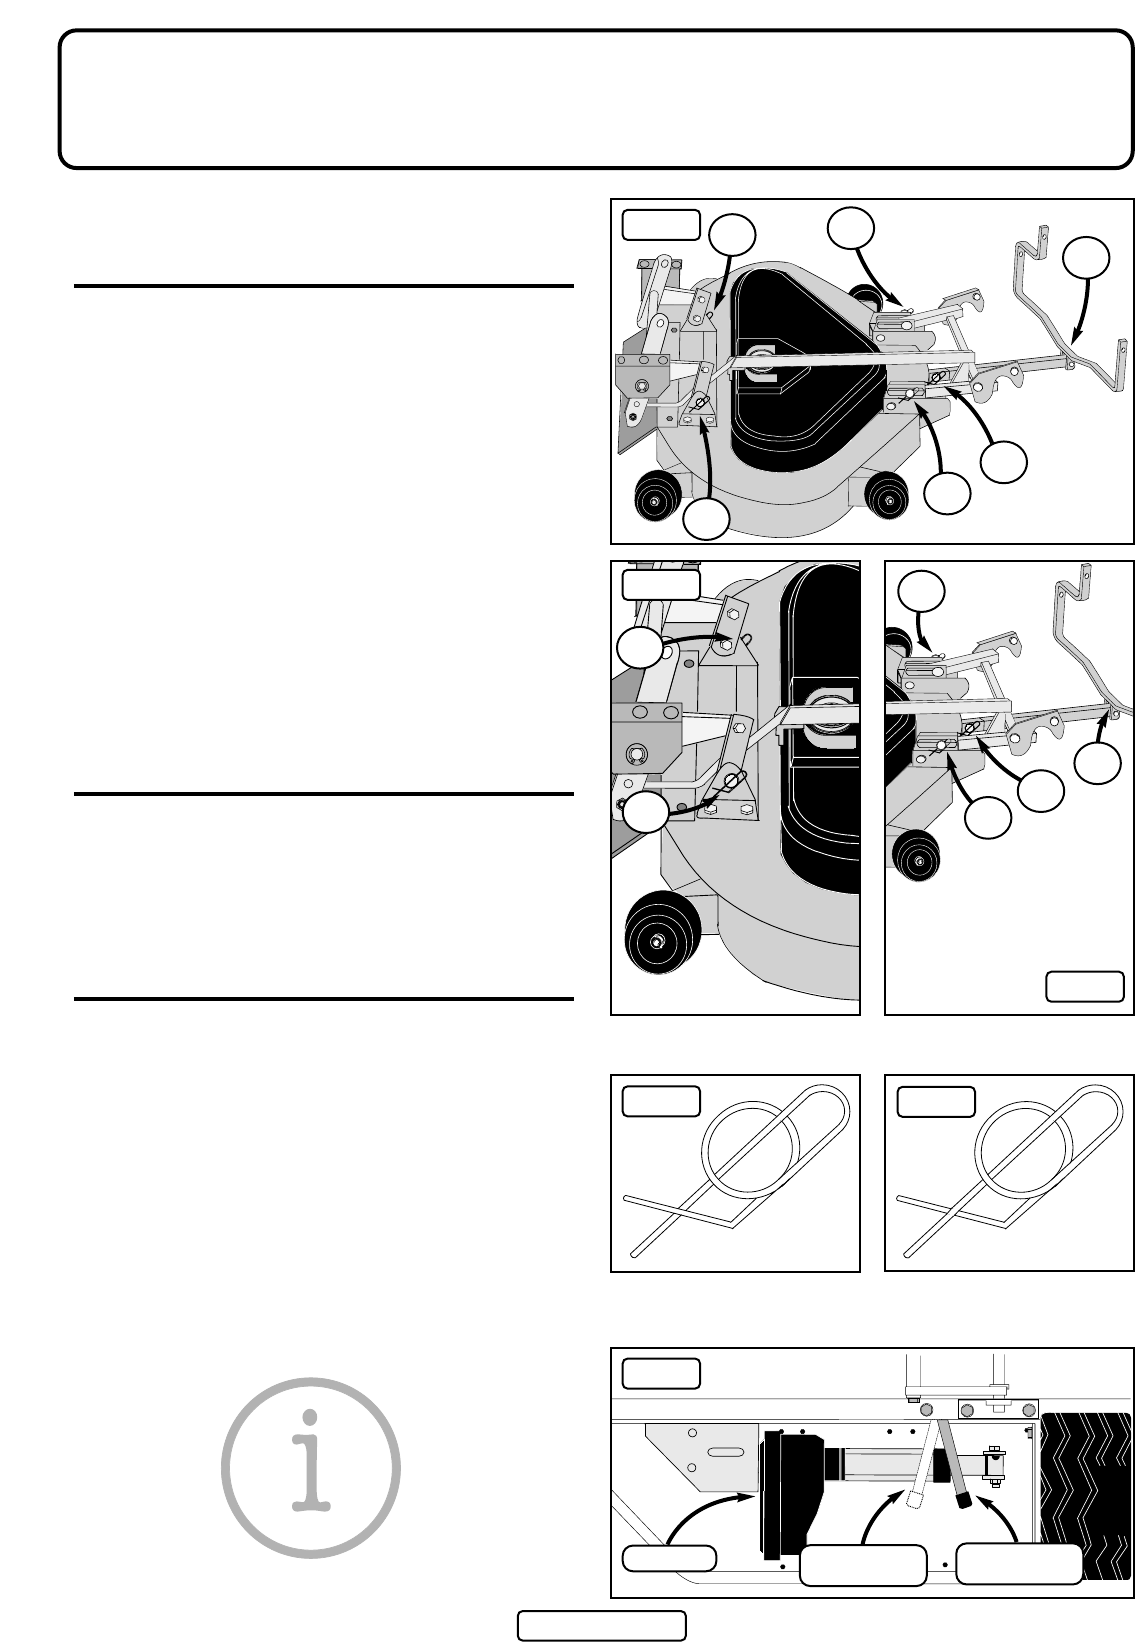
1. Put the cutter to the lowest position (see page 6).
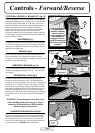
2. De-tension the cutter drive belt with the lever situated under
the left (nearside) running board (fig 6).
3. Remove the 3 securing pins from the front of the deck
(fig 3 – A, B and C) by pulling out the spring clips.
4. Remove the 2 securing pins from the back of the deck
(fig 2 – D and E).
5. Slip the cutter drive belt off the engine pulley.
6. Slide the deck out.
7. If you are going to use the tractor without the deck, remove the
securing bar (F).
When replacing the cutter deck, re-tension the belt with the lever
under the running board. Then check the belt tension (page 12).
TO CLEAN CUTTER DECK
Remove the deck as instructed, stand it on its side and hose off
accumulated cuttings. This may be necessary routinely to prevent
build-up of cuttings particularly at the beginning of the season
when the grass is lush and wet. Thoroughly wash the underside
of the cutter deck as regularly as possible.
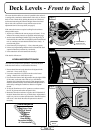
ENGINE TO CUTTER DRIVE BELT
REPLACEMENT
Follow this sequence:
1. Pull the belt tension lever (fig 6) forward.
2. Lower the cutter deck to the lowest position.
3. Remove the cutter deck as described above.
4. Remove belt guard, loosen the two M8 set screws using
using a 13mm spanner and socket.
5. Remove the belt from the pulley and fit replacement.
6. Refit the belt guard ensuring that it is clear of the belt
and pulley.
7. Refit the cutter deck to the tractor and re-tension the deck
drive belt as described on page 12.
C
F
A
B
F
fig 1
fig 2
fig 3
fig 4
fig 5
fig 6
Unsecured
Secured
De-tensioned
Position
Actuator
Tensioned
Position
The belts fitted to your tractor are of a special
construction and belt tensions have been precisely
set in the factory. If you undertake to replace a belt
yourself you must be VERY careful that the
correct Countax supplied belt is used and that the
tension is set accurately.
-Use only genuine Countax parts-
B
A
E
D
D
E
C