Page 10
Deck Levels - Front to Back
The cutter deck should be set so that it is parallel to the surface it
is cutting with a maximum variation from side to side, or front to
back of 3mm. Check this by placing the tractor on a hard level
surface and measuring the clearance heights front to back and
side to side with a steel ruler or tape with the cutter set one
adjustment from its lowest position (see page 6).
If the cutter deck seems to require levelling first check these
other possible causes:
1. Are the tyres inflated to the correct pressure all round – if not,
inflate to the correct pressures as specified on the back page.
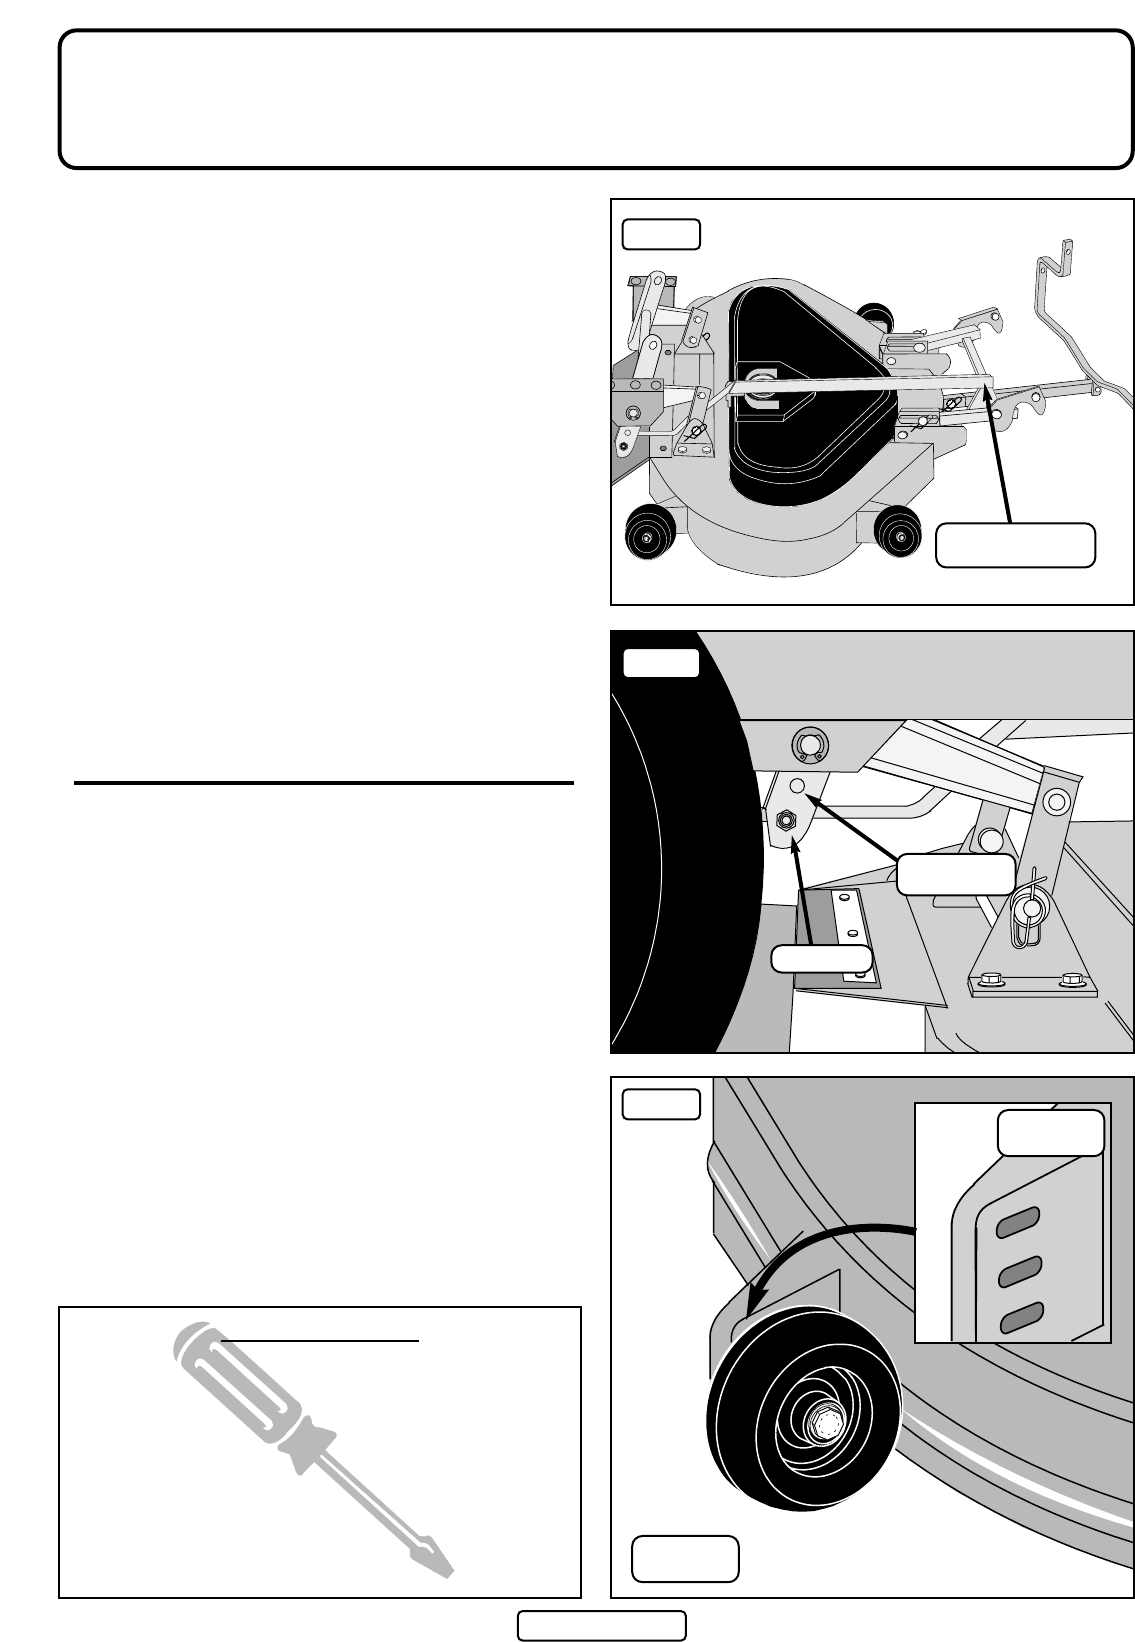
2. Are the cutter deck hanger brackets (fig 2) moving freely. To
check this lift the cutter deck to its highest position and lift and
rock it, watching to ensure that the brackets move freely – if
not clean and grease.
3. Is the front axle pivoting freely? – If not, clean and grease.
4. Is there any impact damage that has bent or distorted the deck
suspension brackets (a matter for your dealer).
5. Is the cutter deck drive belt tensioned correctly?
If the deck is still uneven: -
LEVELLING FRONT TO BACK
(You need two people for this operation – one to lift the deck
while the other removes or relocated the Trunnion)
1. Ensure that all the anti-scalp wheels are all adjusted in the
same hole – if not, rectify (fig 3).
2. Lower the cutter deck to a position one above the lowest
setting – check levels with a ruler or tape.
3. Now locate the front to back adjustment rod to the right offside
of the cutter. At the rear end of this rod you will find the
Trunnion (fig 2) that links the rod to the deck hanger bracket.
Both the Trunnion and the rod are threaded and adjustment is
achieved by rotating the Trunnion to shorten or lengthen
the rod.
4. To free the Trunnion use a 9/16" spanner or socket to remove
the 3/8" Nyloc nut and washer and push it free.
5. Rotate the Trunnion to advance it up the rod to lift the back of
the deck. Rotate it the other way to lift the front. Adjustment is
rapid so try one or two turns and relocate the Trunnion bracket
and secure – then check the effect. Repeat and re-check if
necessary.
fig 1
Tools Required
Steel Rule or Tape
9/16” AF Socket
1/2” Spanner
1/2” Socket
13mm Spanner
13mm Socket
Reversible Ratchet
12” Extension Bar
fig 2
fig 3
Anti-Scalp
Wheels
Adjustment
Holes
Deck Hanger
Bracket
Trunnion
Front to Back
Adjustment Rod


